Introduction
Dealing with customer inquiries quickly and efficiently is one of the most important tasks for every business. Customers are always the most important part of any organization and it is crucial for every business to listen to what their customers are saying and to deal with any issues they may have as quickly as possible. The Converse product from Pulsate is designed with this goal in mind to give users an easy way to contact a company through its app. For more information on Converse and starting meaningful conversations with customers, see our guide on Starting a Conversation..
Ideally, all customer queries would be dealt with very quickly by a trained customer support representative who can represent the company and provide a great experience for the user who sent a message. However, even with the best will in the world, it may not be possible to reply to every customer query straight away. This may be because the volume of requests being received is very high or because the customer support term is not available 24/7.
The purpose of this guide is to demonstrate how to set up an automated reply to customer messages using Pulsate. Typically, automated replies work best when there is going to be a delay replying to the user, such as when a message is received out of regular office hours. This guide will concentrate on that example and outline the steps for sending an automated reply whenever the customer support team is not available.
Creating a Segment of Users who have Sent a Message
The first step is to identify which users have sent a message. To do that, we will create a segment based on users who have sent a message from the app on their device either in reply to a campaign they received or as a new conversation that they have created by clicking the new message button in the Pulsate feed. Depending on your app setup, you may choose to show or not show the new message button on Android or iOS.
Depending on your app setup, you may choose to show or not show the new message button on Android or iOS.
We will create a segment based on the Last Contacted Admin rule in the Activity section of the segment builder. For details on how to create segments, see our guide here
For this example, we will create a segment based on all users who have sent a message to Pulsate within the last ten minutes. All users who send a message through the Pulsate feed will be added to this segment as soon as they send a message and we can send them an automated reply message. They will be automatically removed from the segment after ten minutes so there is no possibility of them receiving the automated message reply again unless they send another message.

Last Contacted Admin Segment Rule
Click Save Segment and give your campaign a name, for this example we will call this segment "Automated Message Reply".
Creating an Automated Reply Campaign
Now that we have a segment based on users who sent a message from the feed, we need to set up a campaign to send an automated reply every time a user sends a message during specific time periods. For this example, we are going to create a push notification card campaign to deliver the automated reply message. For more information on the different types of Pulsate campaigns, see our guides here..
To set up the automated reply campaign, follow these steps.
Campaign Type
Click New Campaign and choose Notification + Card Campaign
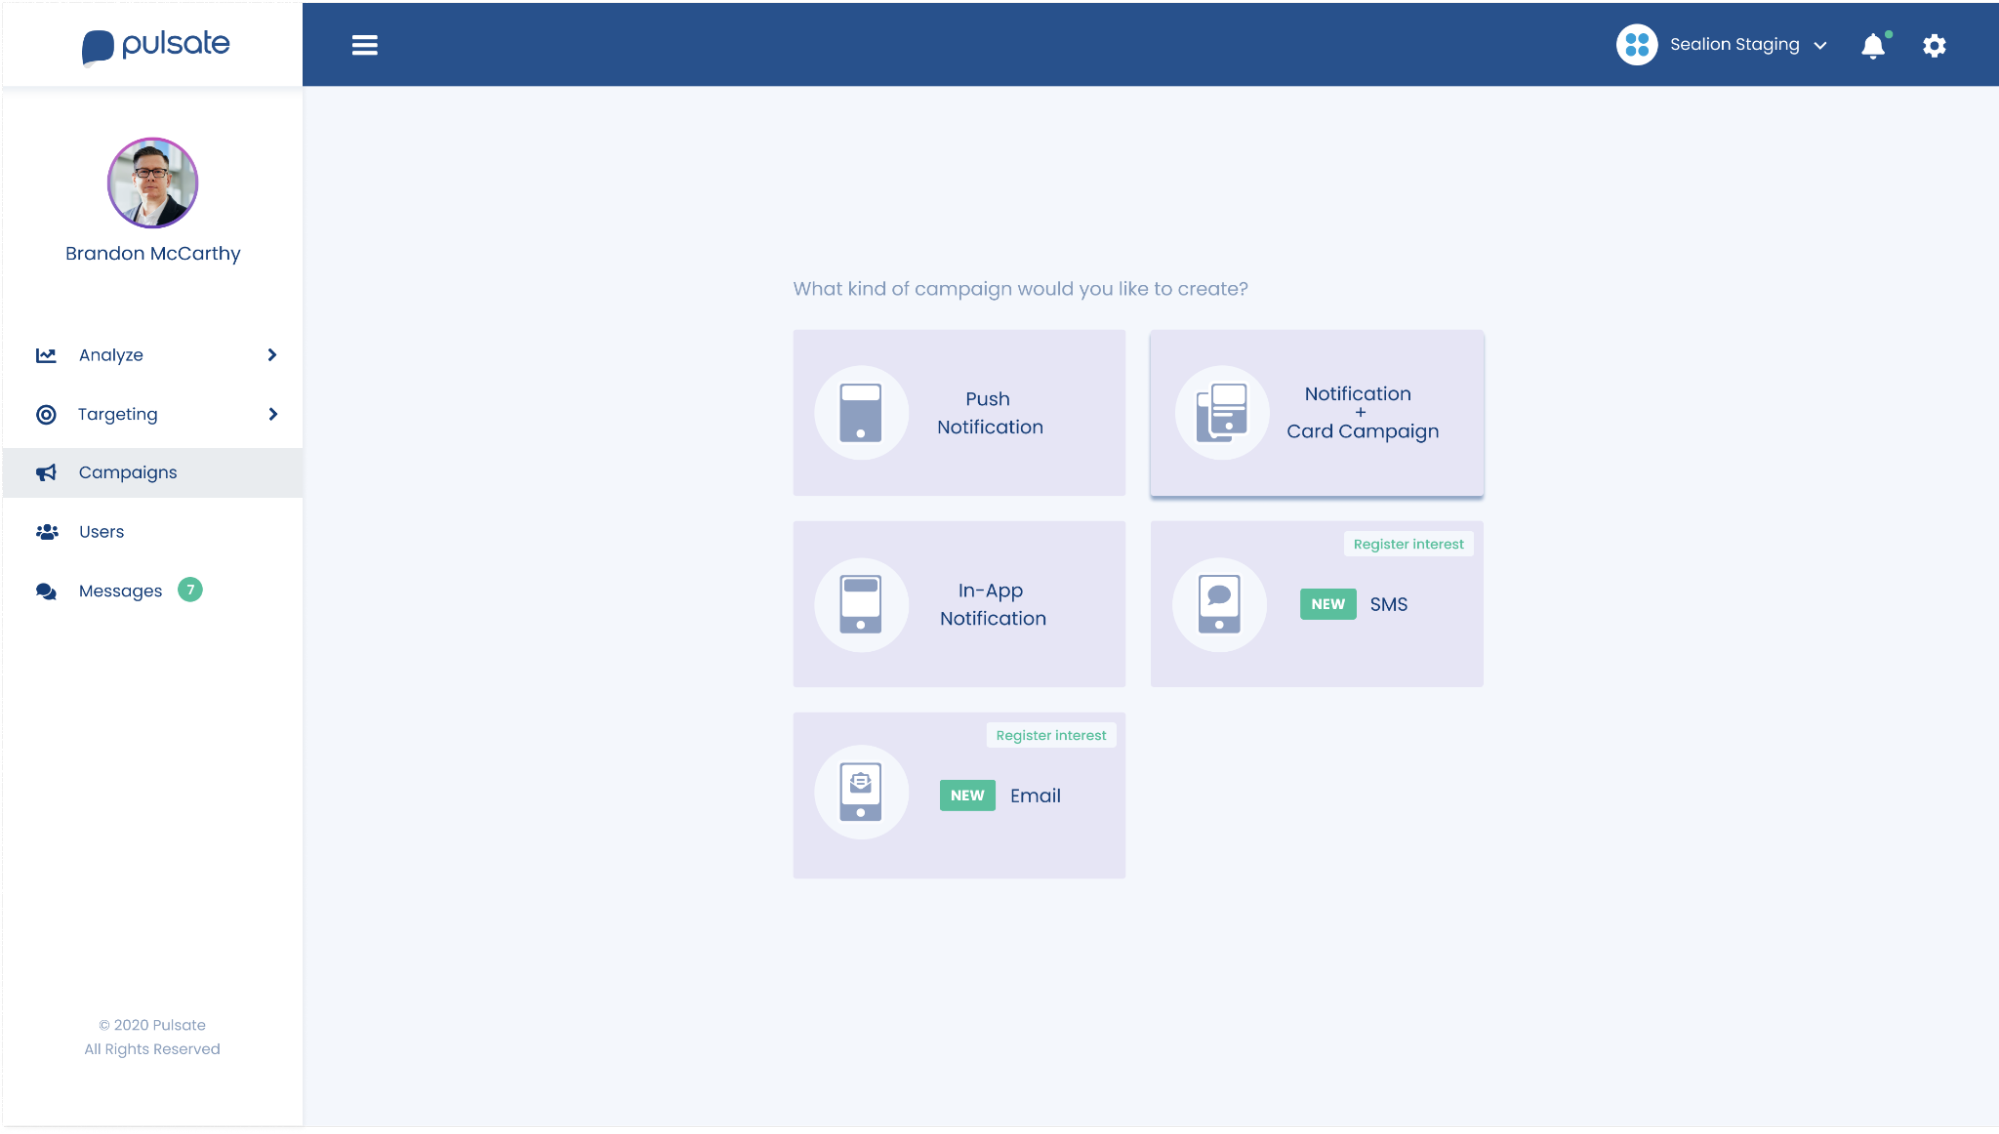
Select Campaign
Give your Campaign a name (eg Support Automated Message Response) and enter a Conversion Goal for the campaign such as the user opening the app within a specific period of time. It is unlikely that you will want to add a Control Group to this campaign as it is a service message and you will most likely want every user to receive it.
Campaign Card
You can then start to craft your automated message by creating a campaign card. There are a number of options here, you can add a custom image or you can use the Headline or Text widgets. However, the aim of this campaign is to be as personalized as possible. With that in mind, utilizing the Personal Message Widget is a good option. This widget allows you to create a card as if it has been sent from a Customer Support Representative. This is an ideal scenario for utilizing the Personal Message Widget because even though you are not replying directly to the user's message, you can still show a personal touch.
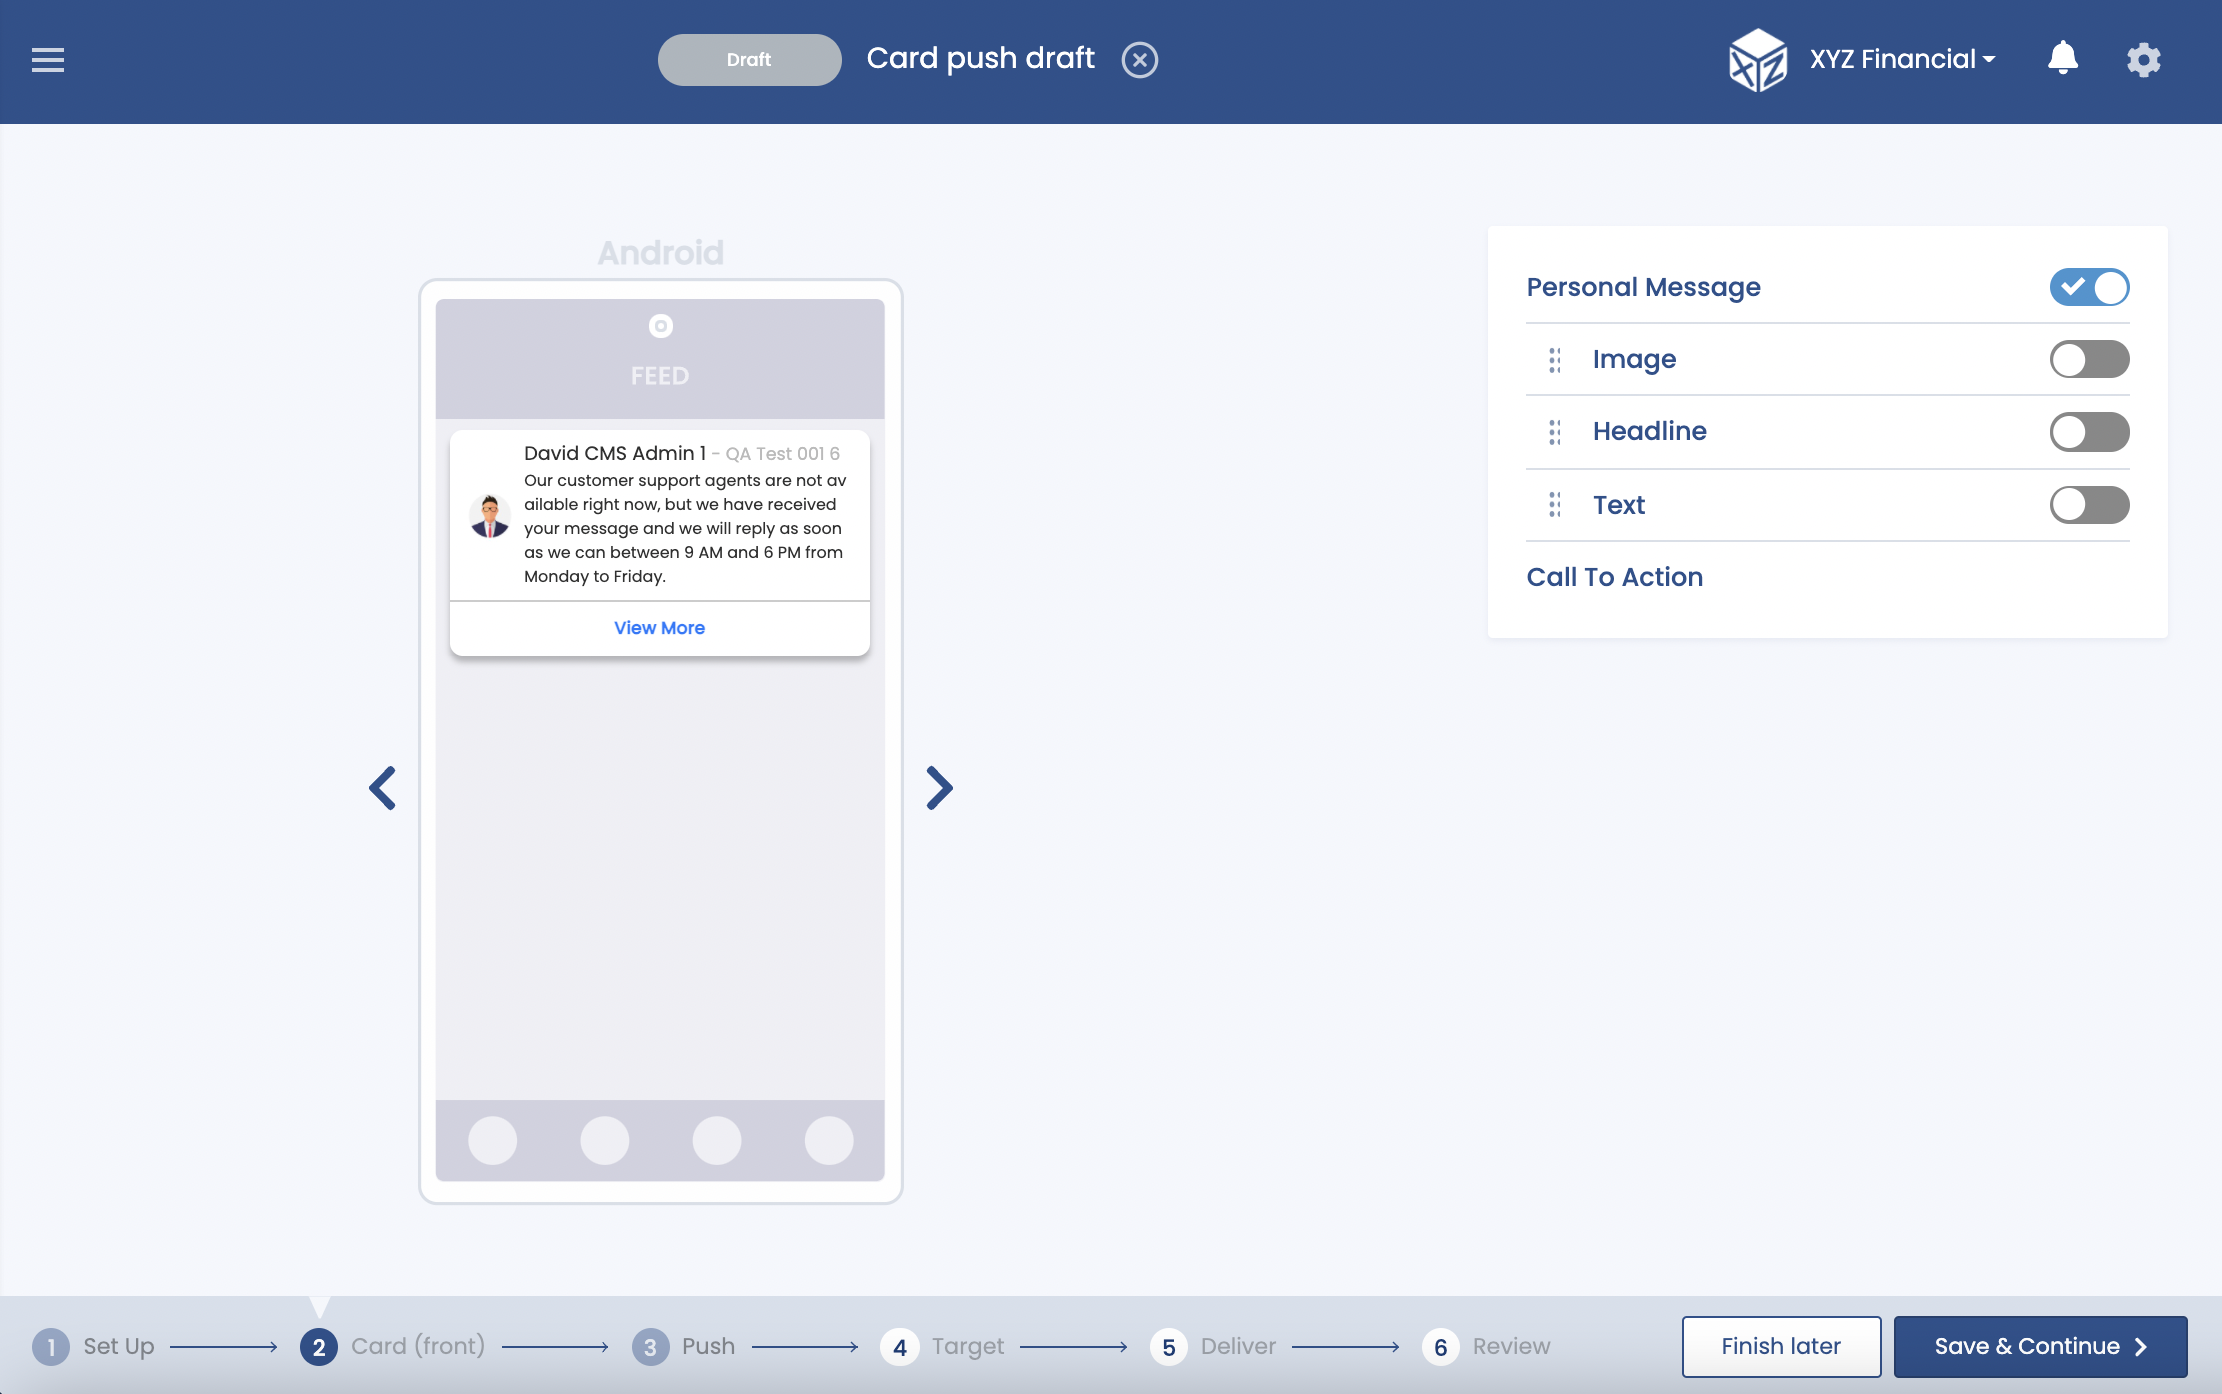
Personal Widget
You can choose to add Images or a Headline or Text but for this example, we will leave just the Personal Message widget as the card. All cards should have the Call to Action configured, so you can either deep link users to a specific area of your app or website (ie FAQs) or link them to the back of the card where you can add more content.
Notification
Once you have created the card, the next step is creating a Notification and you can choose to send the card directly to the user's feed or to notify them with a Push or an In-App notification about the automated reply. The user may leave the app as soon as they send their message so a push notification is the best option here. It is also a good idea to use a user's first name as a personalization tag for the push notification if your app tracks that information and sends it to Pulsate.
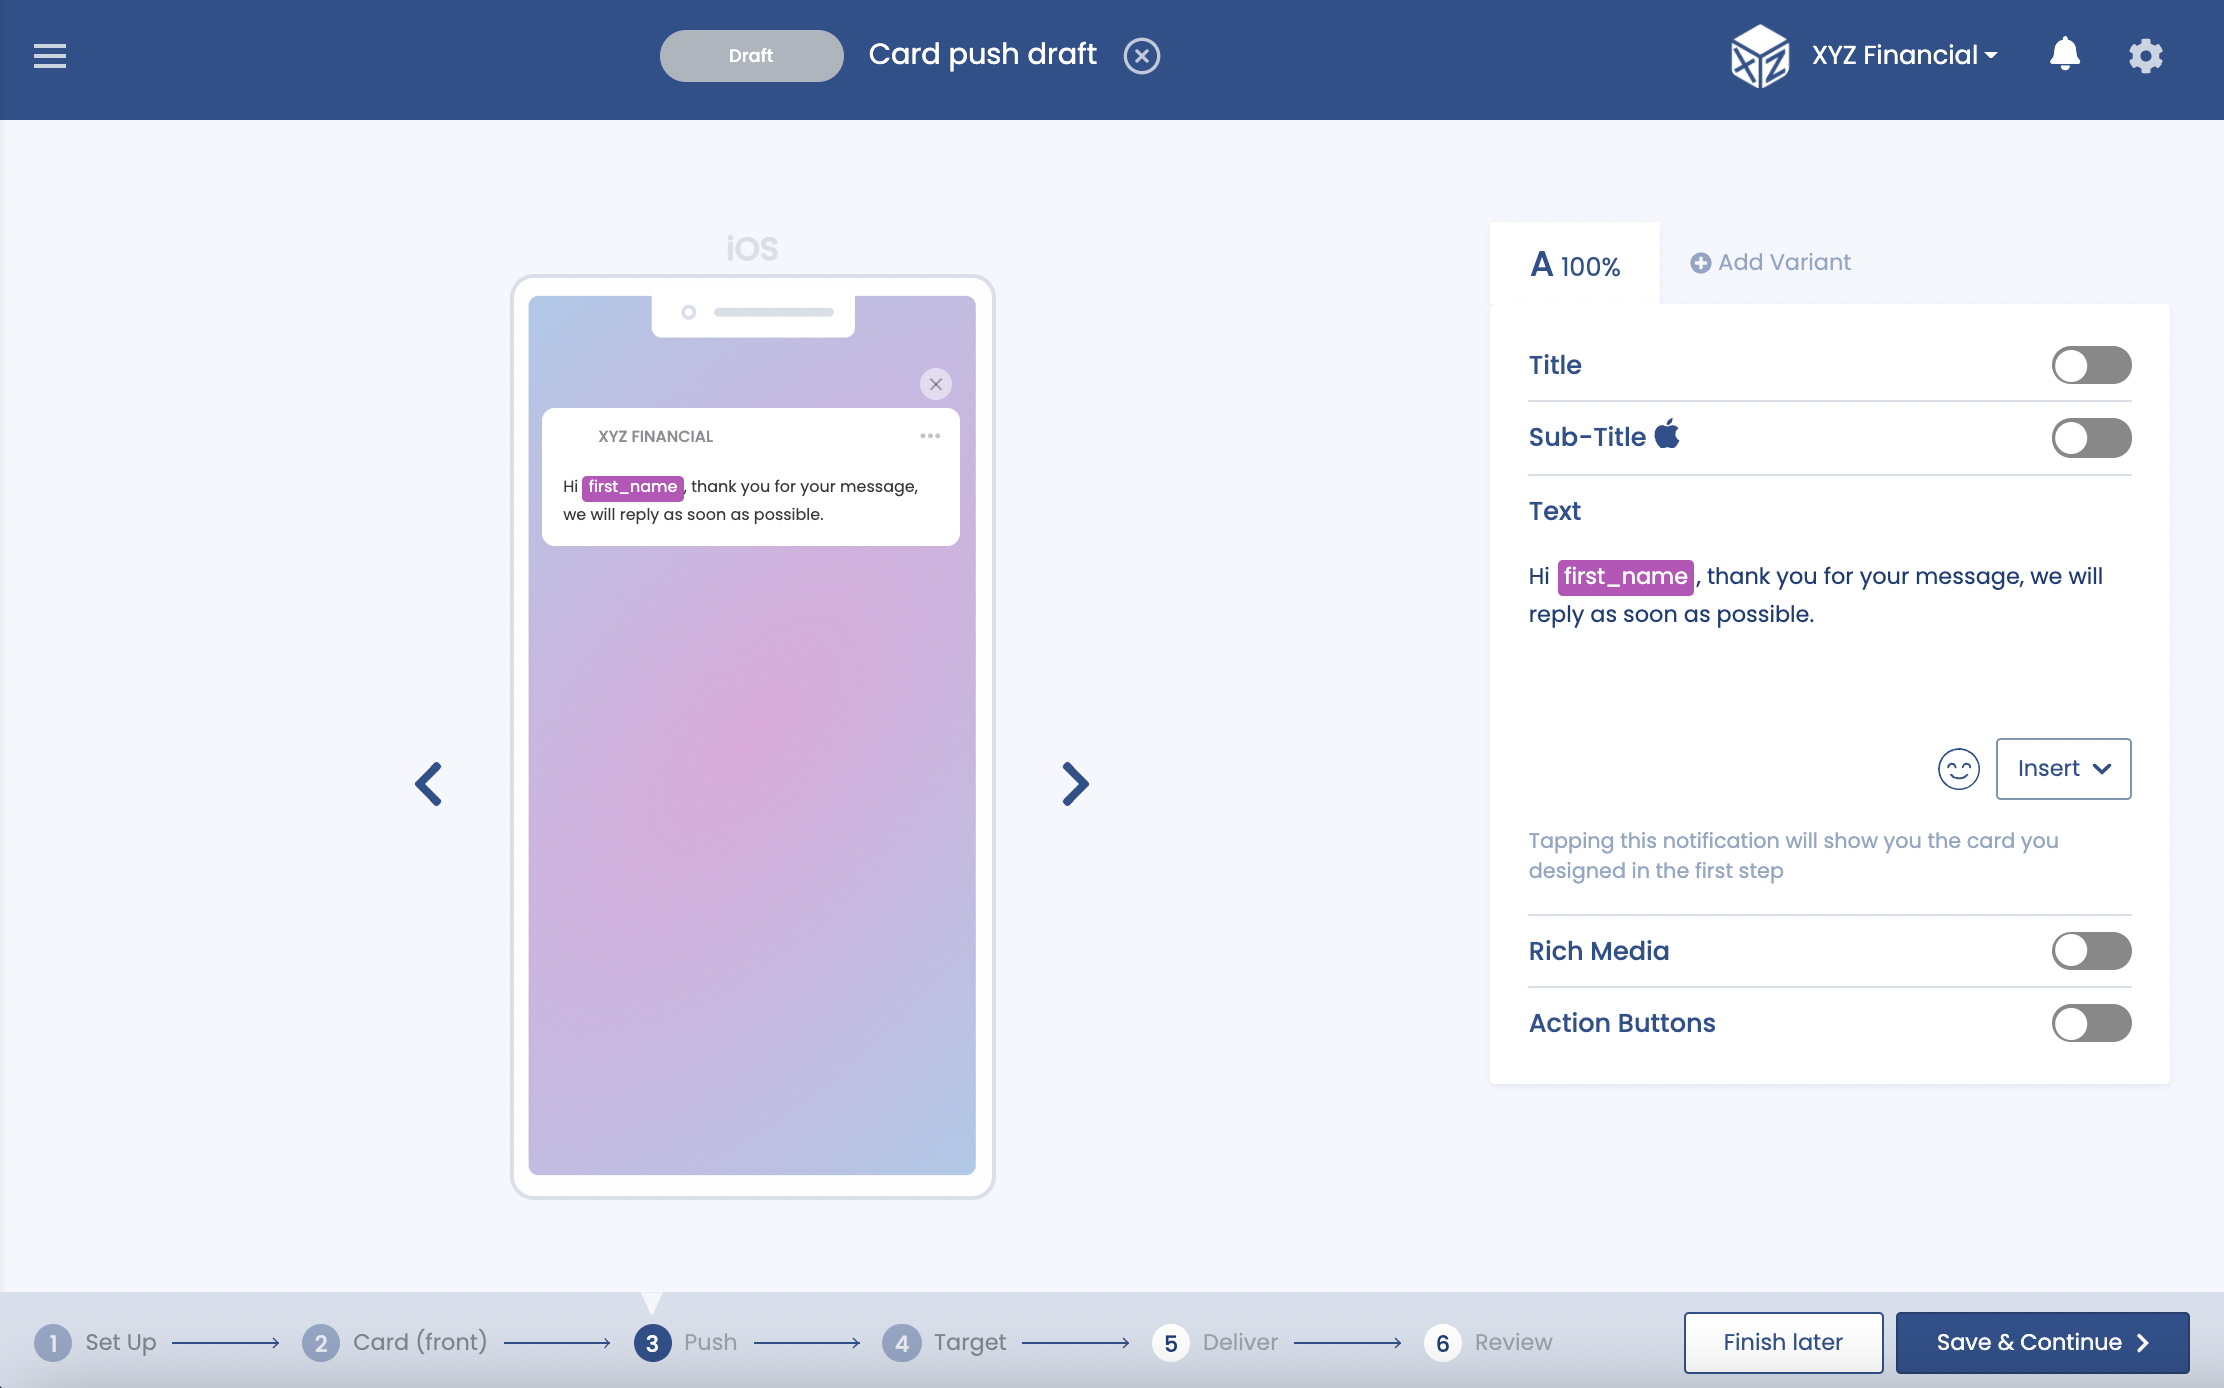
Push Notification
Push Notification Options
For more information on the other options available when (ie adding action buttons or adding rich media see our guide here.
Targeting
The next step is to choose the Segment that we previously created as the Targeting option for the campaign. You can add other Targeting Options here but for this example, we will just select the previously created Segment.
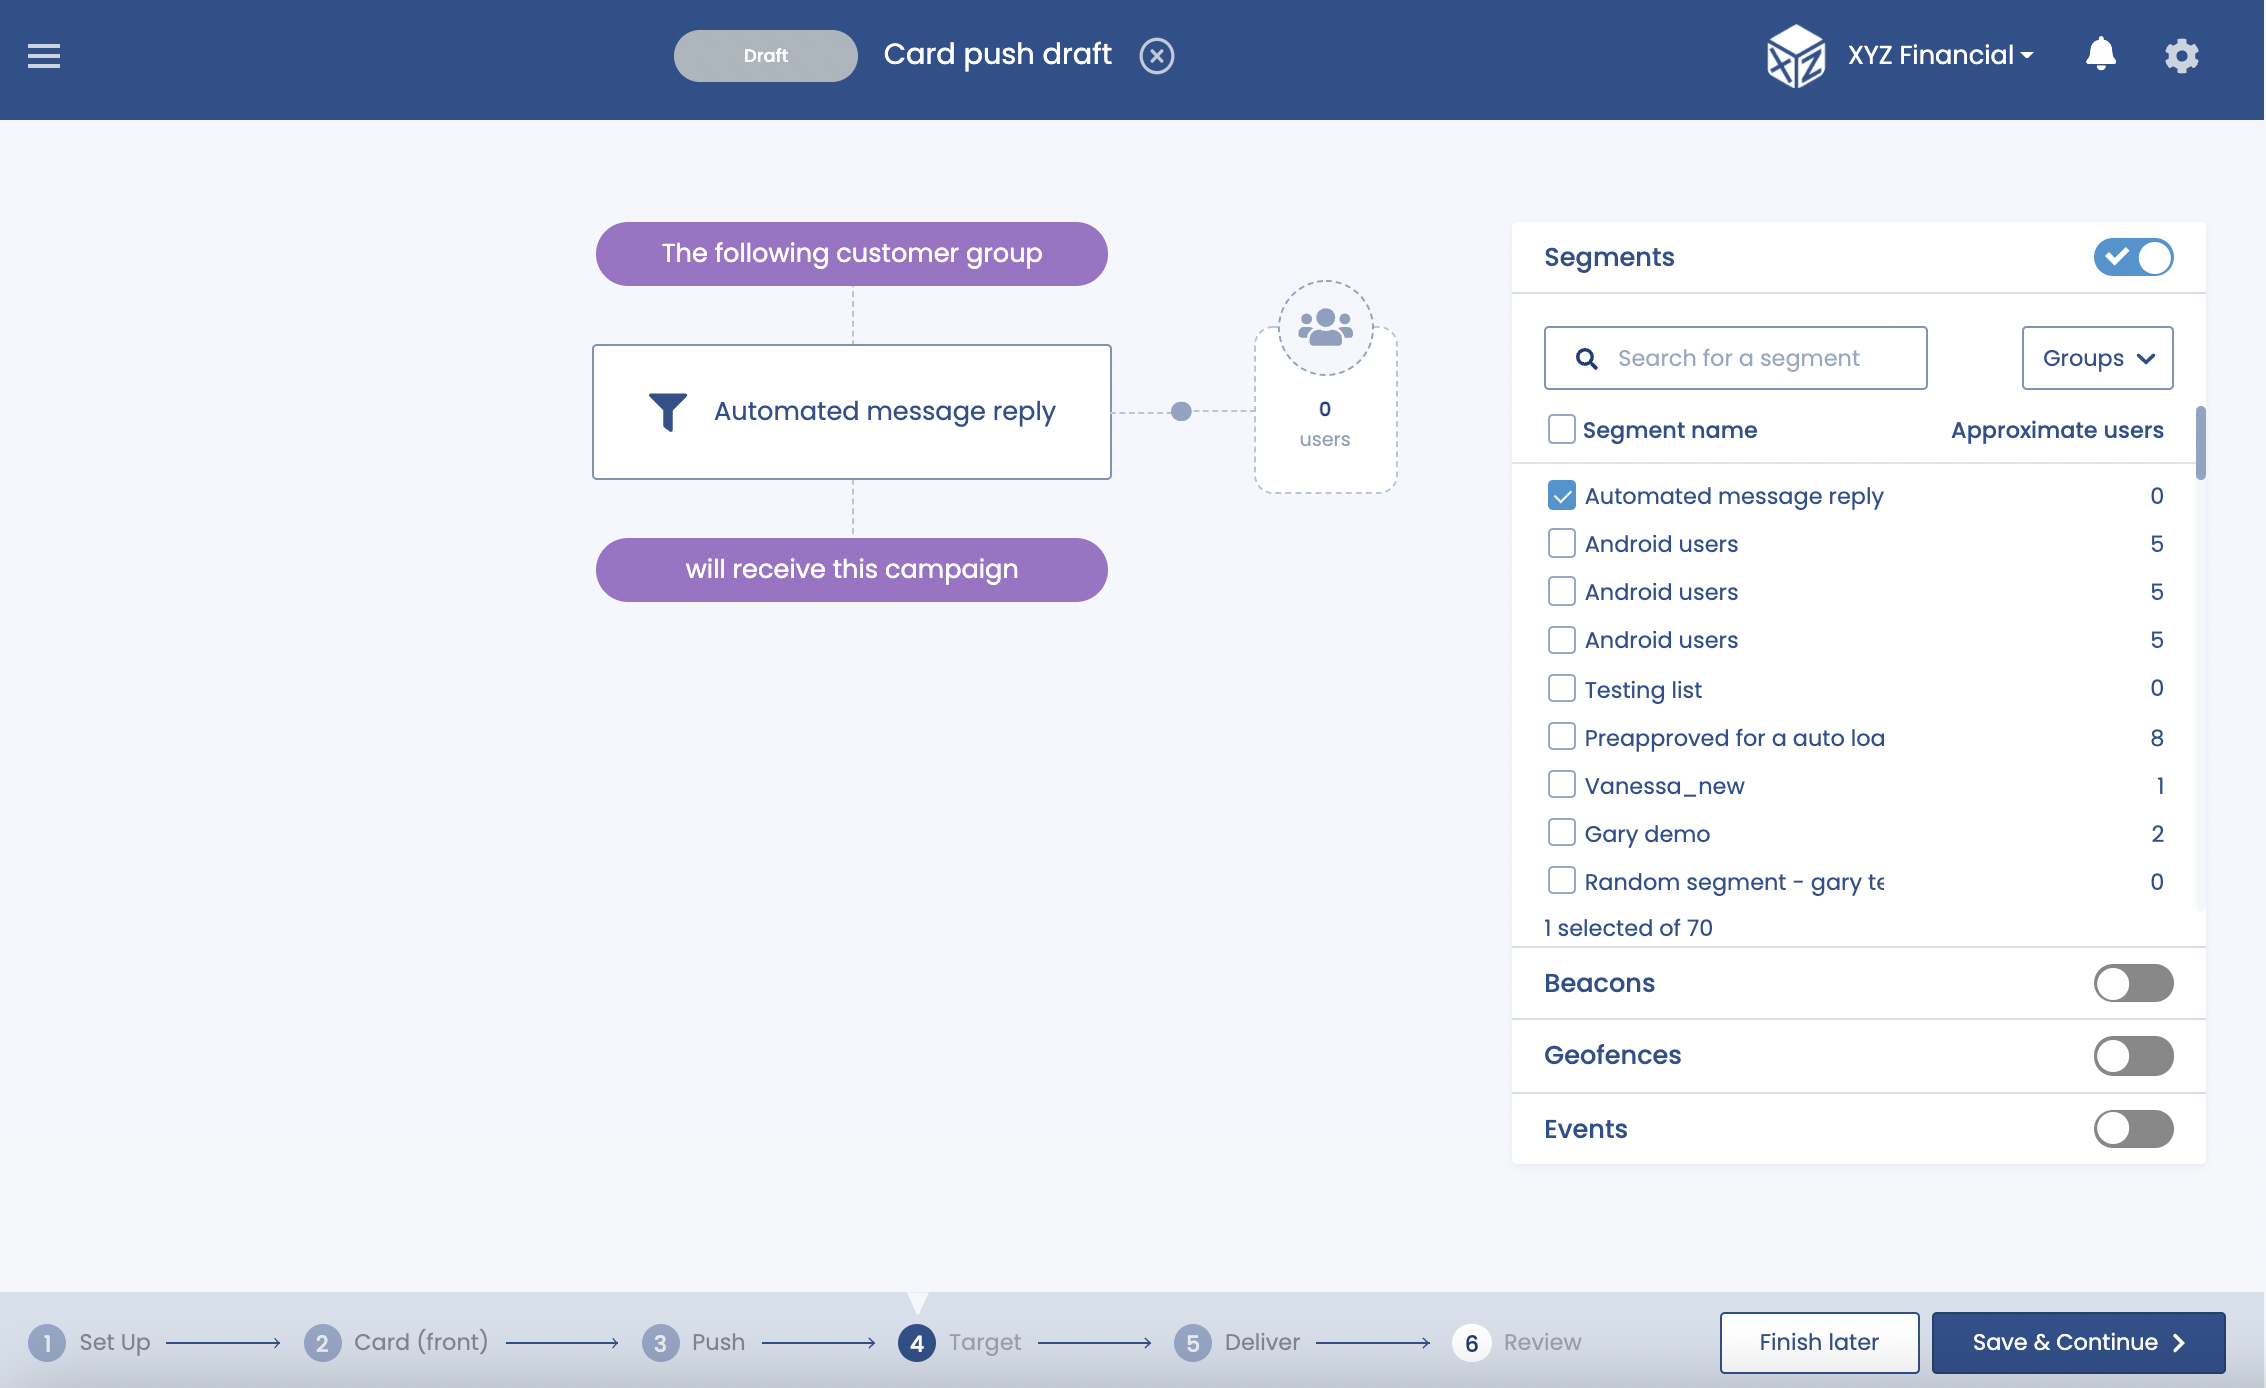
Delivery
Delivery is the most important part of this campaign as it will define when the message should be sent to users. To ensure that the message can be sent to users who are added to the segment in the future, select "People who enter the segment in the future" on the Delivery page. This will send the campaign to users who are currently in the segment and all eligible users who enter the segment in the future.
To enable the campaign to be sent to users more than once, select Multiple Times. You can set campaign limits here to ensure that the campaign is not sent to the user more than once in a specified time period. For this example, we will set the campaign limits to send no more than once per day.
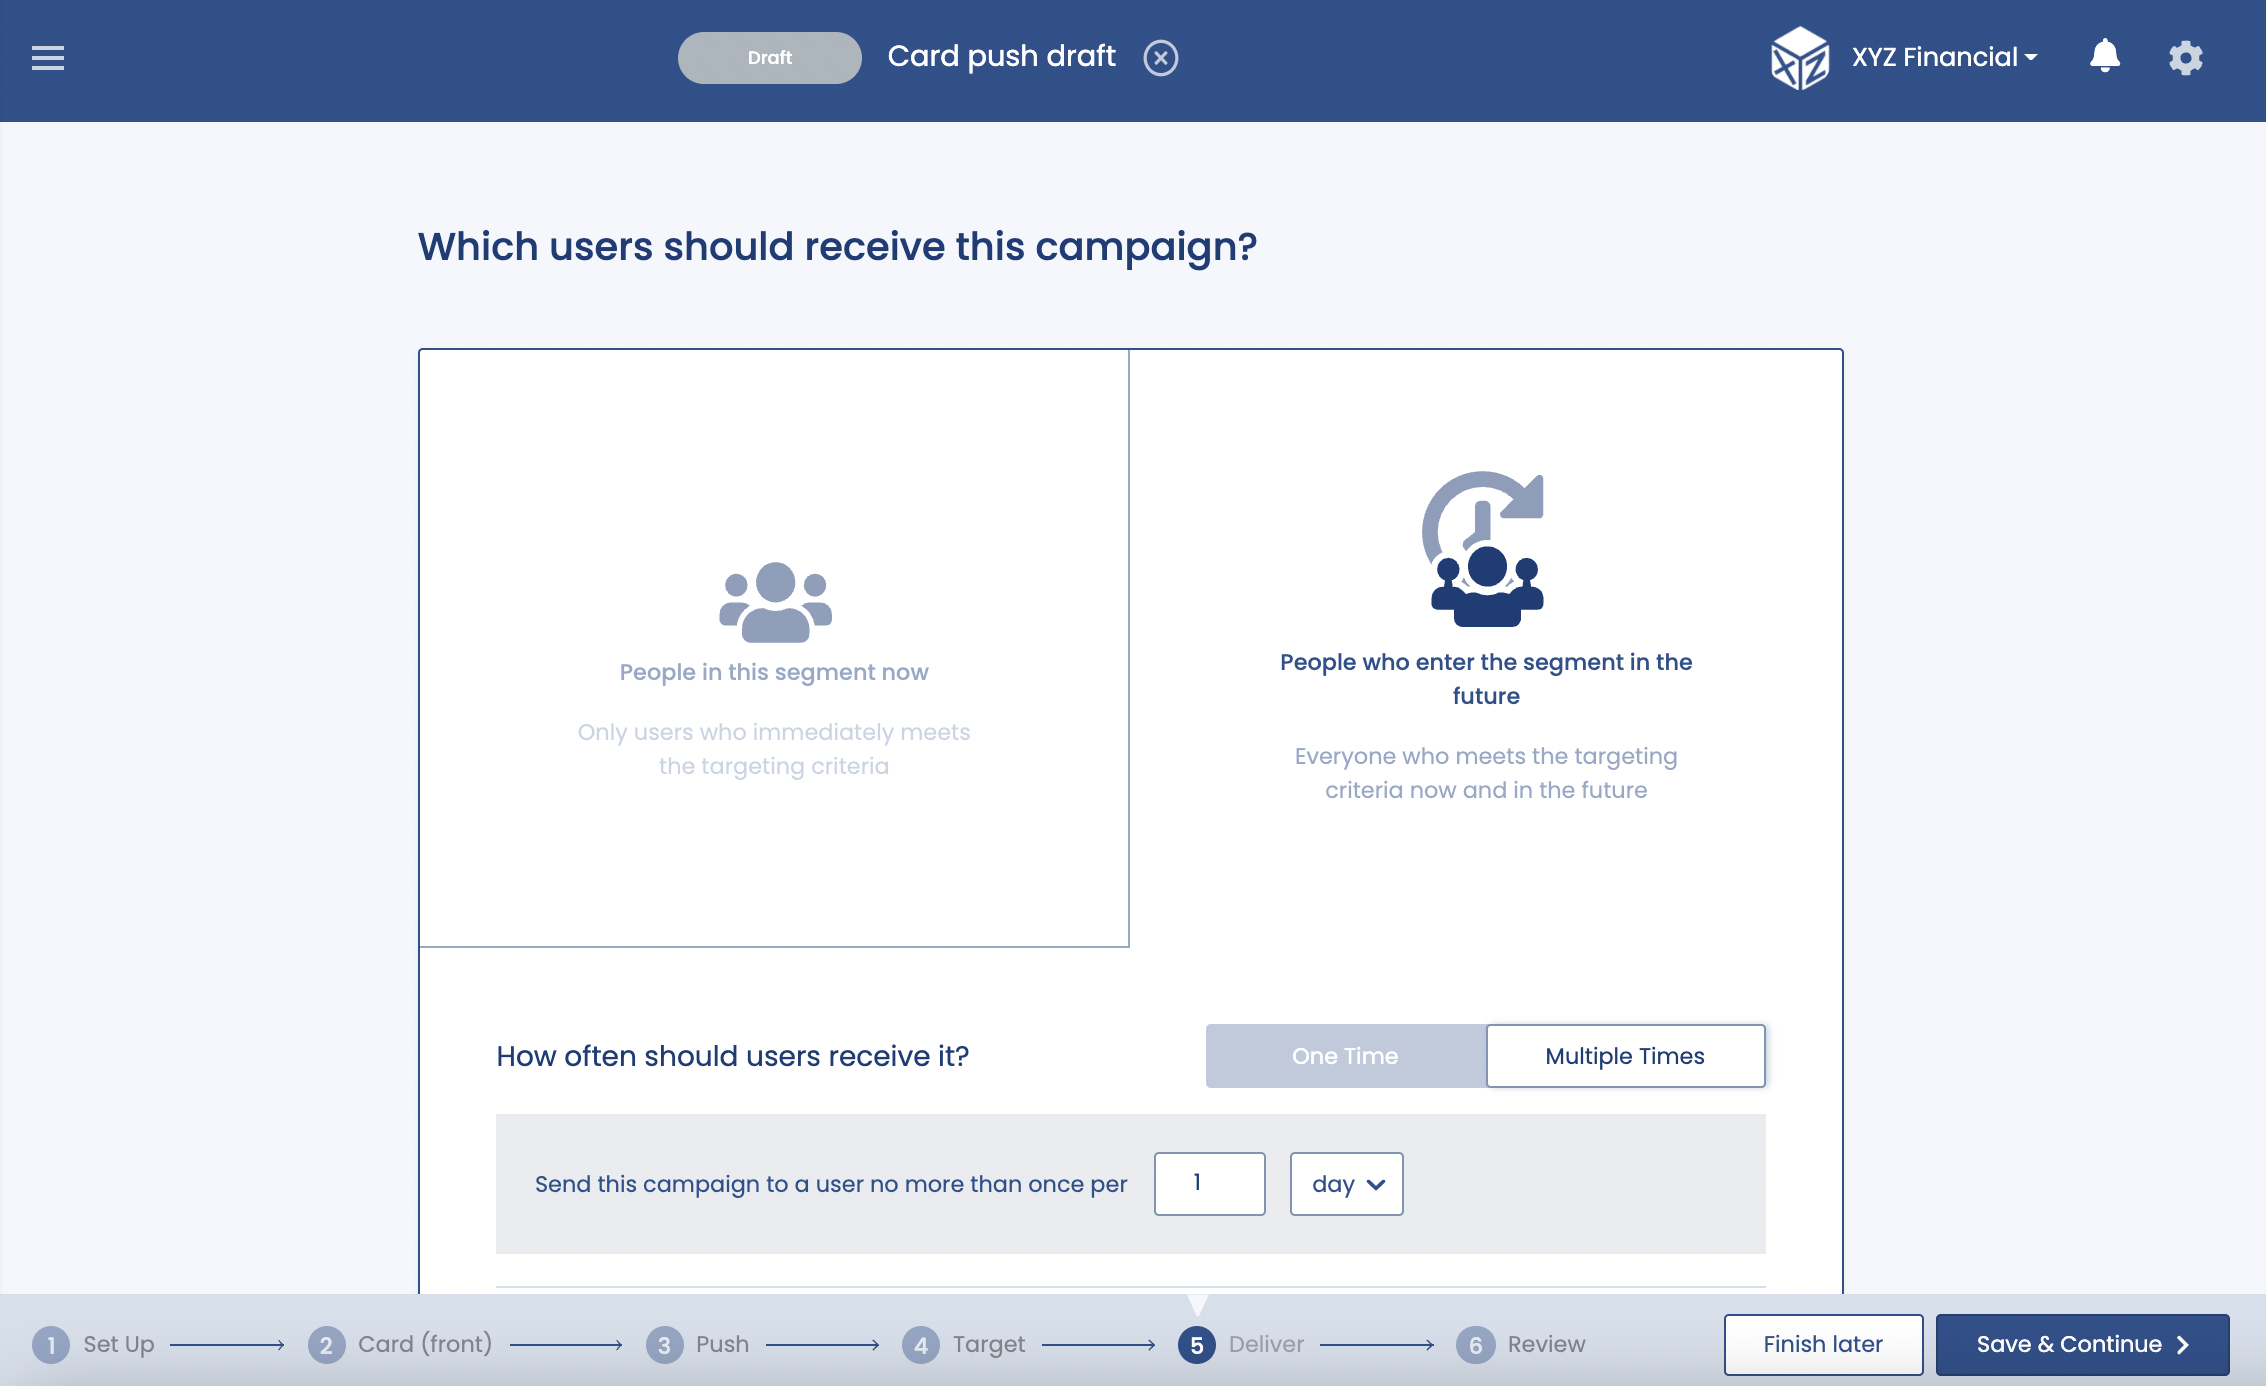
Campaign Limits
Delivery on Certain Days
Scroll down to the bottom of the Delivery page and choose whether to activate the campaign immediately or to schedule the campaign for the future. This is also where you will define when the campaign should be sent. To do that, click on Advanced Options and select Deliver on Certain Days. This option allows you to define what days and times the campaign should be sent. For this example, it will be the days and times that the customer support team is not available. That could be one uniform time every day (ie All Days 6 pm to 8 am) or different times for each day or group of days. To add a new time-based sending restriction, click the plus icon and to remove them, click the minus button.
If you have selected the campaign to Activate Now, you will need to set the timezone for the Deliver on Certain Days options. This will default to your current timezone or if you have chosen to Schedule the Campaign for the future, Deliver on Certain Days will inherit the timezone that you selected for that option.
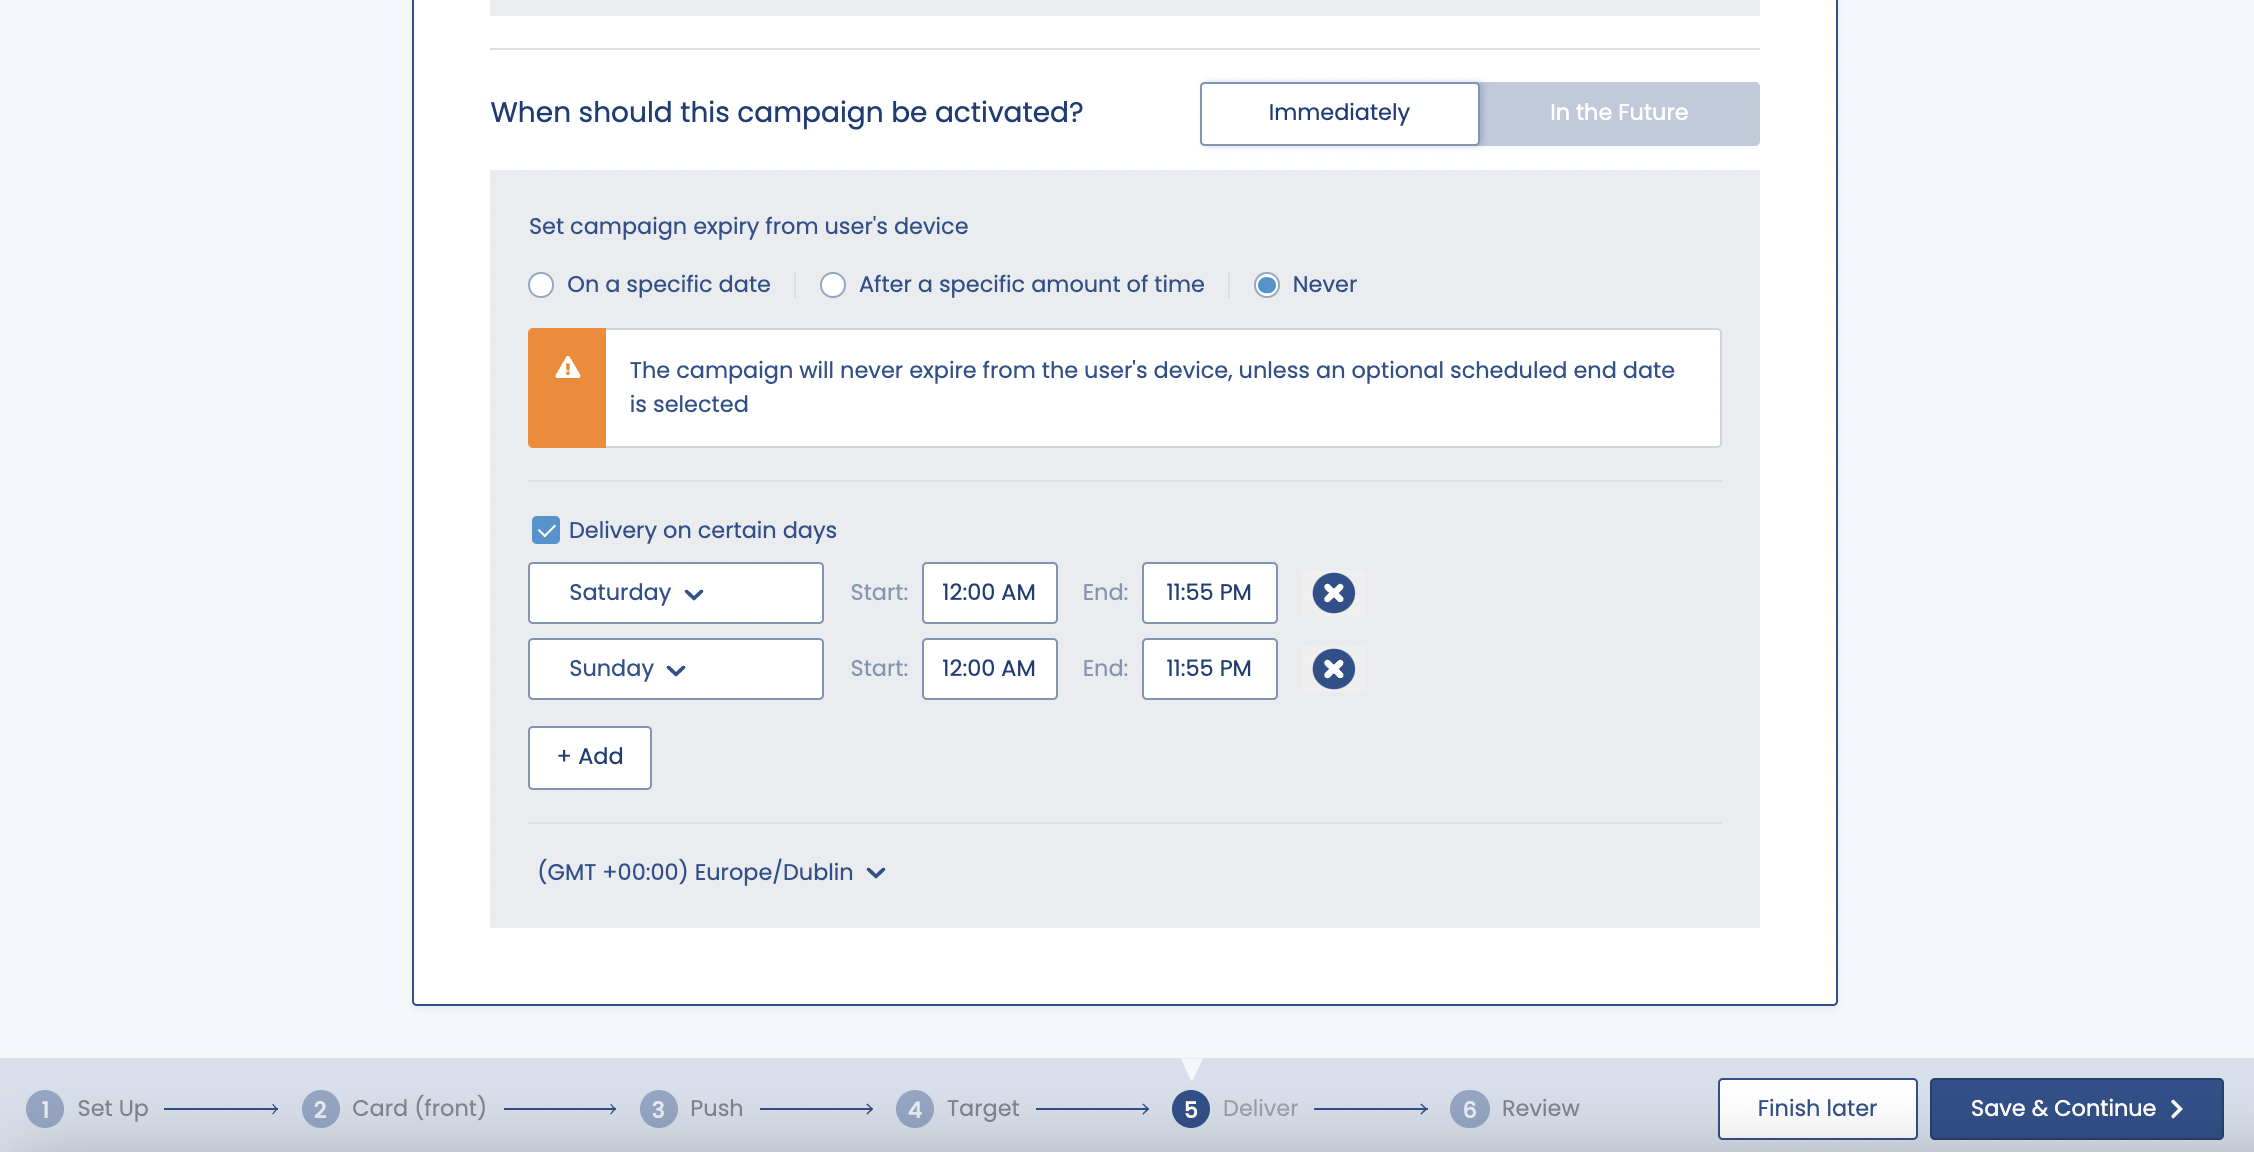
Deliver on Certain Days
The campaign is now set up and you can press Next and review it before activating it. Eligible Users who send a message during the times that you specified in the previous section will now be automatically sent this automated reply.
