Pulsate Email enables you to create highly targeted and personalized email marketing campaigns.
1. Select Email Type
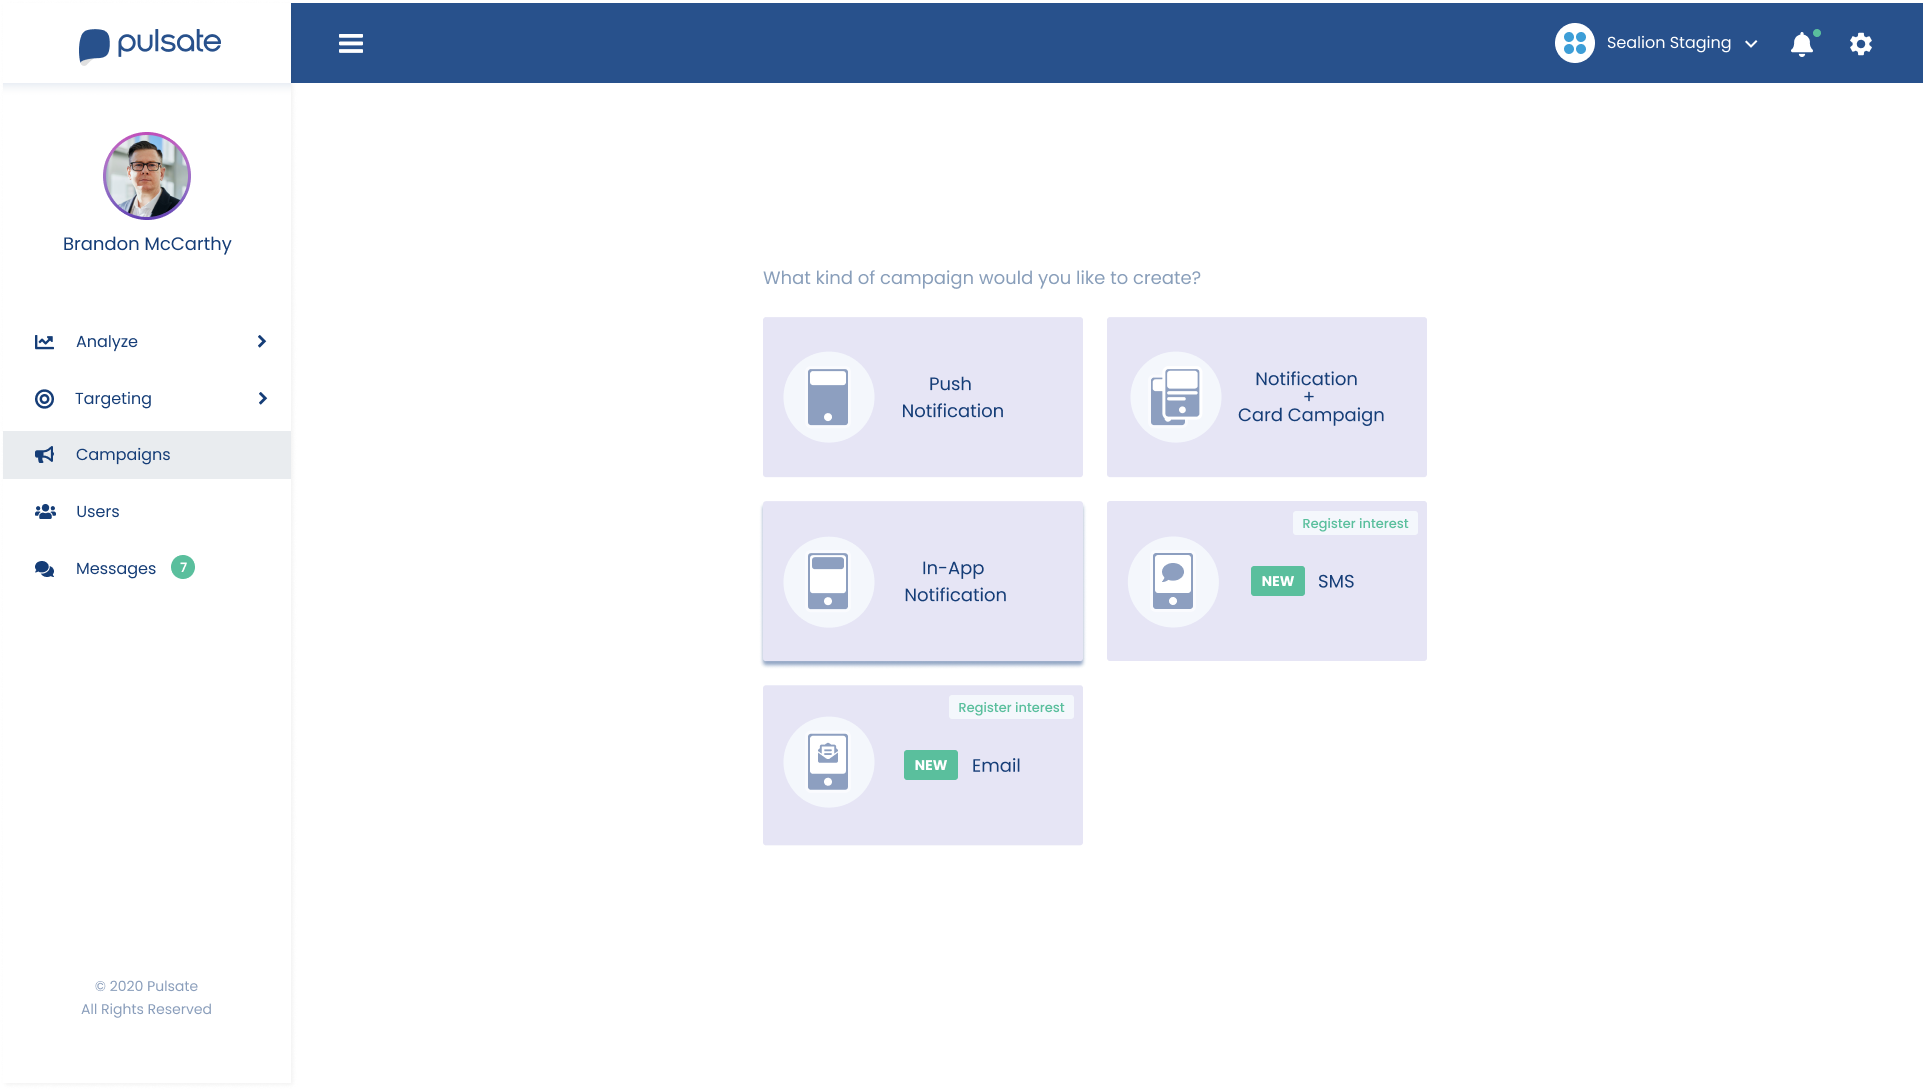
To market your products and services over email, click on New Campaign and choose Email from the grid containing different types of campaigns.
2. Set up Campaign
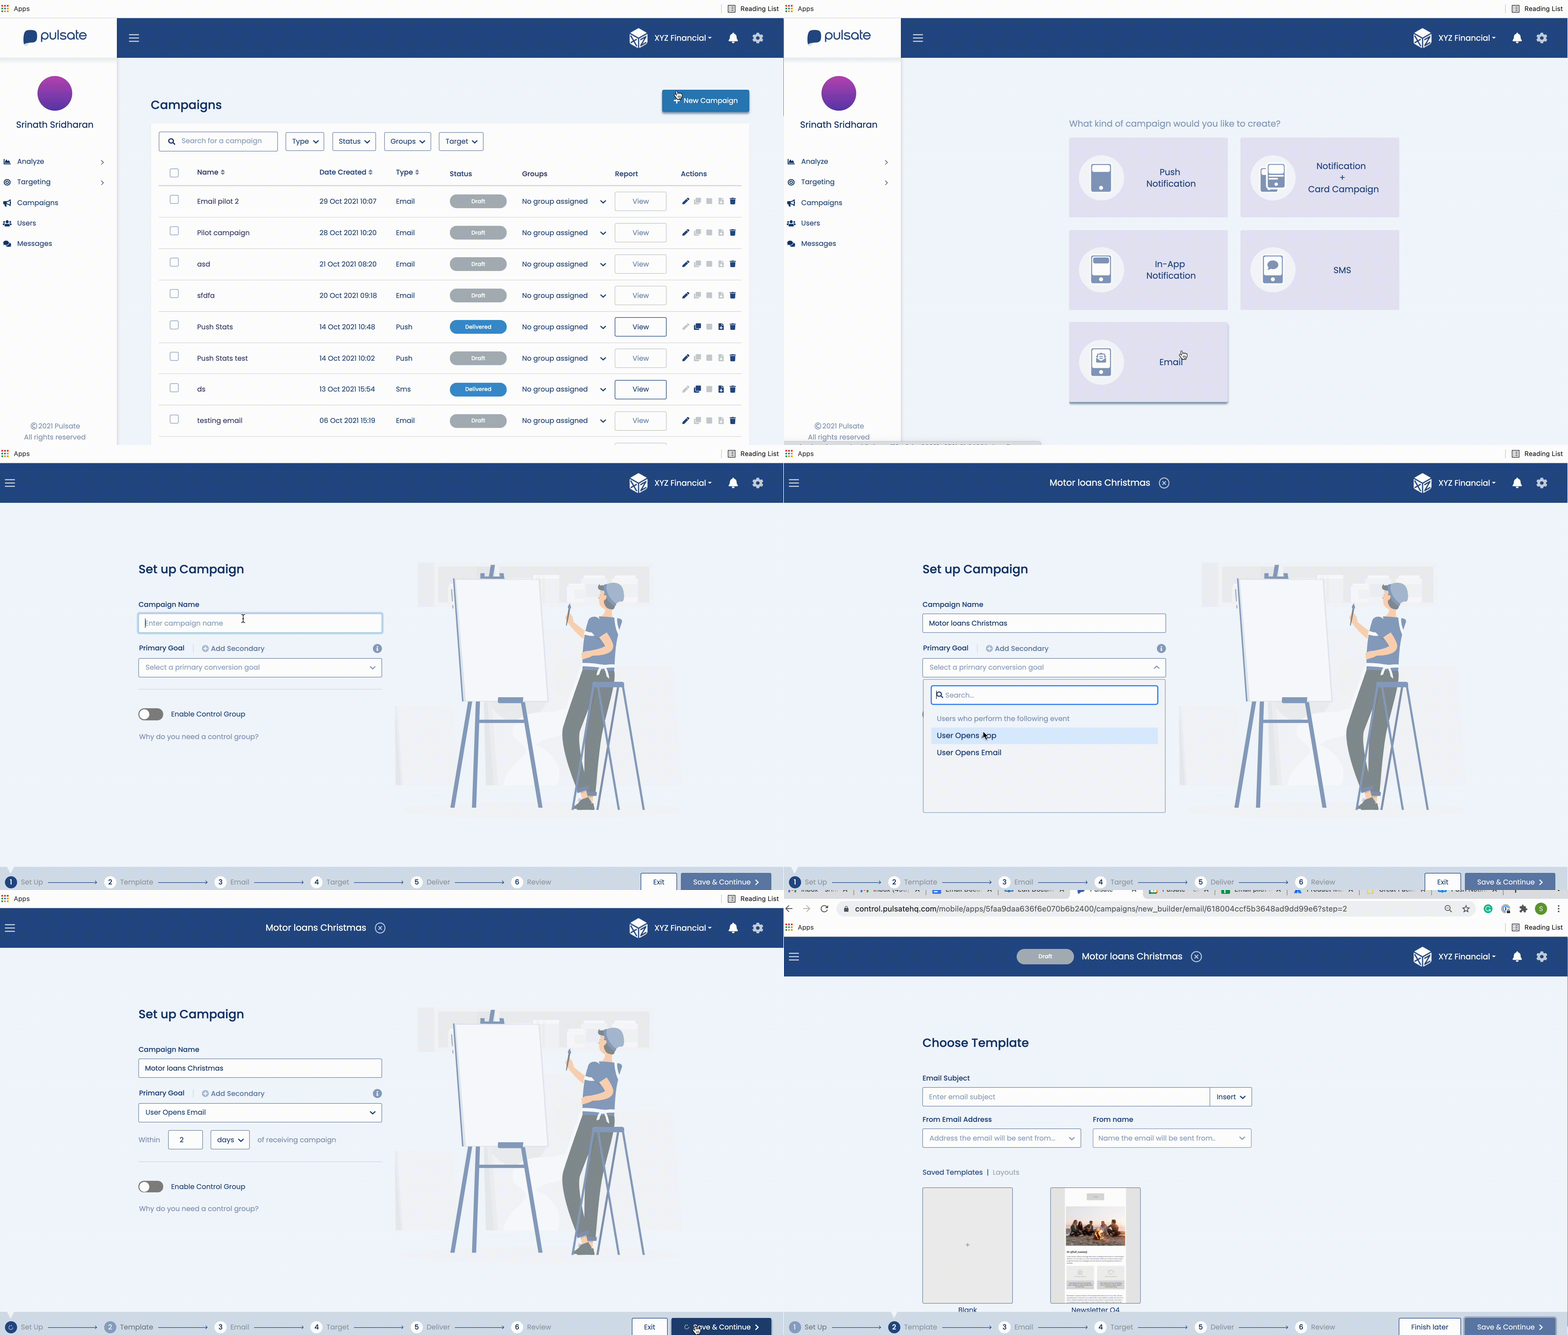
The campaign name (which is meant for the purpose of marketing and not visible in the email), primary goal, and secondary goal could be configured on this page. Additionally, it allows the administrator to enable a control group, a subset of the customers we are targeting with a particular campaign, who will not receive the campaign communication. Upon setting up the parameters click on “Save & Continue”.
3. Choose Template
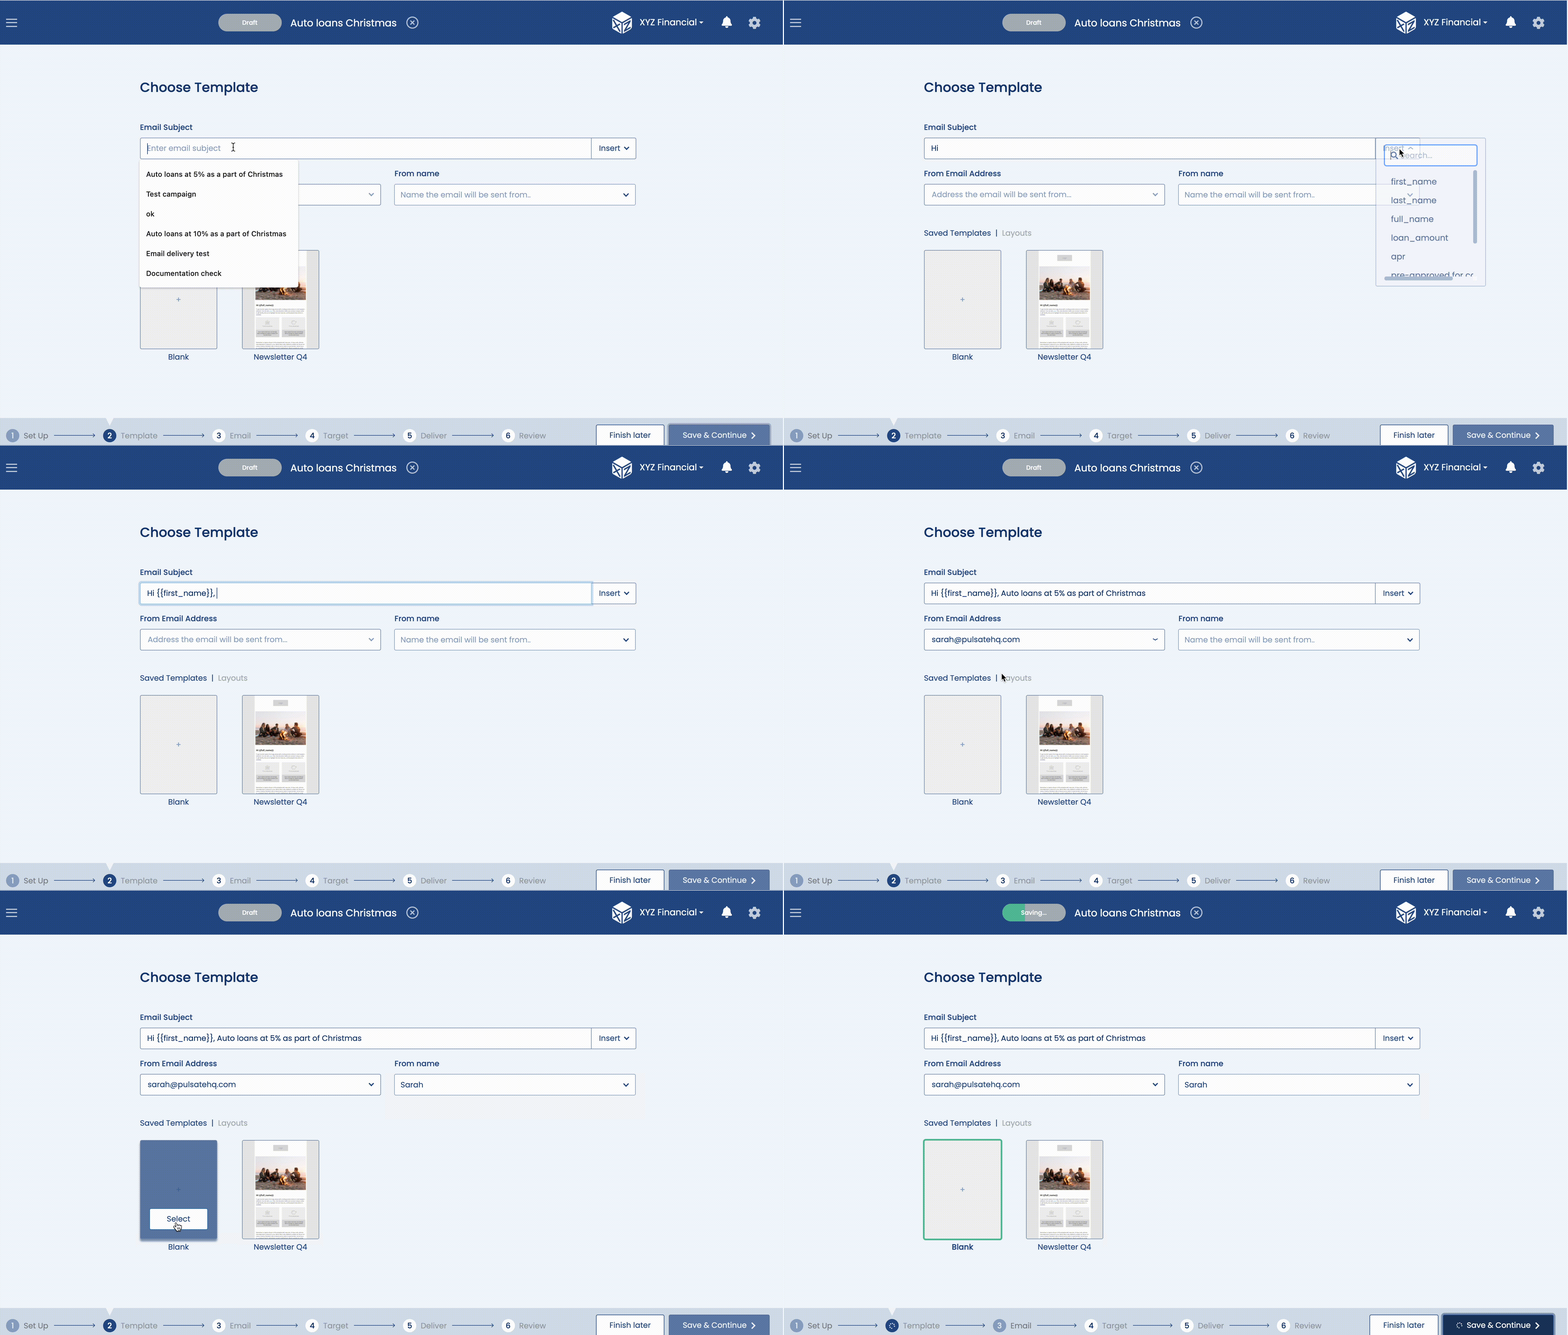
The email subject line could be composed on this page and the personalization tags enable you to deliver an exceptional customer experience. The From Email Address and the From Name of the campaign has a list of preconfigured email addresses and names from which the administrator can make the selection based on the campaign being sent. Depending on the nature of the campaign an appropriate layout can be chosen from the list. Or, previously saved or blank templates can be used. Click on Save & Continue upon template selection.
If you would like to add a new email address and a name navigate Settings → App Settings and configure them under Email Verification and From Name list fields.
3. Email Builder
The email builder is the section where the body of the email is composed. It has 4 important sections drag and drop elements: Content, Blocks, Body, and Images.
Content
| Name | Description | Editor |
|---|---|---|
| Columns | Columns help you create horizontal sections inside the email canvas and add content to it. | The column properties like padding, border type (dotted, dash, etc.), background image, etc. |
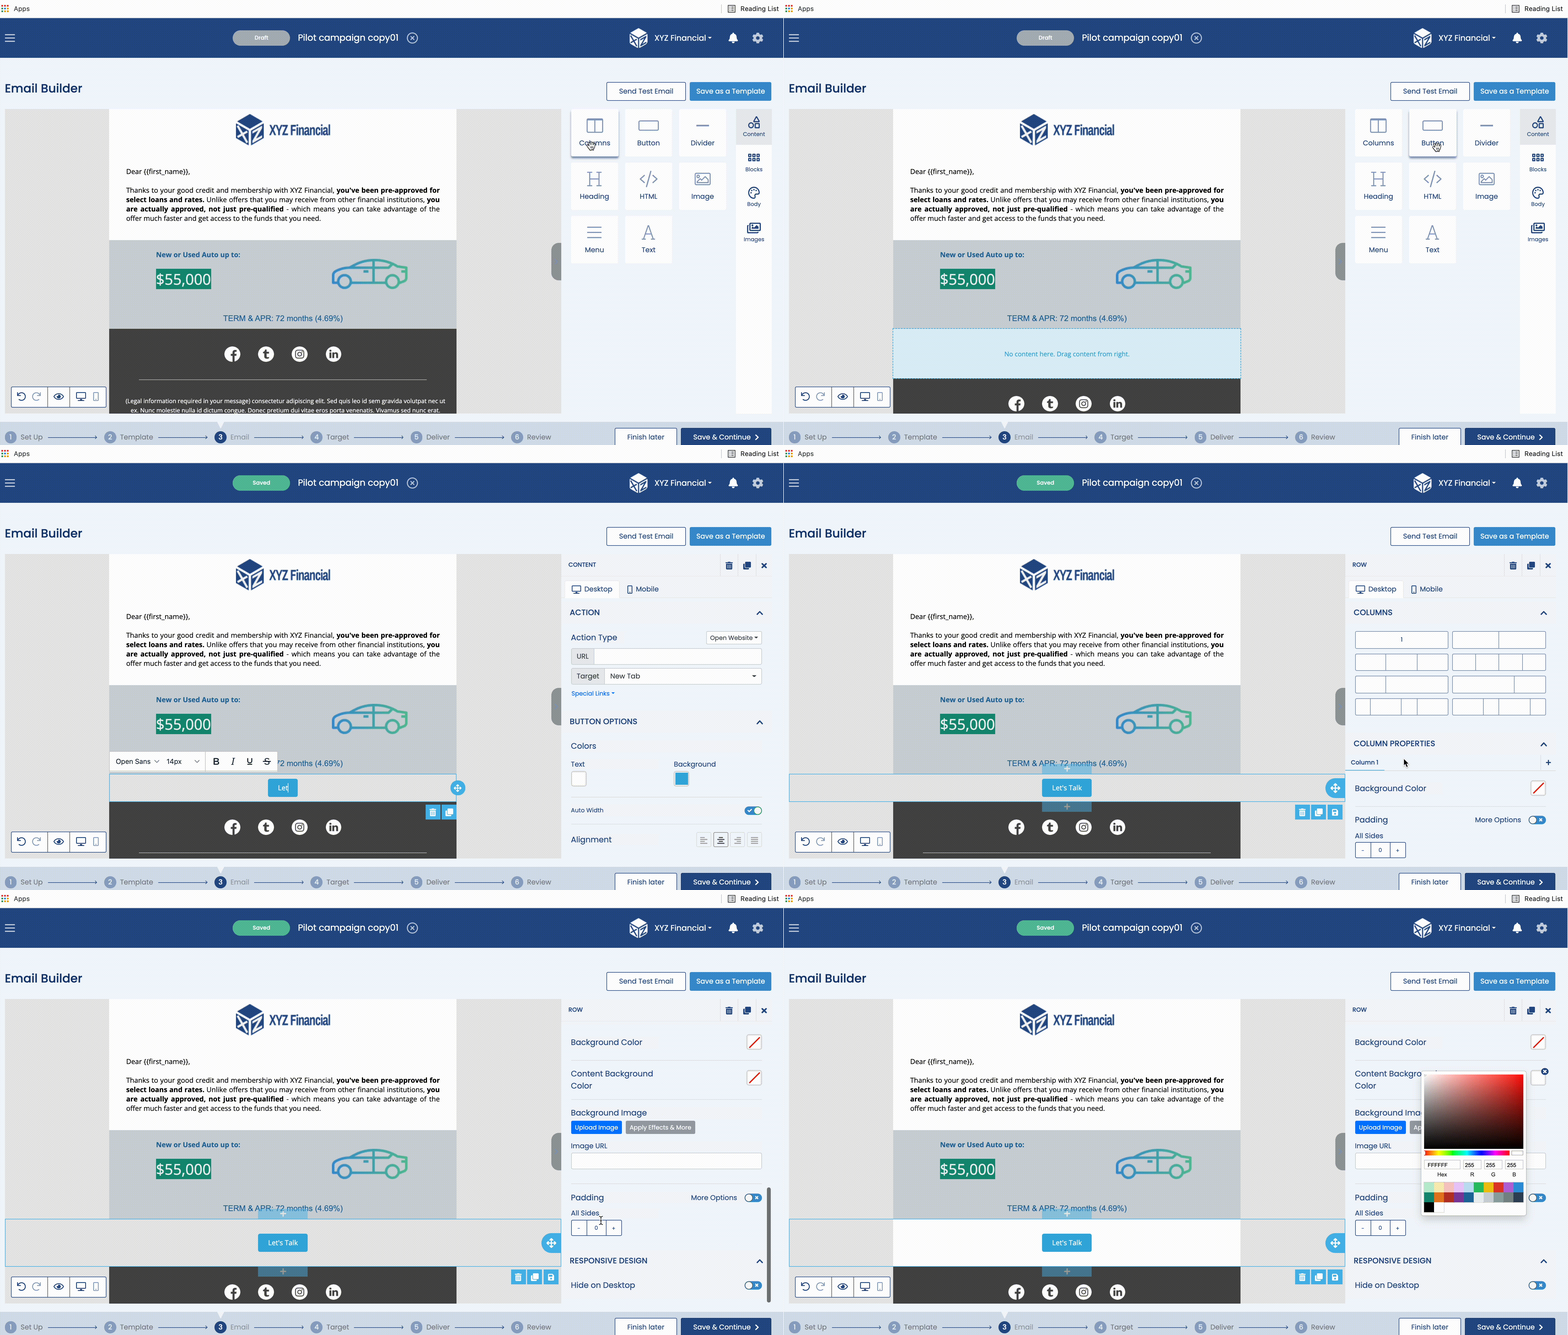
| Button | Buttons help you redirect the users to a certain page within your application or open the browser with a pre-loaded URL. | The button colour, text colour, borders, alignments, etc. |
| Divider | A divider is an HTML element that allows you to separate the contents of the email vertically. | The width, thickness, and padding of the divider. |
| Heading | The heading is a text element that enables you to create headings and sub-headings for an email. There are 4 types of headings: H1, H2, H3, and H4 | The font family, font size, text colour, text alignment, etc. |
| HTML | The HTML editor allows you to write HTML commands to customize the content to suit the campaign’s requirements. | Container padding. |
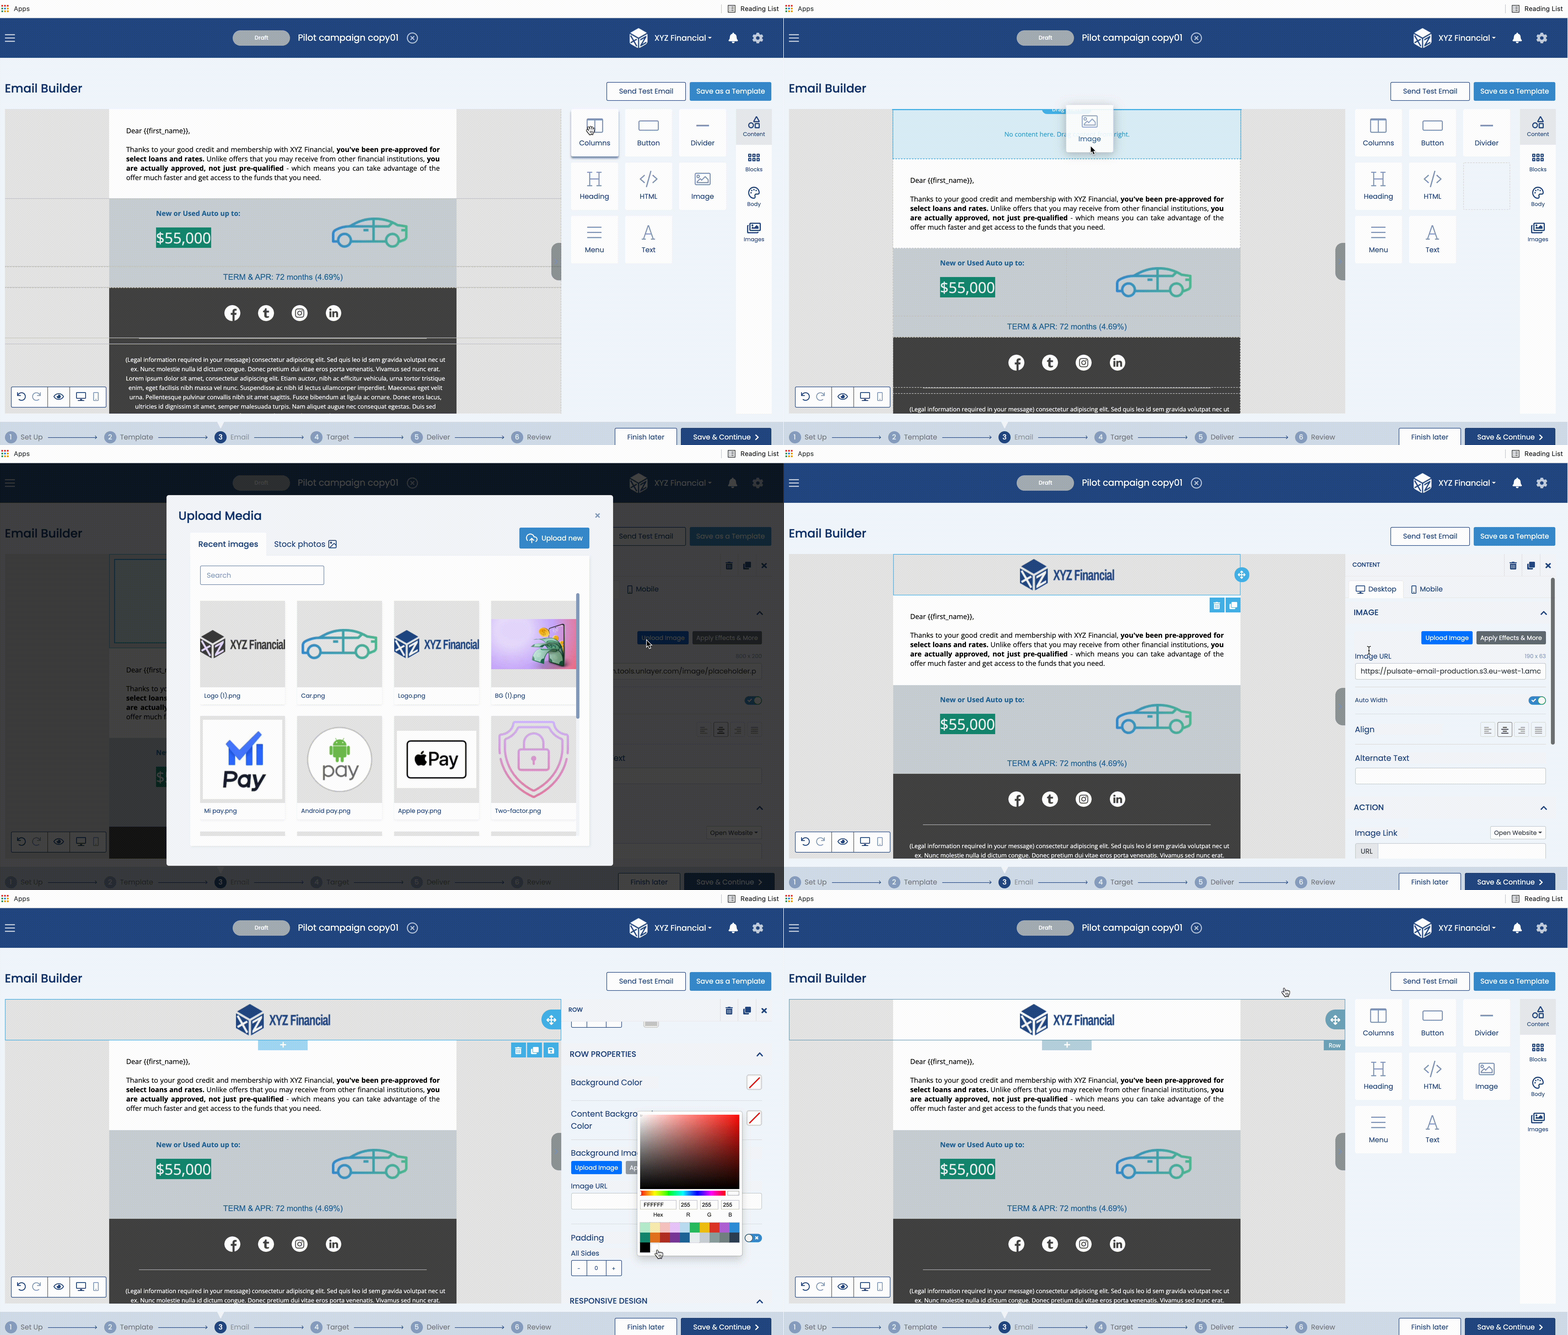
| Image | The image element allows you to upload images or add an image URL from the web. | Image size, width, alignment, padding. |
| Menu | The menu option helps you create horizontal hyperlinks for redirecting the users. | The hyperlink’s font size, font family, text colour, link colour, alignment, padding, layout, padding. |
| Text | The text block allows you to type in the content, the editor allows you to tailor the content according to the campaign. | The text colour, alignment, line height, container padding. |
Adding an image
Adding a button
Blocks
Blocks are similar to the columns in the Content section which allows you to create horizontal sections inside the email canvas, add content to it, and change the properties of the columns in it.
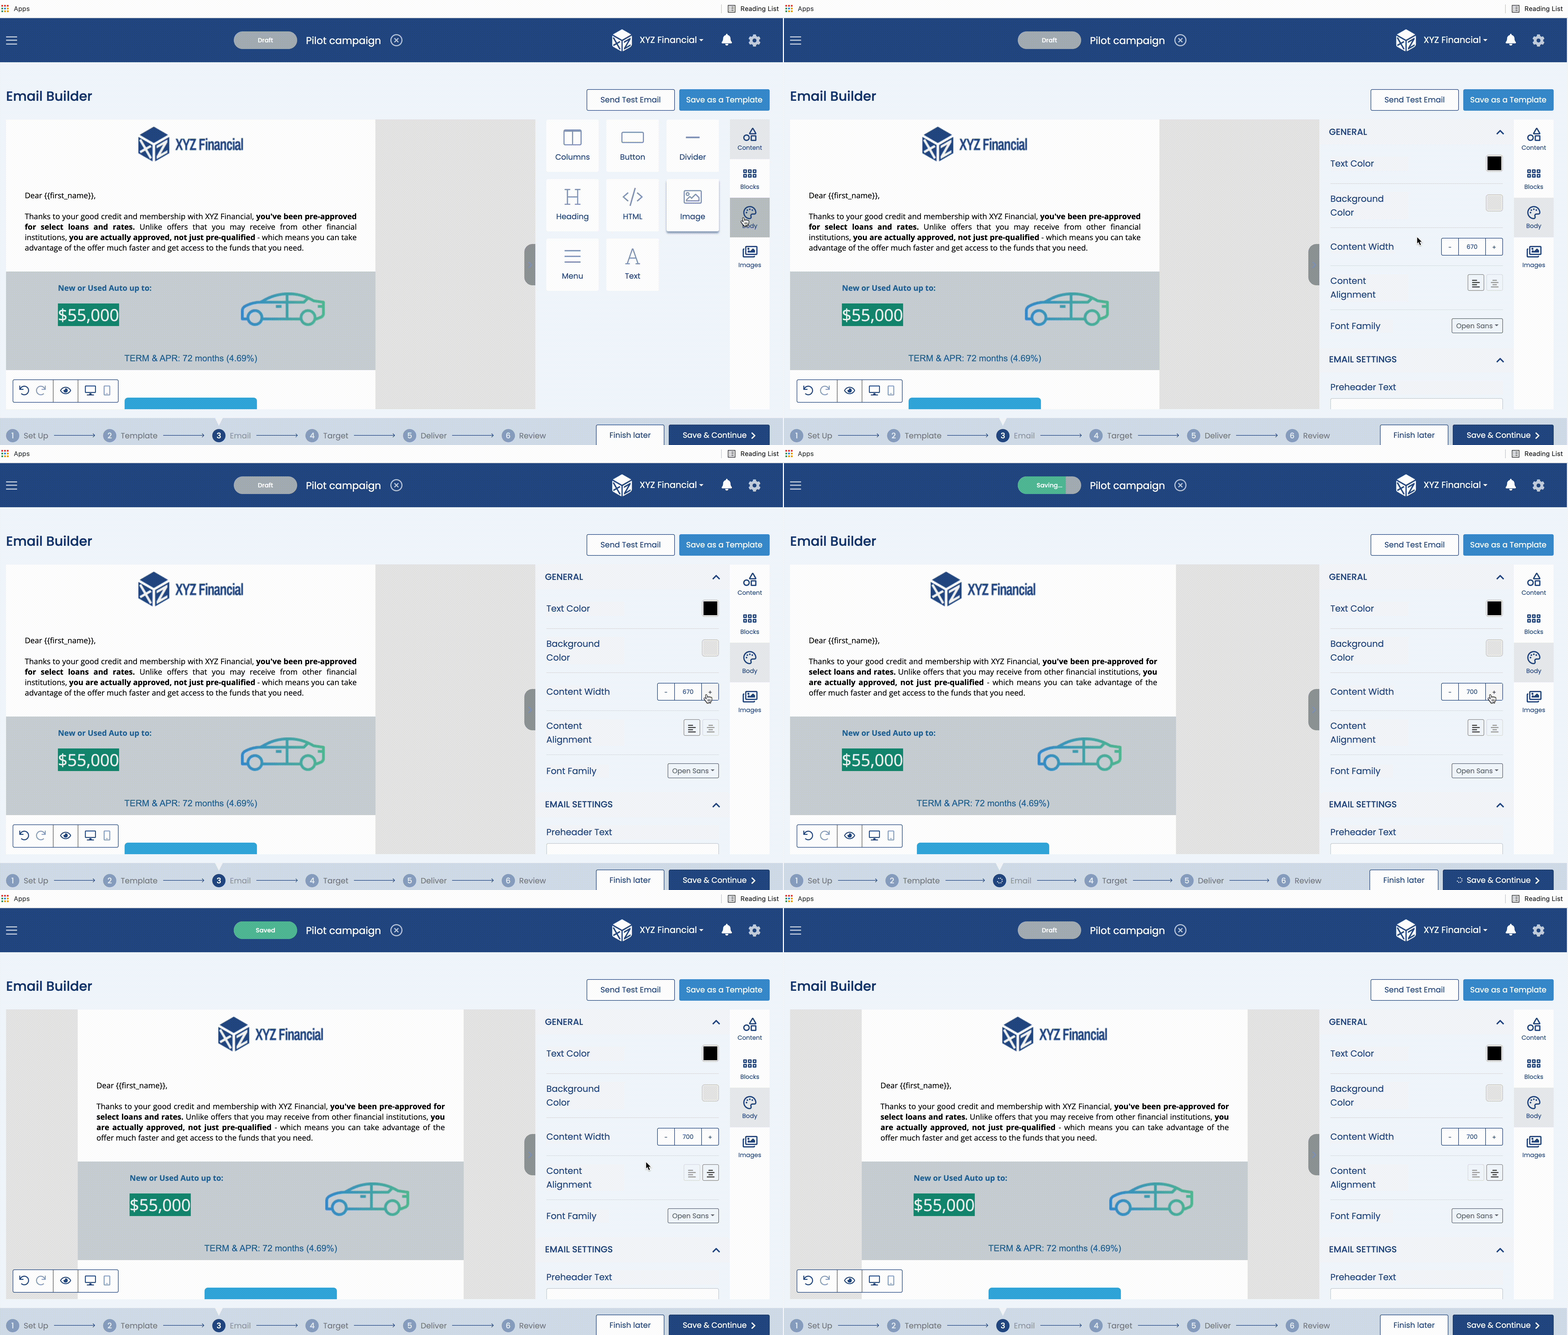
Body
The body section of the email allows you to modify background properties like colour, text alignment, font family, hyperlink properties etc. Additionally, you would be able to add a preheader text which is a short summary text that follows the subject line when viewing an email from the inbox.
Images
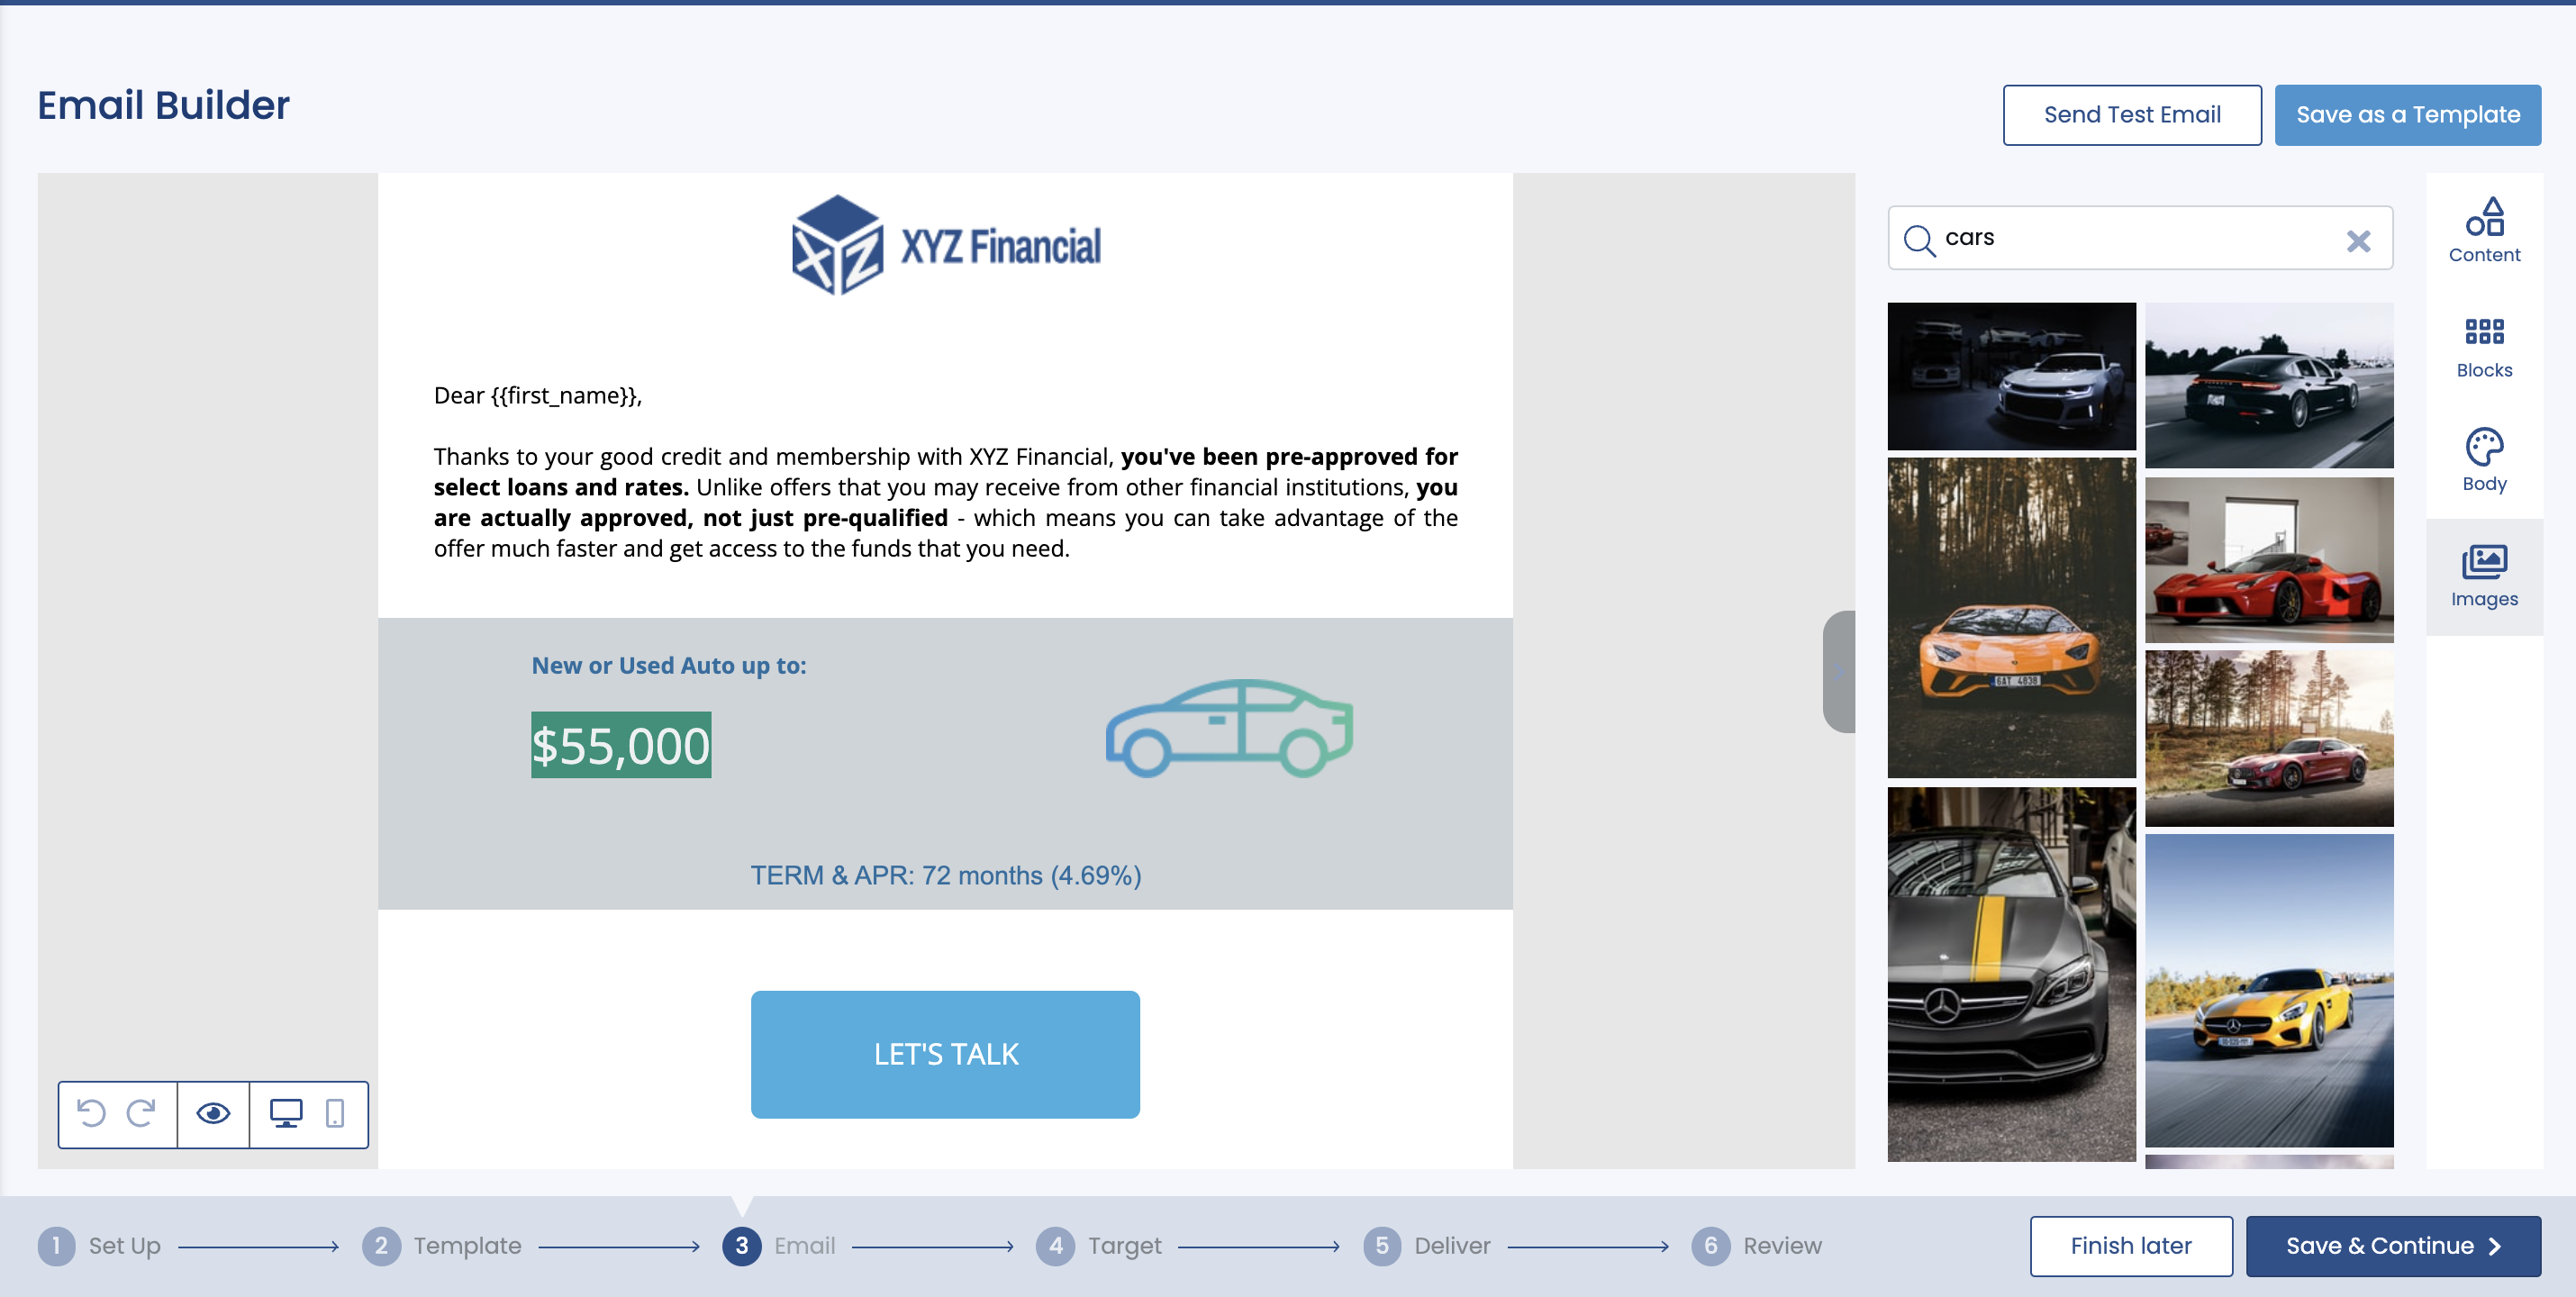
Pulsate allows you to select an image appropriate for your campaign from millions of images available in the image section. The search bar makes it easy for you to narrow down to your requirements.
How does the email appear in your phone?
The email campaigns created in the canvas display the desktop view by default and any changes made to the content of the email will correspond to this view. However, you would be able to switch to the mobile view by clicking on the Mobile icon in the display control panel and modify the email elements to adjust it to a mobile phone. Changing the email design in a particular UI (Mobile or Desktop) does not affect the other.
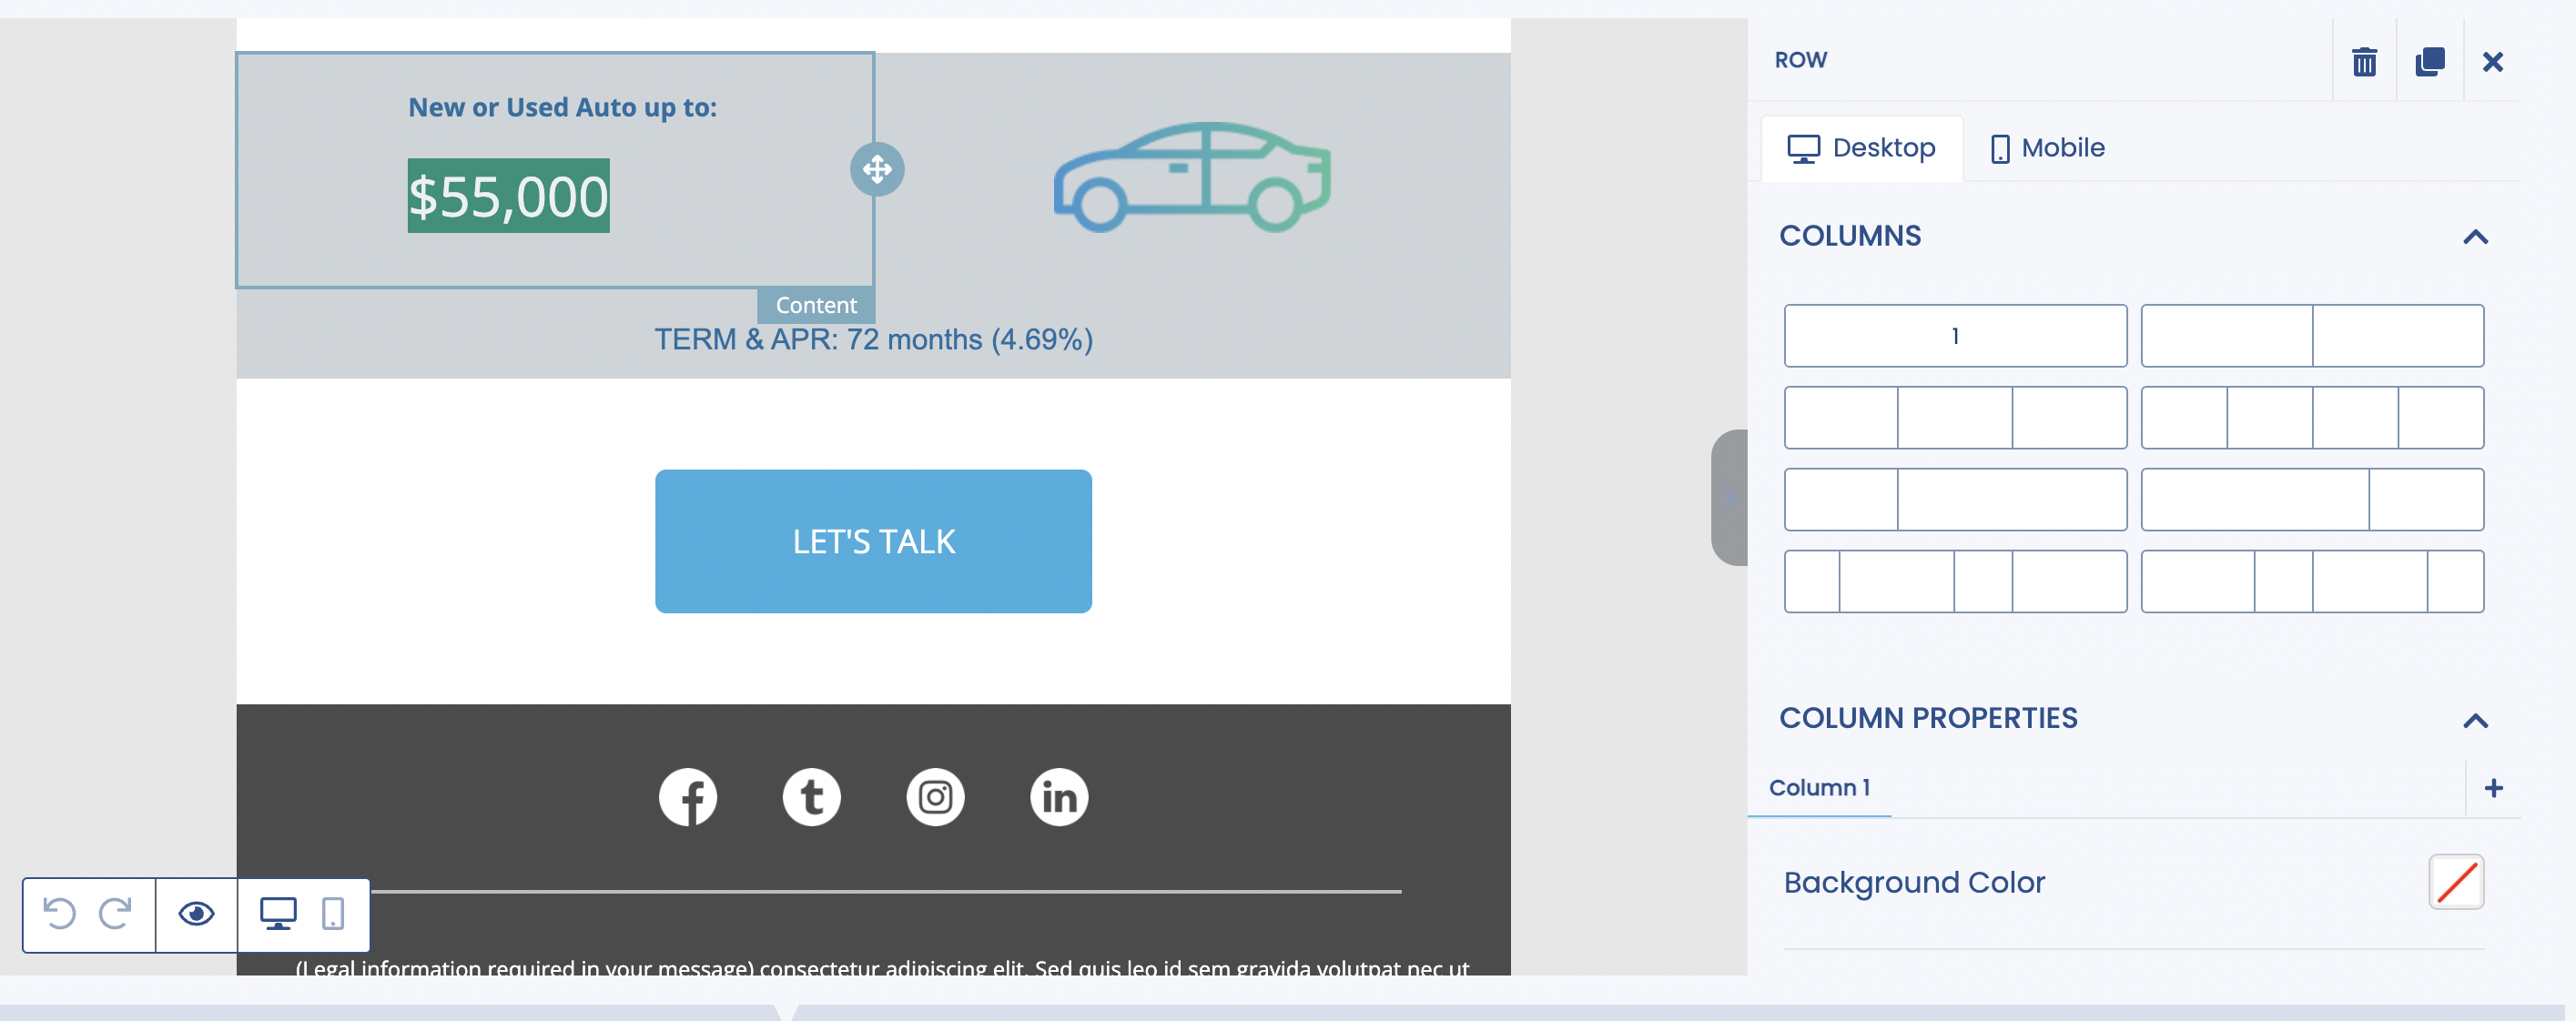
Email when viewed from Desktop
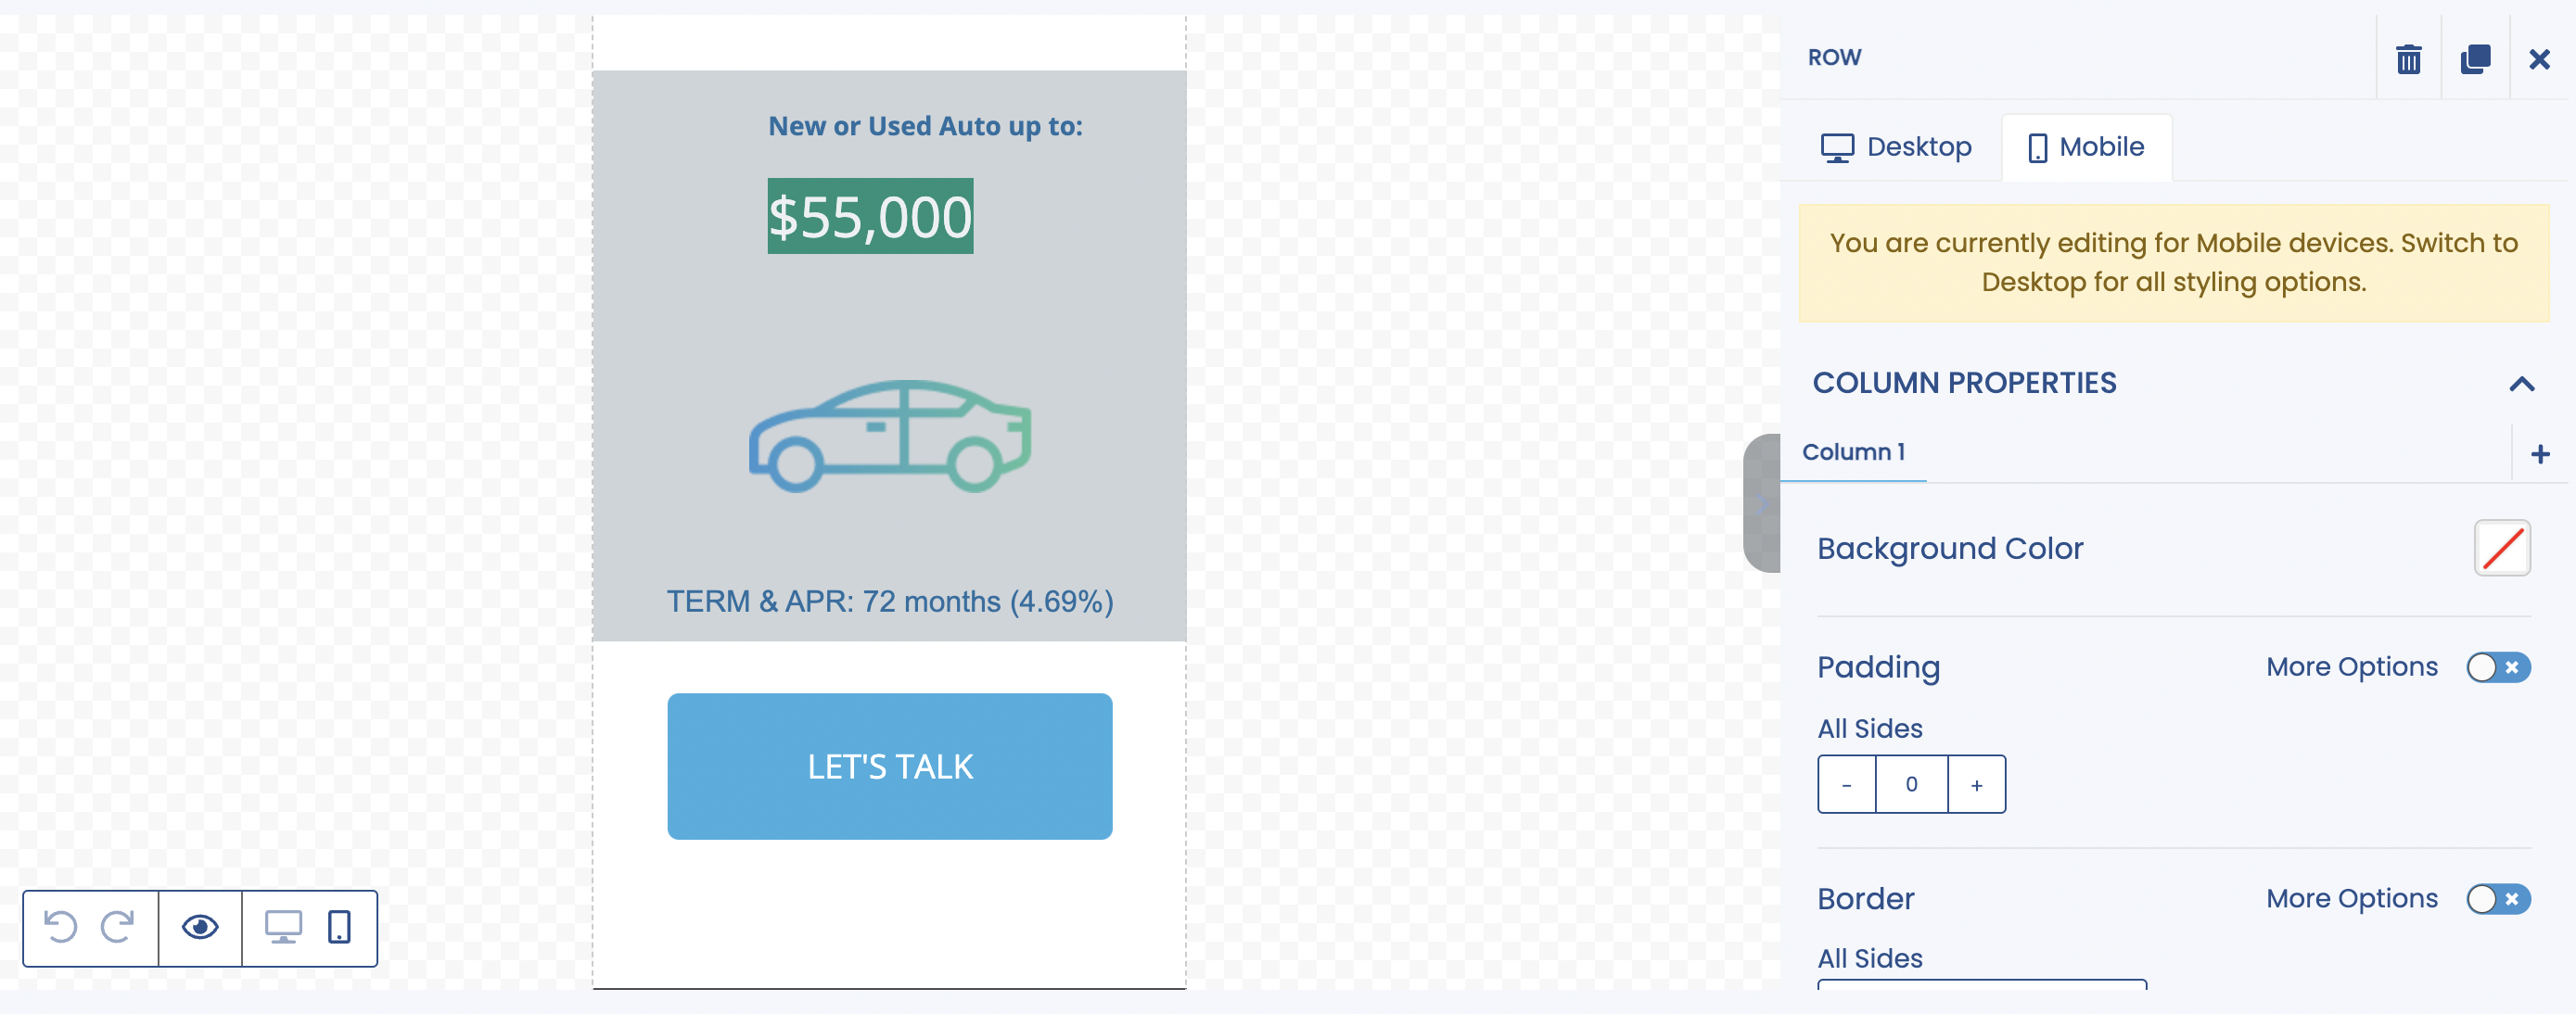
Email when viewed from a mobile
4. Select Targeting
The target page allows you to choose which groups of your users get your campaign. This is the audience for your email campaign and as much as possible it should be chosen based on the group of users that you believe will be most interested in this campaign based on their previous transaction history, current proximity to a physical location, and/or in-app actions that the users will take within your app.
In the Targeting section you can choose from the following parameters:
- Segments
- Beacons
- Geofences
- In-App Events
When you choose any of these parameters, they will be displayed on the left-hand side of the screen in the Targeting simulator with an estimate of how many users the campaign will be sent to.
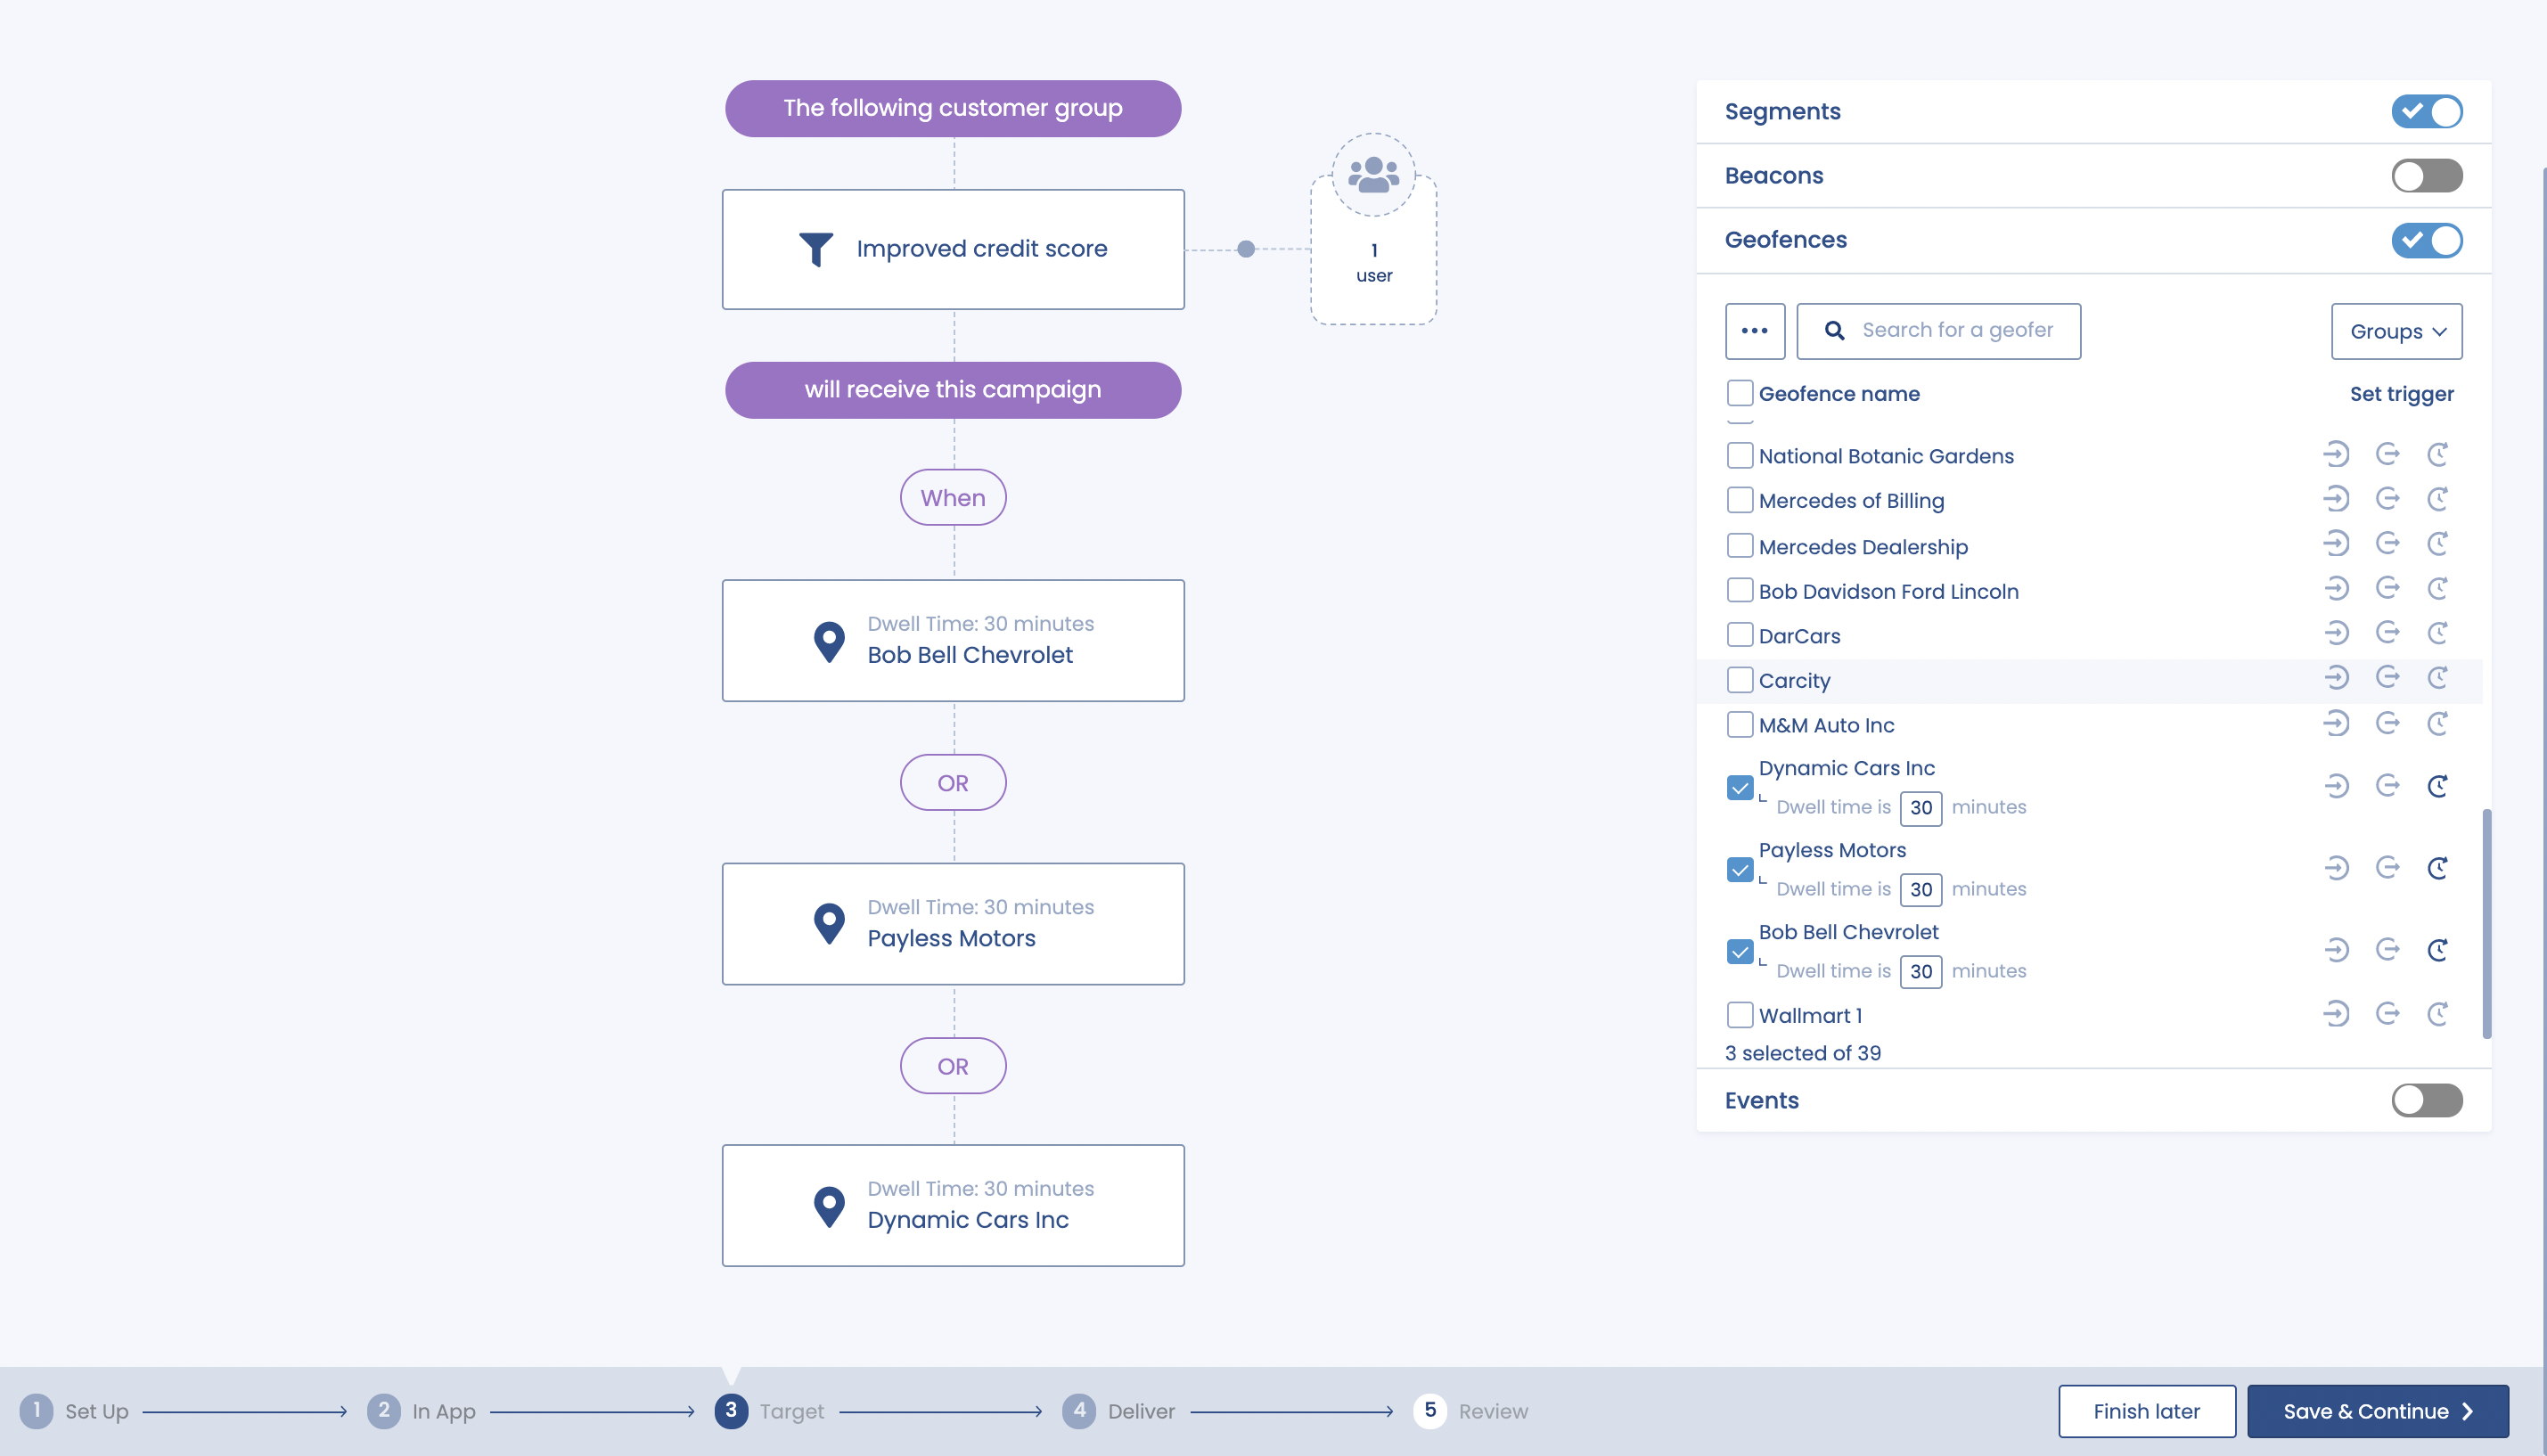
With Pulsate you can choose to target as many Segments, Beacons, Geofences and In App Events as you want. However, you should be trying to send each campaign to as well targeted a group of users as possible to ensure the highest open rates. You can send a campaign to multiple Segments of users and/ or send it to users who enter a Beacon, Geofence or carry out a specific in app action. Don't worry though, users will only receive the campaign once by default no matter how many of these parameters that they meet unless you specify otherwise whilst sending the campaign.
Pro Tip
Use the search functionality when you are looking for a Segment, Beacon, Geofence or In-App Event to quickly find the one that you are looking for.
You can also set up a Control Group in the Targeting section. For more information on Control Groups and how to set them up, please go here.
4. Select Delivery
Upon setting up the email campaign and choosing the groups of users who should receive it, the final step is to define when and how often users should receive your campaign. Different scheduling options are available depending on whether you have chosen to send a campaign to a Segment or chosen to send it to any combination of Segments, Beacons, Geofences, or In-App Events. The reason for the difference is that if you are sending a campaign to only a segment, you may want to just send the campaign to users already in the segment.
However, if you decide to send the campaign to users who enter or exit a beacon or geofence region or carry out an In-App Event (and possibly are also in a segment), you are relying on those users being in that location or carrying out that event in the future so you cannot just send it to users already in that segment.
Segment Only Campaigns
As mentioned above, if you send a campaign exclusively with a segment you will be given a choice whether to send the campaign only to users who are already in the segment or users in the segment combined with users who may enter the segment at some point in the future whilst the campaign is live.
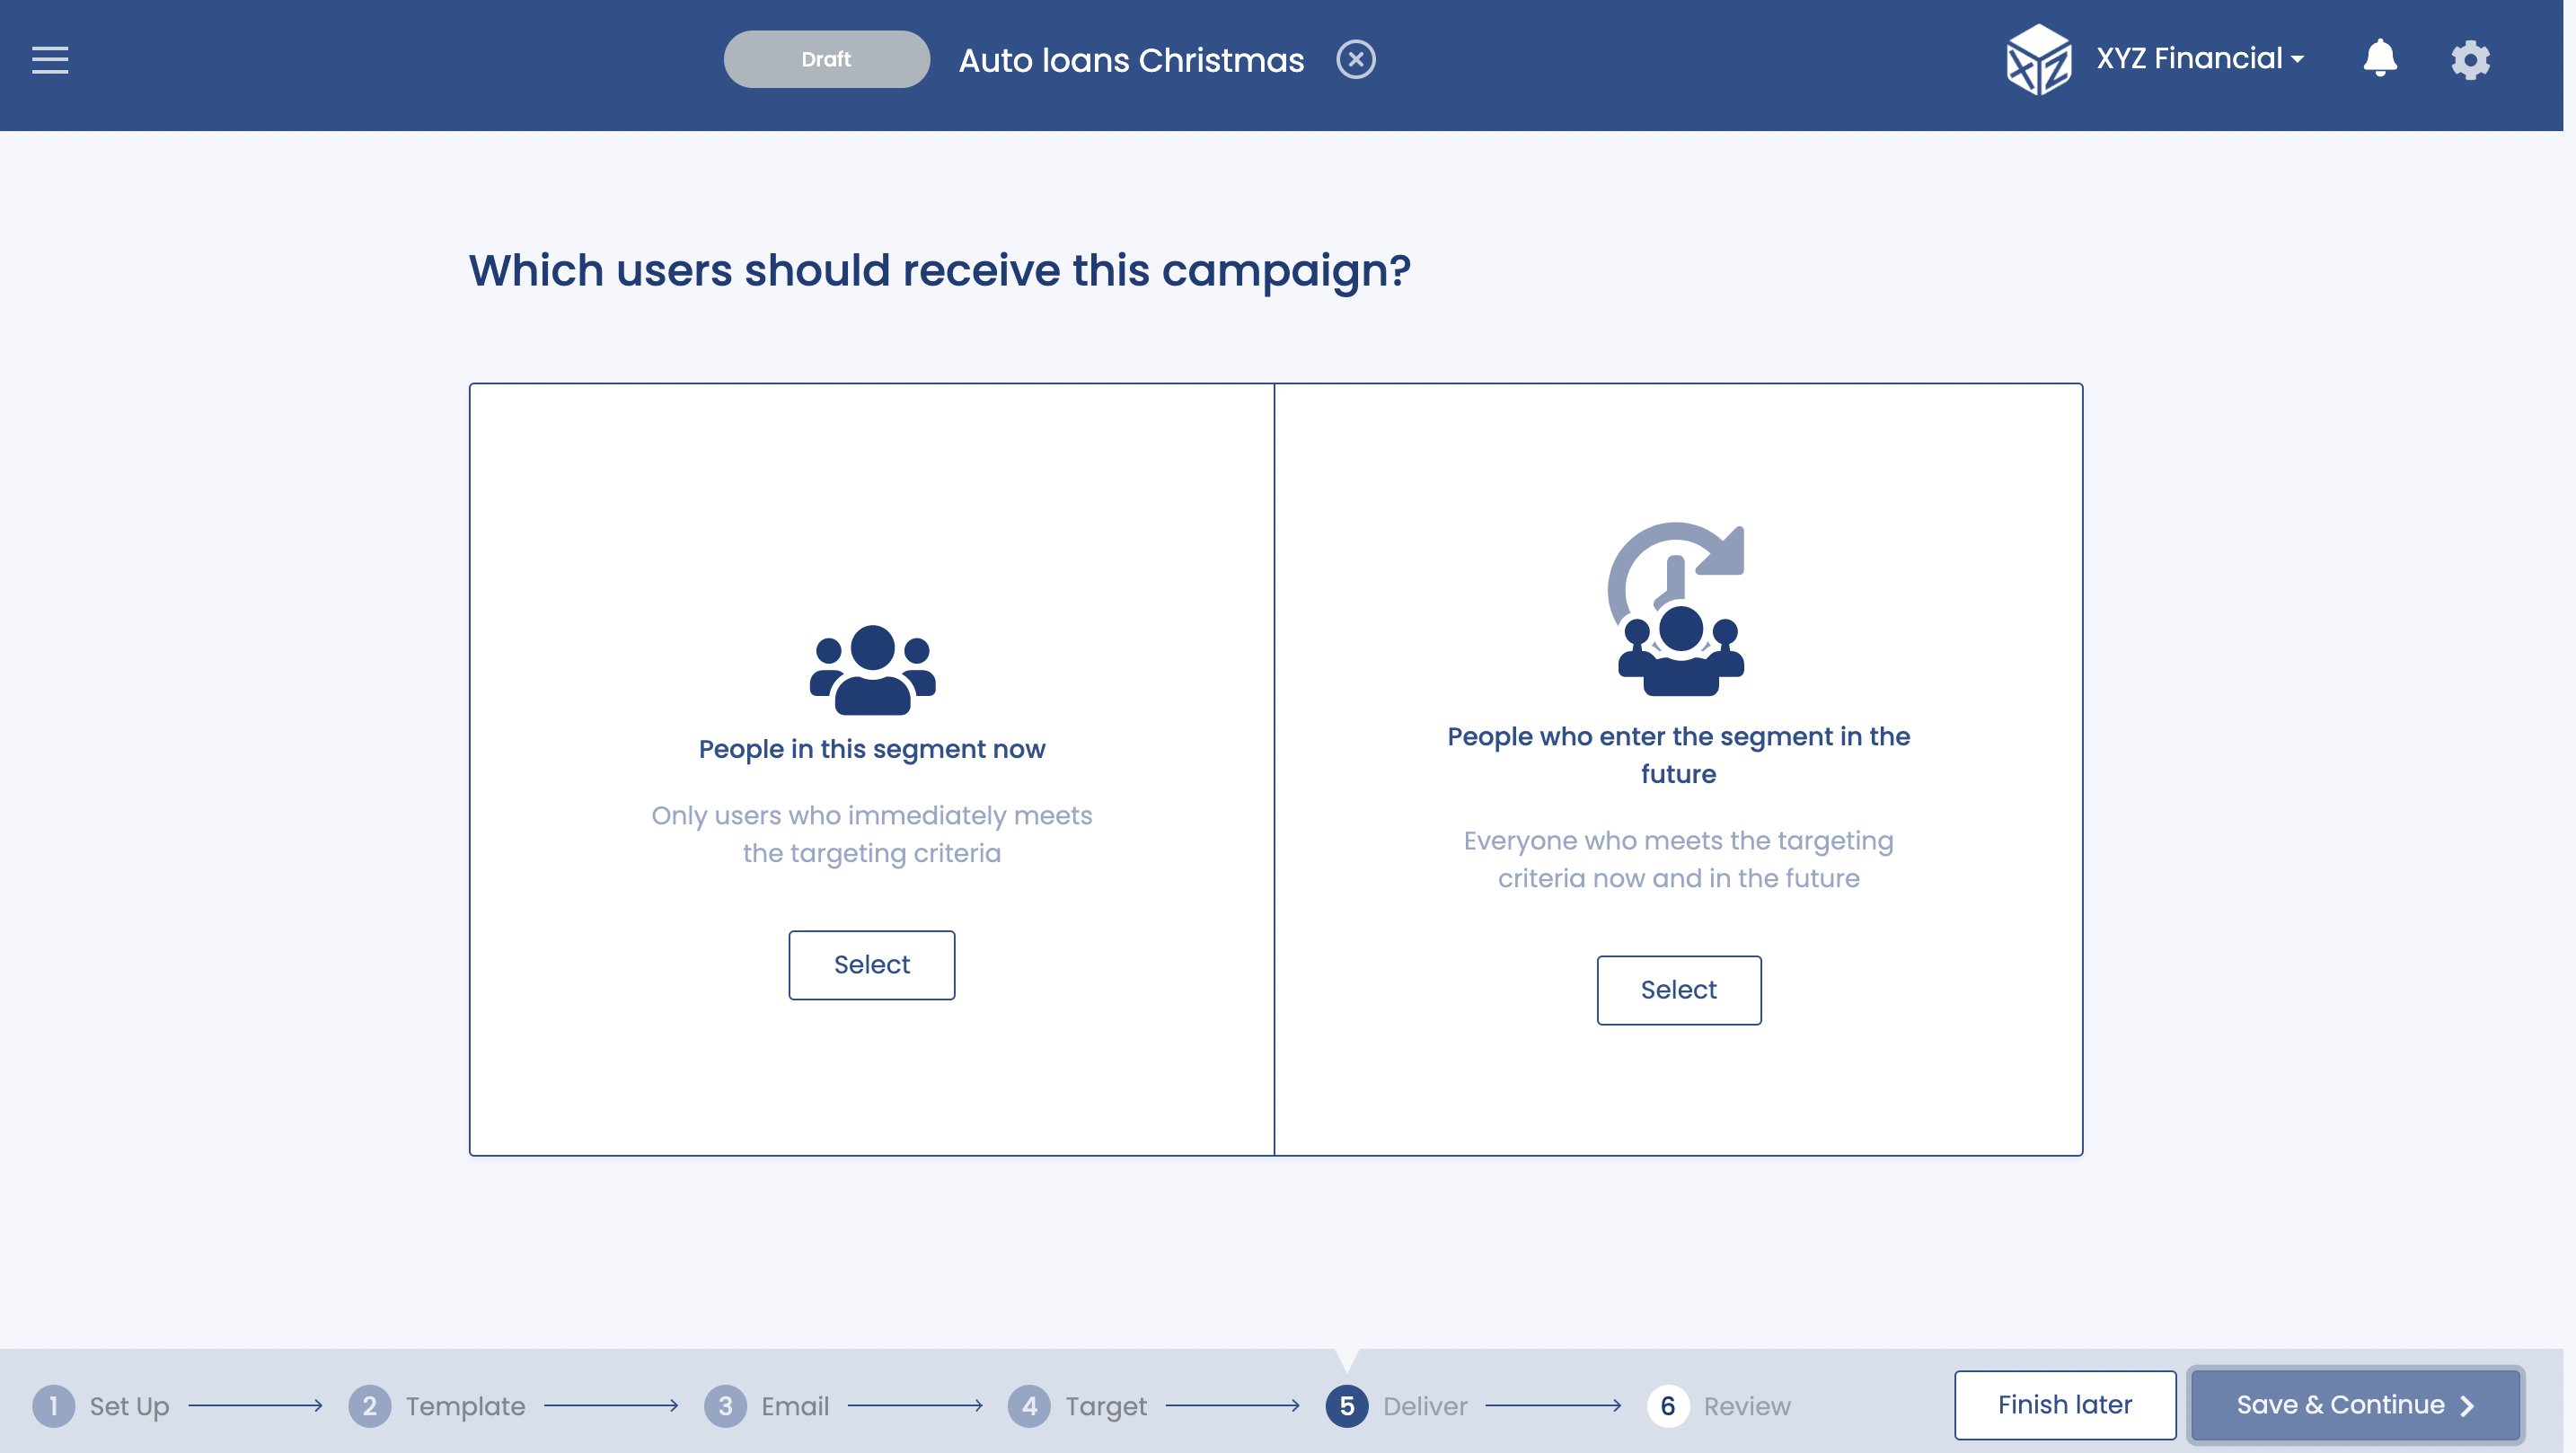
People in the segment now
If you choose to send the campaign to only users who are currently in the segment, it will be sent to every user that is in the segment when the campaign is sent and the campaign will then end. However you can still choose whether the campaign should be sent now or at some point in the future.
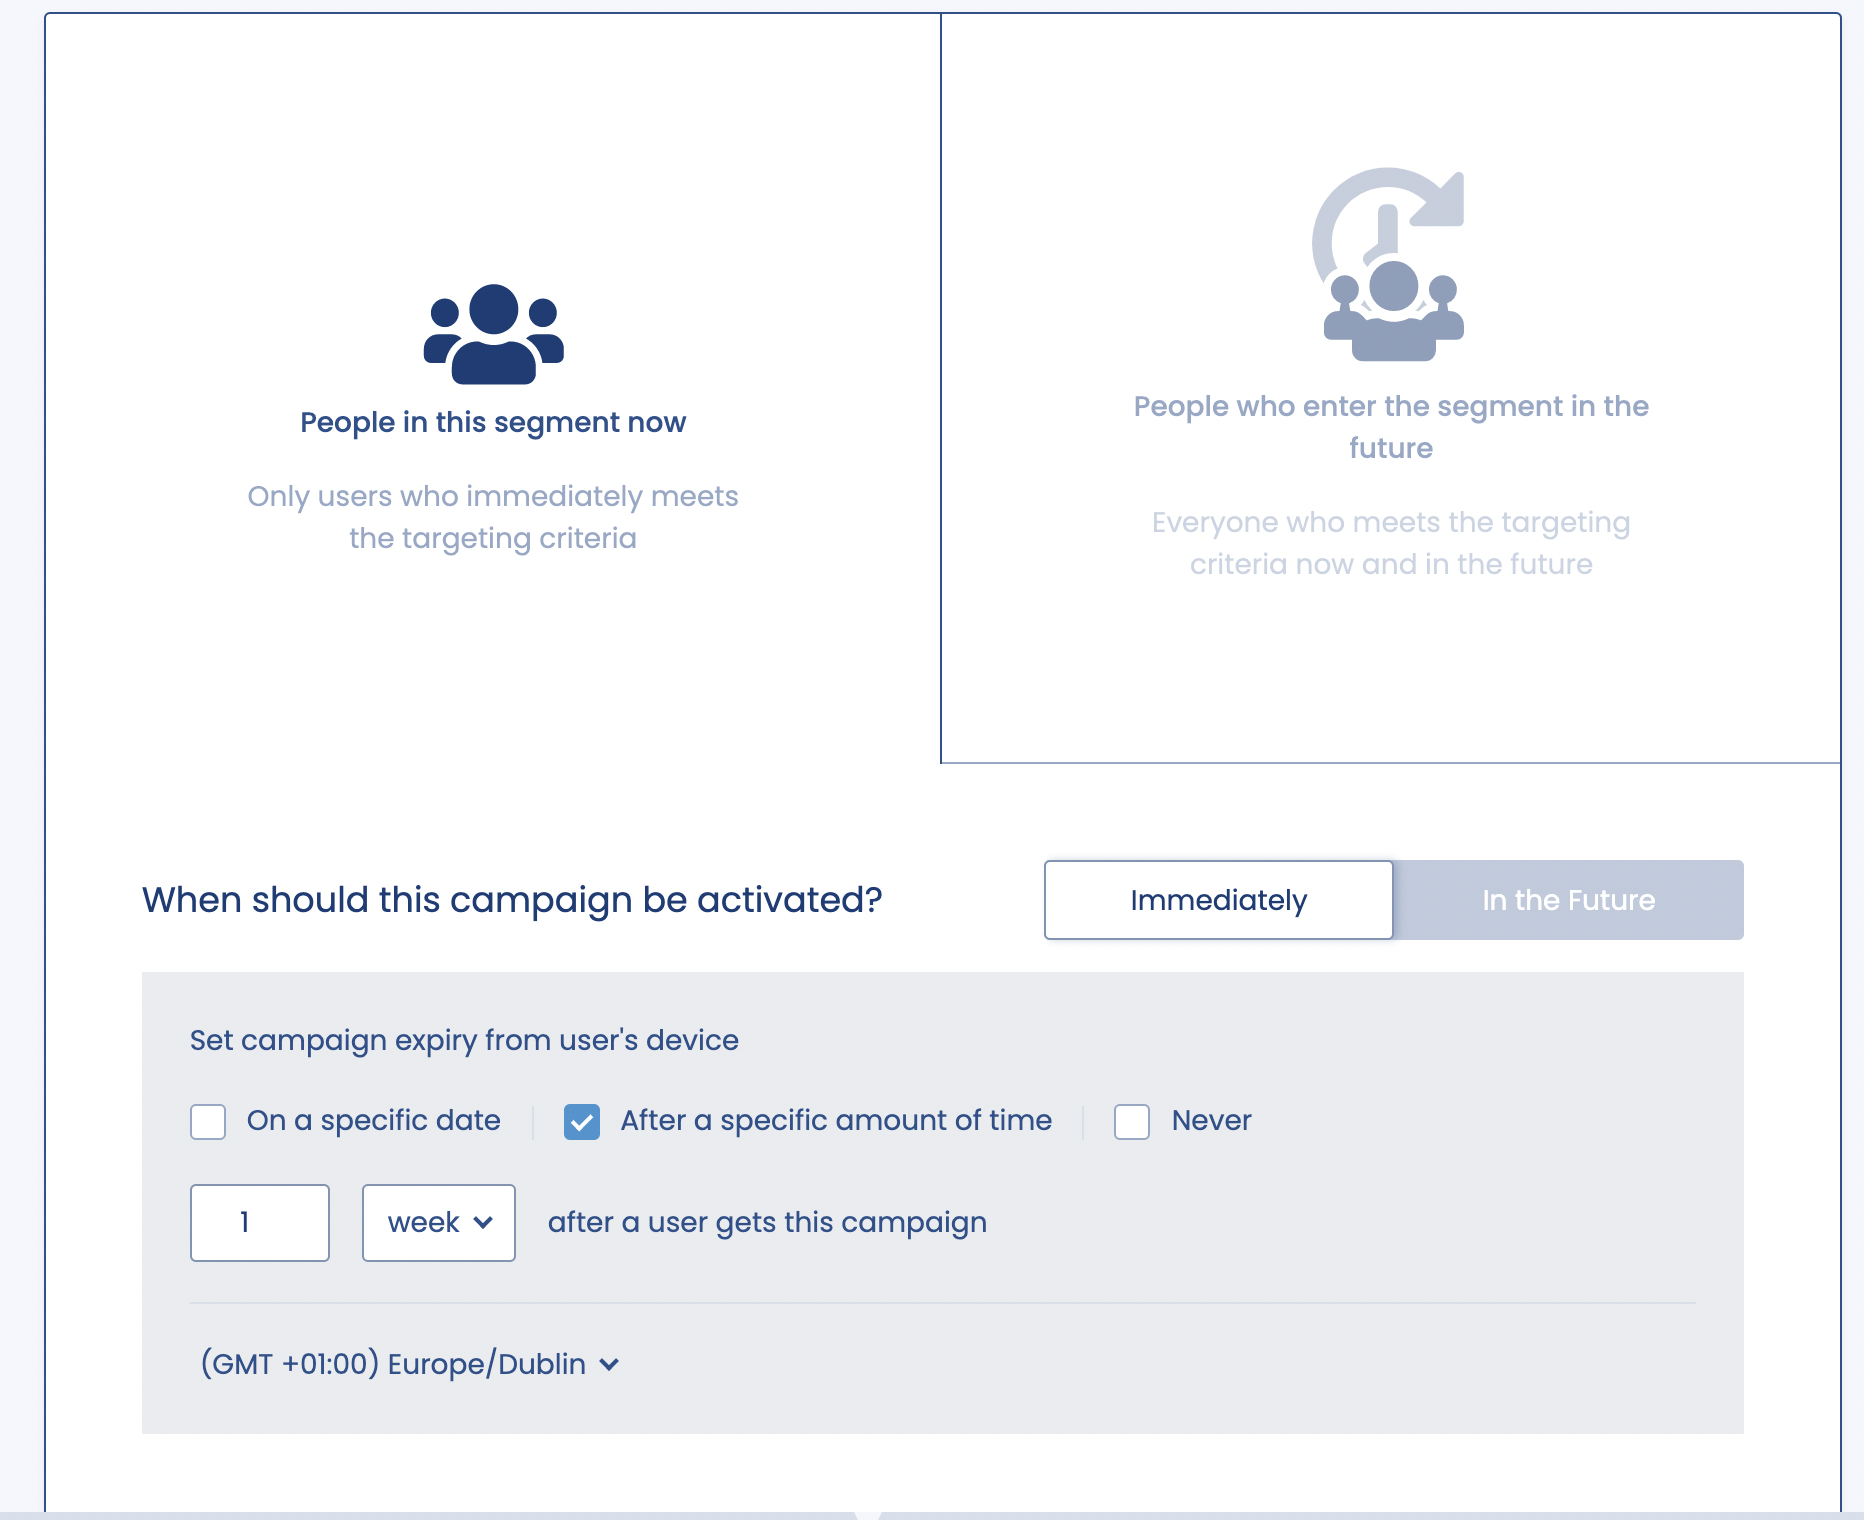
There is no option for an end date when you are sending a campaign to People in the segment now because the campaign will be ended as soon as it is sent to all users in that segment.
People who enter the segment in the future
There are a number of different options if you want to send a campaign to users who enter the segment in the future too.
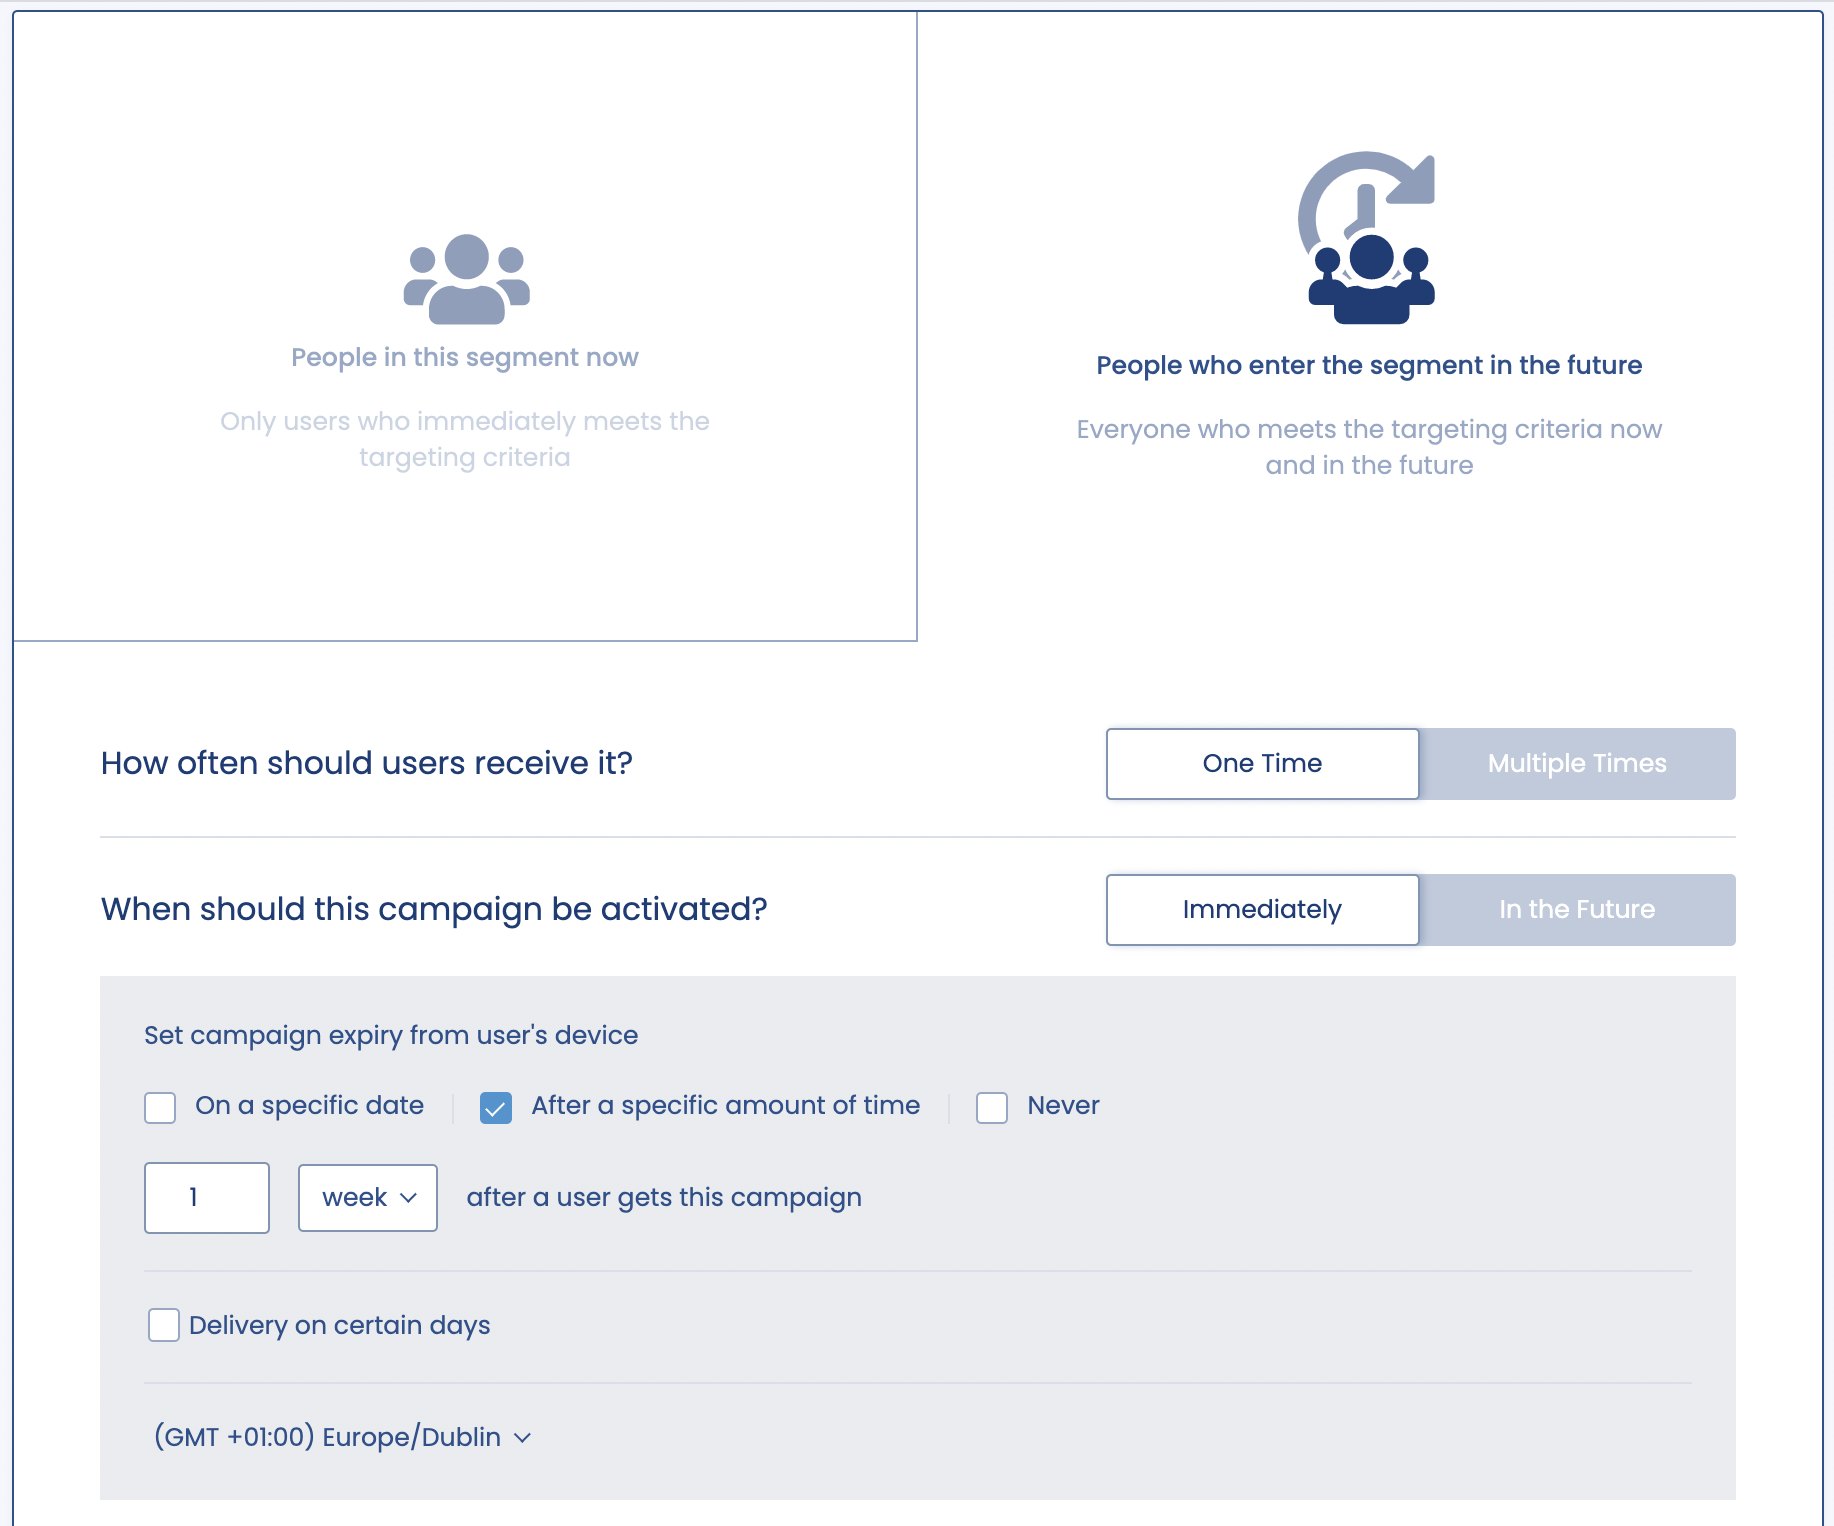
The first choice to be made is whether this campaign is send to each user once or multiple times if they remain eligible for it. Choosing One Time is useful would be useful if you were sending a campaign that every user in that segment should get but only once. An example might be a Welcome Campaign which you would like to send every user once they enter the segment but you only want to send it once even if the user leaves and re-enters the segment at some point in the future.
Conversely, you may want to send other campaigns multiple times to a user. An example might be a receipt for purchases the user makes, you may want to send that campaign to users every time they make a purchase and are added to that segment. If you choose to send a campaign Multiple Times, you can set Campaign Limits to ensure that users do not get overloaded by campaigns. Campaign Limits adds a delay between users receiving this campaign. For instance, if you set the campaign limit to five minutes, users will only receive this campaign once every five minutes even if they are eligible to receive it more often than that.
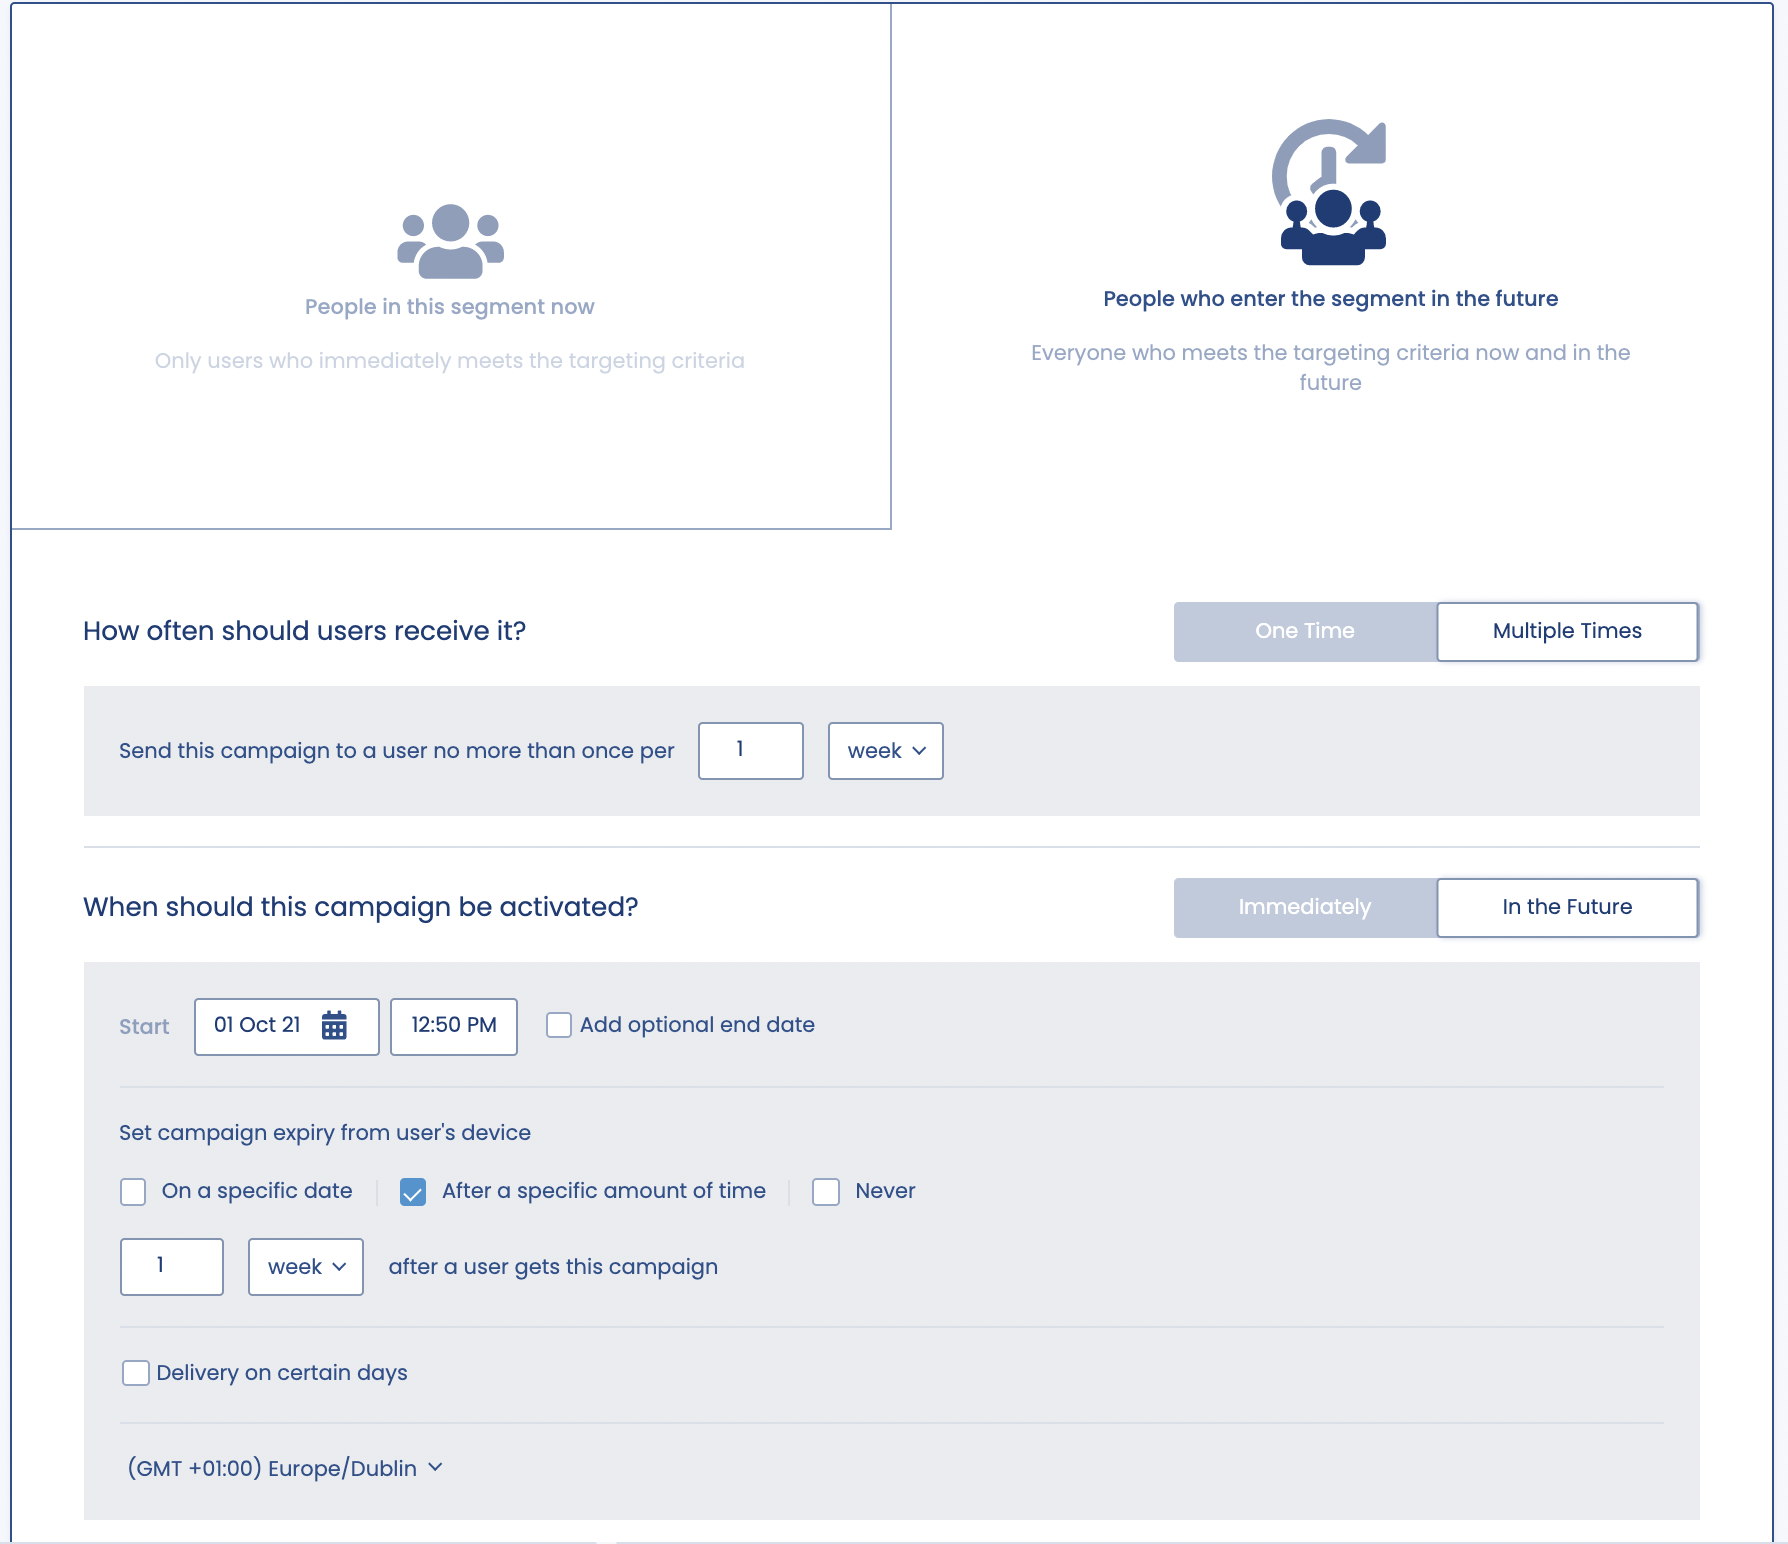
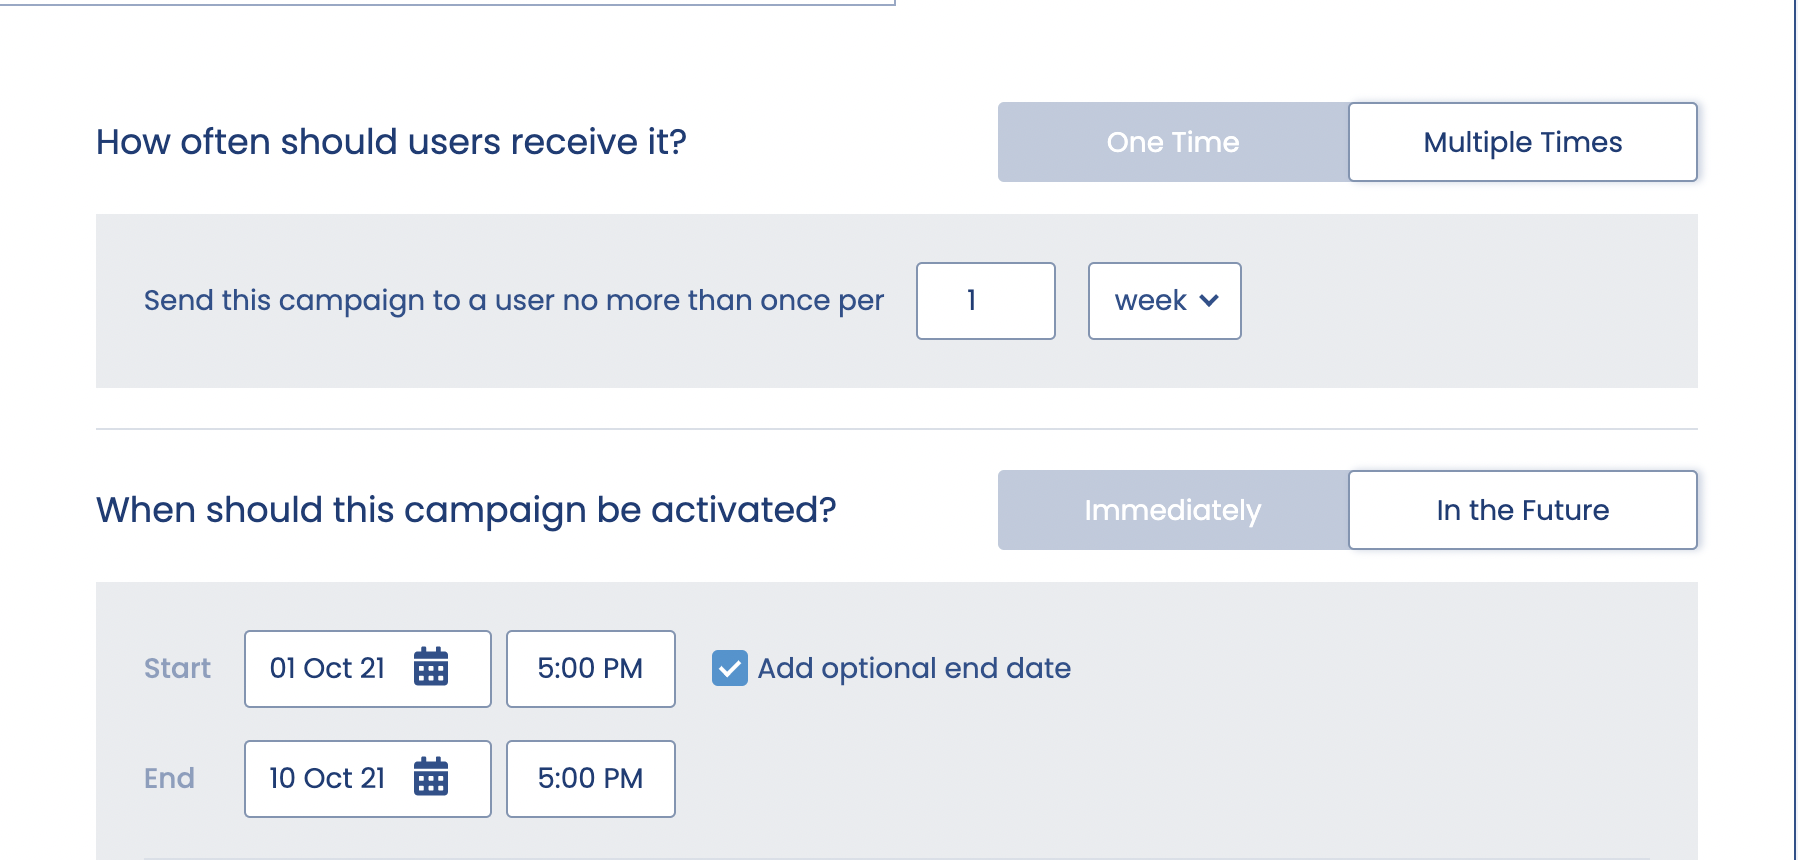
The final choice to make is to decide when the campaign should be scheduled. Choose Activate Immediately to send the campaign immediately or choose Schedule for the future to send the campaign at some point in the future. You can also choose here when the campaign should stop sending or whether it should continue until it is manually stopped. You can also choose to send your campaign in another timezone if you wish.
Pro Tip
If you would like to set your campaign to be delivered on certain times on specific days of the week, click Advanced Options and you can specify that by clicking the Deliver on certain days checkbox.
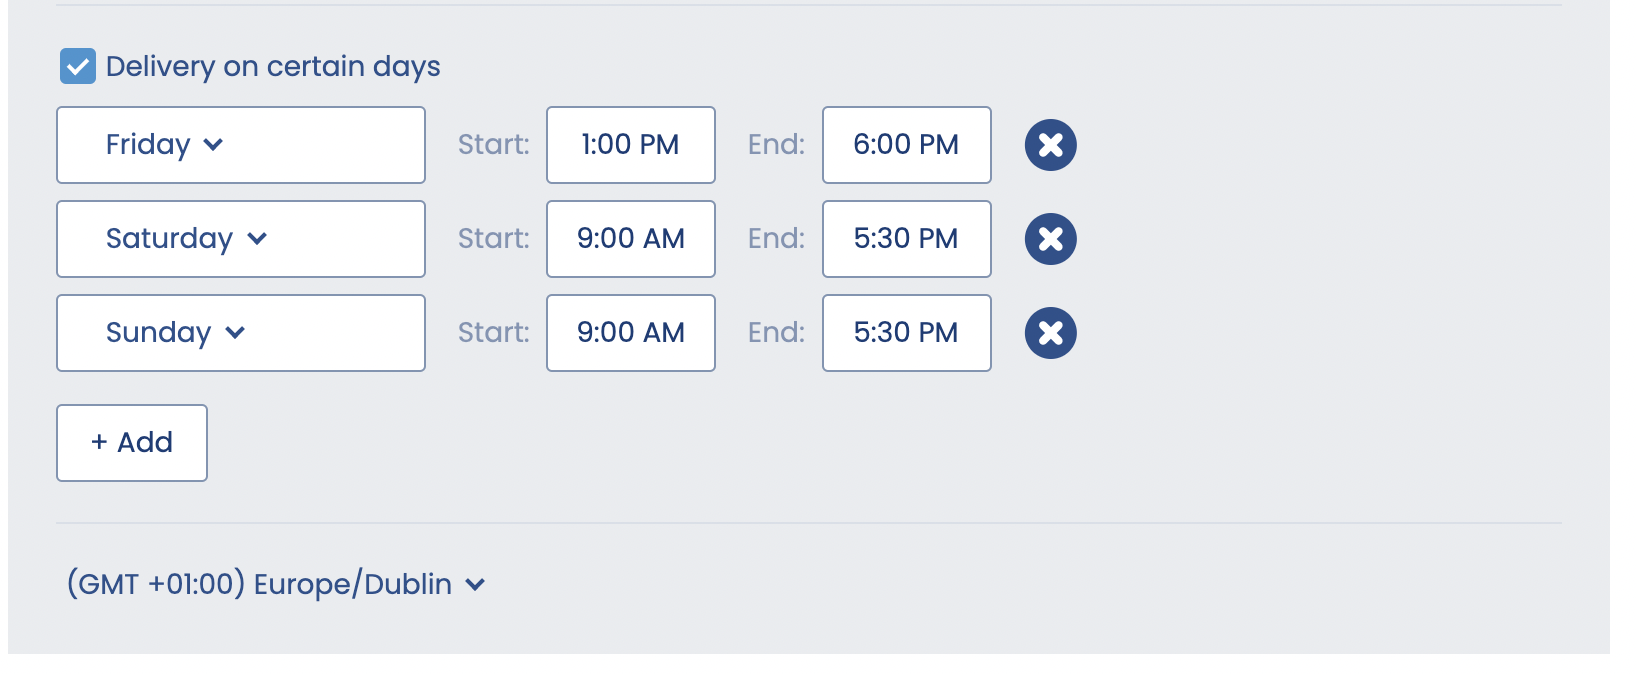
Delivery for Other Campaigns
If you wish to send a campaign based on the user entering or exiting a beacon or geofence or carrying out an in app event in your app and/ or combining those targeting types with a segment, you have slightly different targeting options. As users will be carrying out these actions in the future, you can only target people who will receive the campaign in the future.
The first choice to be made is whether this campaign is send to each user once or multiple times if they remain eligible for it. Choosing One Time is useful would be useful if you were sending a campaign that every user in that segment should get but only once. An example might be a Welcome Campaign which you would like to send every user once they enter a physical location but you only want to send it once even if the user leaves and re-enters the beacon or geofence region at some point in the future.
Conversely, you may want to send other campaigns multiple times to a user. An example might be a receipt for purchases the user makes, you may want to send that campaign to users every time they make a purchase and are added to that segment.
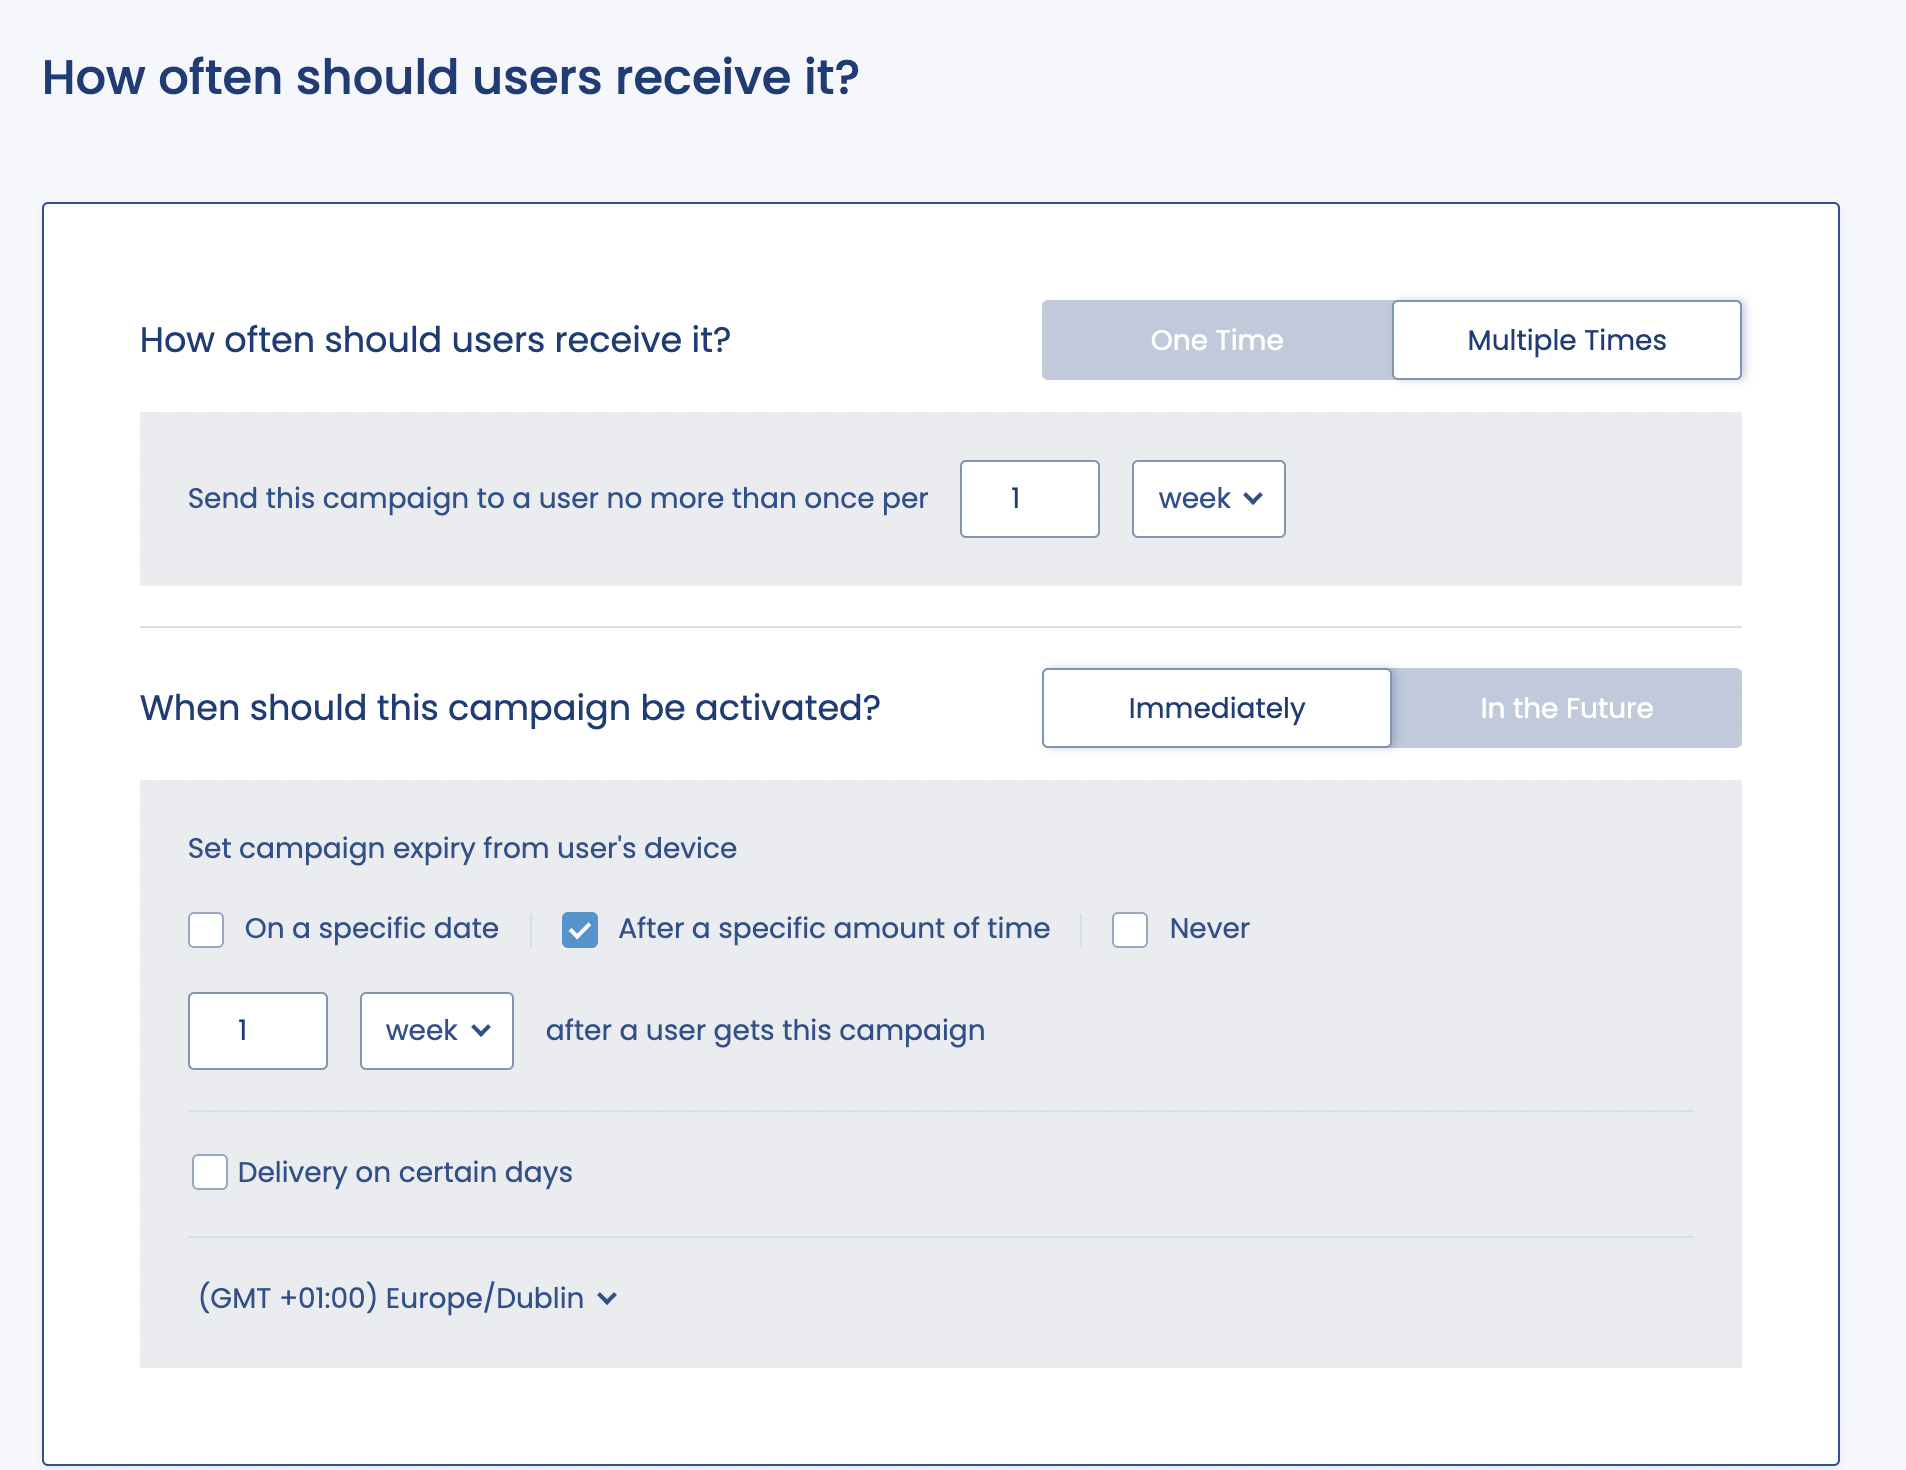
If you choose to send a campaign Multiple Times, you can set Campaign Limits to ensure that users do not get overloaded by campaigns. Campaign Limits adds a delay between users receiving this campaign. For instance, if you set the campaign limit to five minutes, users will only receive this campaign once every five minutes even if they are eligible to receive it more often than that.
The final choice to make is to decide when the campaign should be sent now or scheduled for some point in the future. Choose Activate Immediately to send the campaign immediately or choose Schedule for the future to send the campaign at some point in the future. You can also choose here when the campaign should stop sending or whether it should continue until it is manually stopped. You can also choose to send your campaign in another timezone if you wish.

Be Careful
Please ensure that you add an end date if you want this card to be removed from the feed at some point in the future. It will not be possible to change this after the campaign is sent.
Pro Tip
If you would like to set your campaign to be delivered on certain times on specific days of the week, click Advanced Options and you can specify that by clicking the Deliver on certain days checkbox.
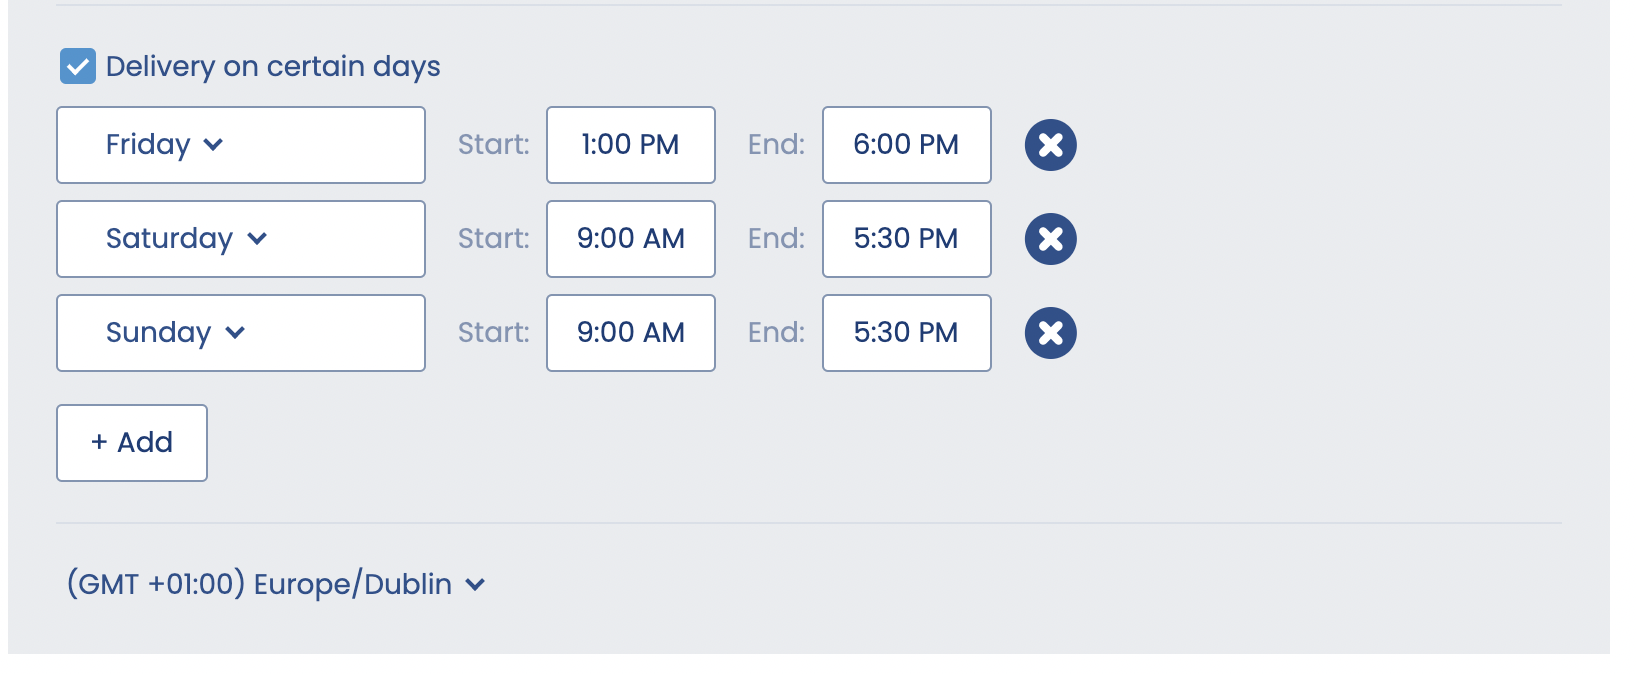
Pro Tip
The Set campaign expiry from user's device functionality allows you to configure the duration up to which a campaign remains in the user's feed. Three choices are available:
Never - The campaign will never expire from the user's device unless an optional scheduled end date is selected
On a specific date - The campaign would expire the user's feed on this day
After a specific amount of time - Custom time range after which the campaign would expire from the user's feed.

5. Review and activate the campaign
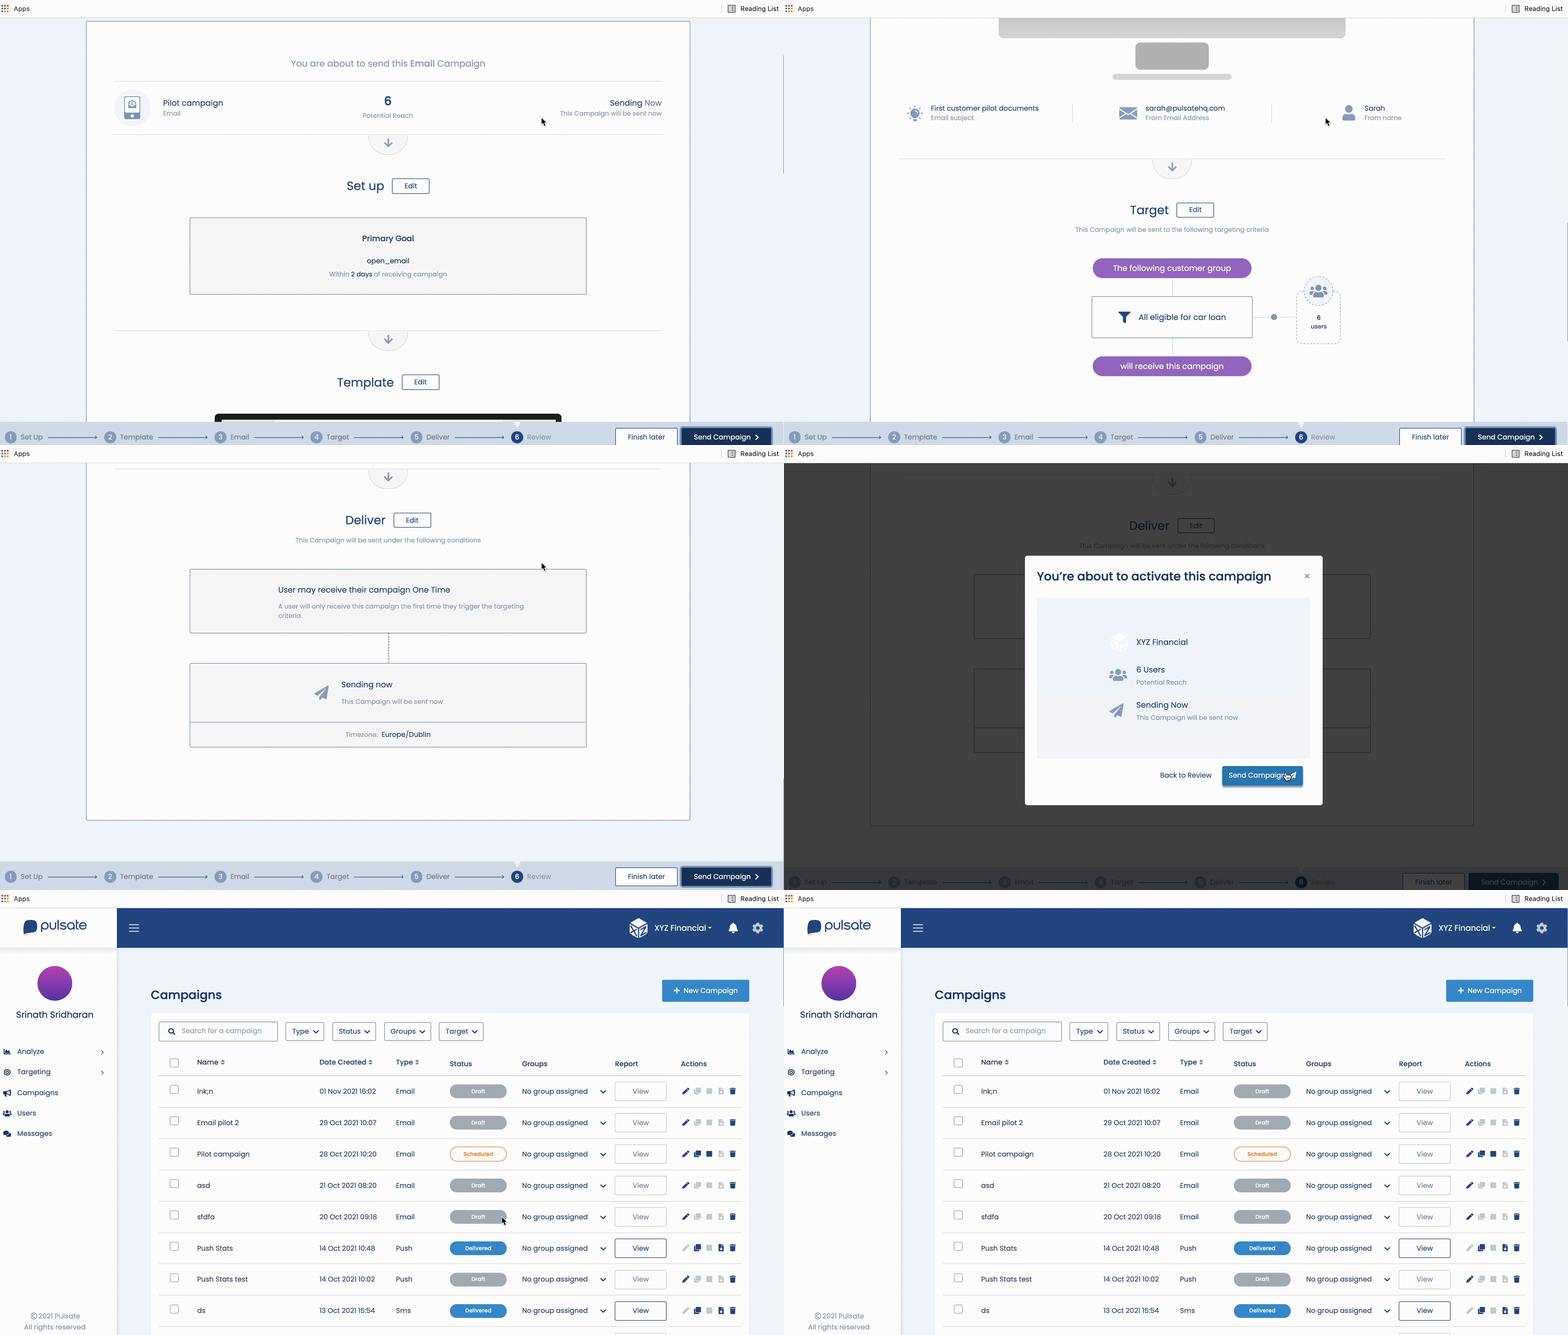
Congratulations, your campaign is almost ready to be sent. Before you send it, Pulsate enables you to review everything that you have set up one last time so that you can make sure that everything is perfect.
The first thing you will notice on the Review page is the key parameters for this campaign which are email subject, the estimated reach of the campaign, and when the campaign will be triggered.
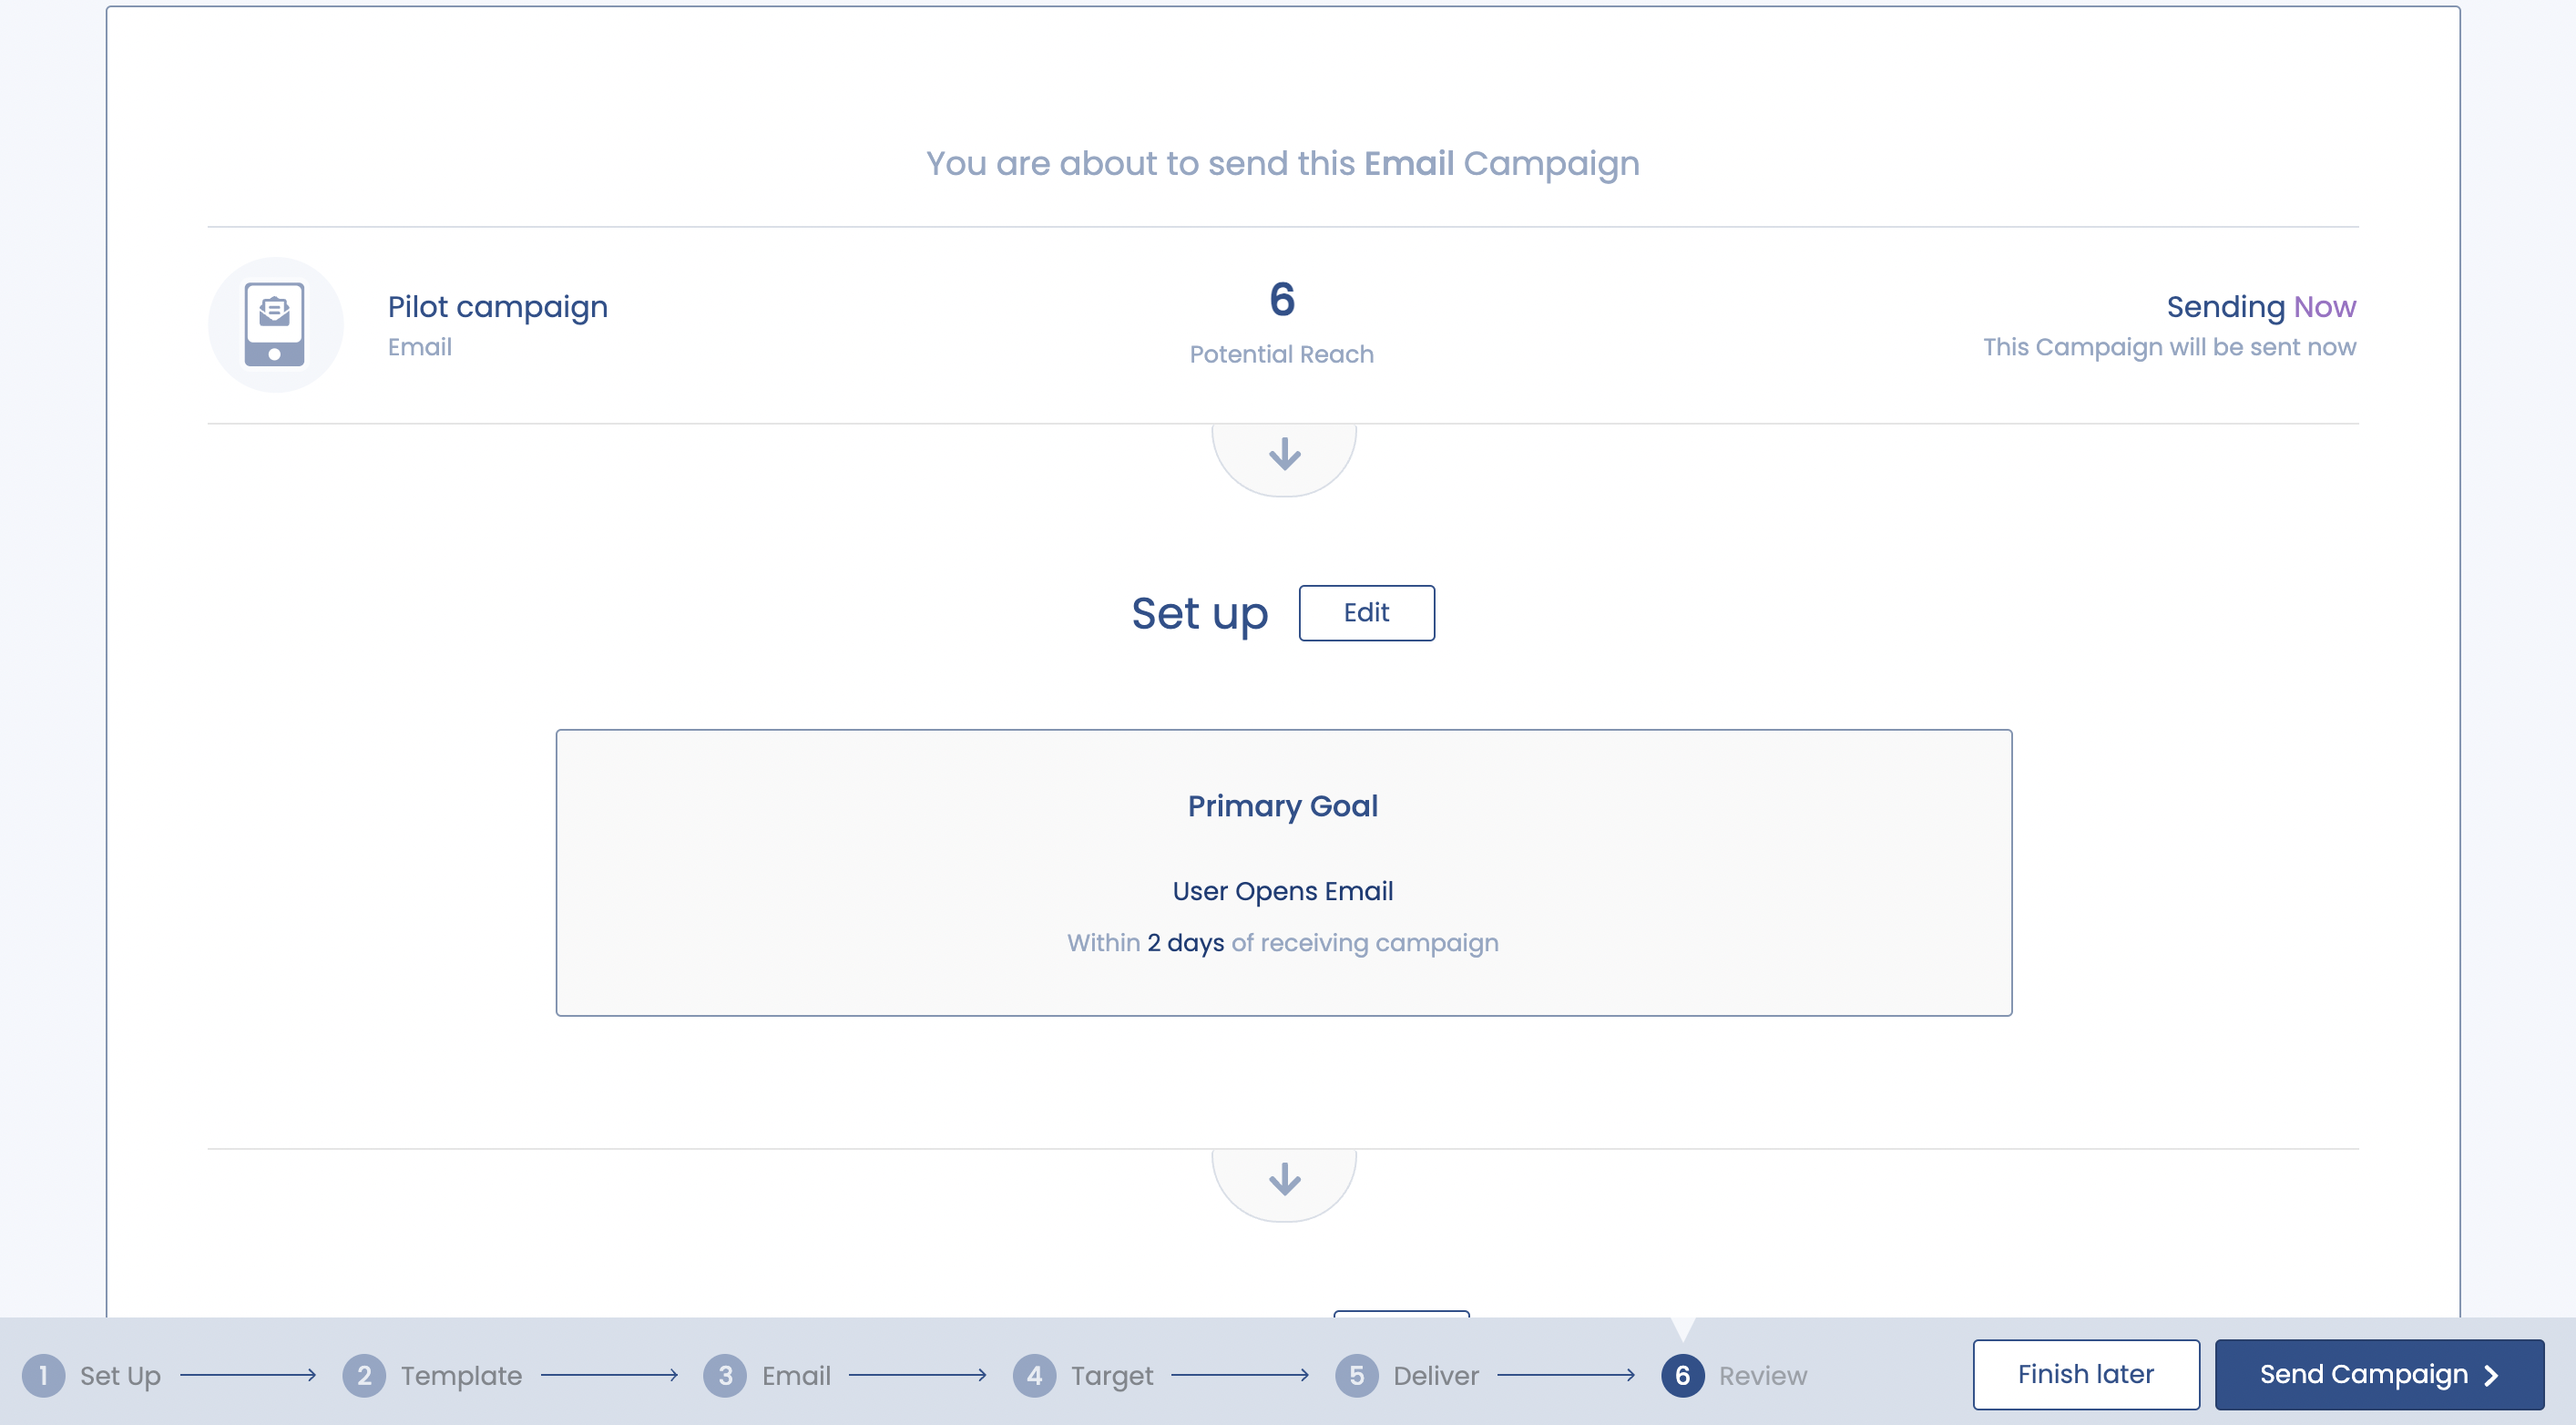
As you scroll down through the rest of the review page, you will be able to check the other details that you have set for that campaign including the Email Subject, Targeting, and Delivery Options. If you see anything that you would like to change, you can quickly jump to that section by clicking on the Edit button corresponding to that section.
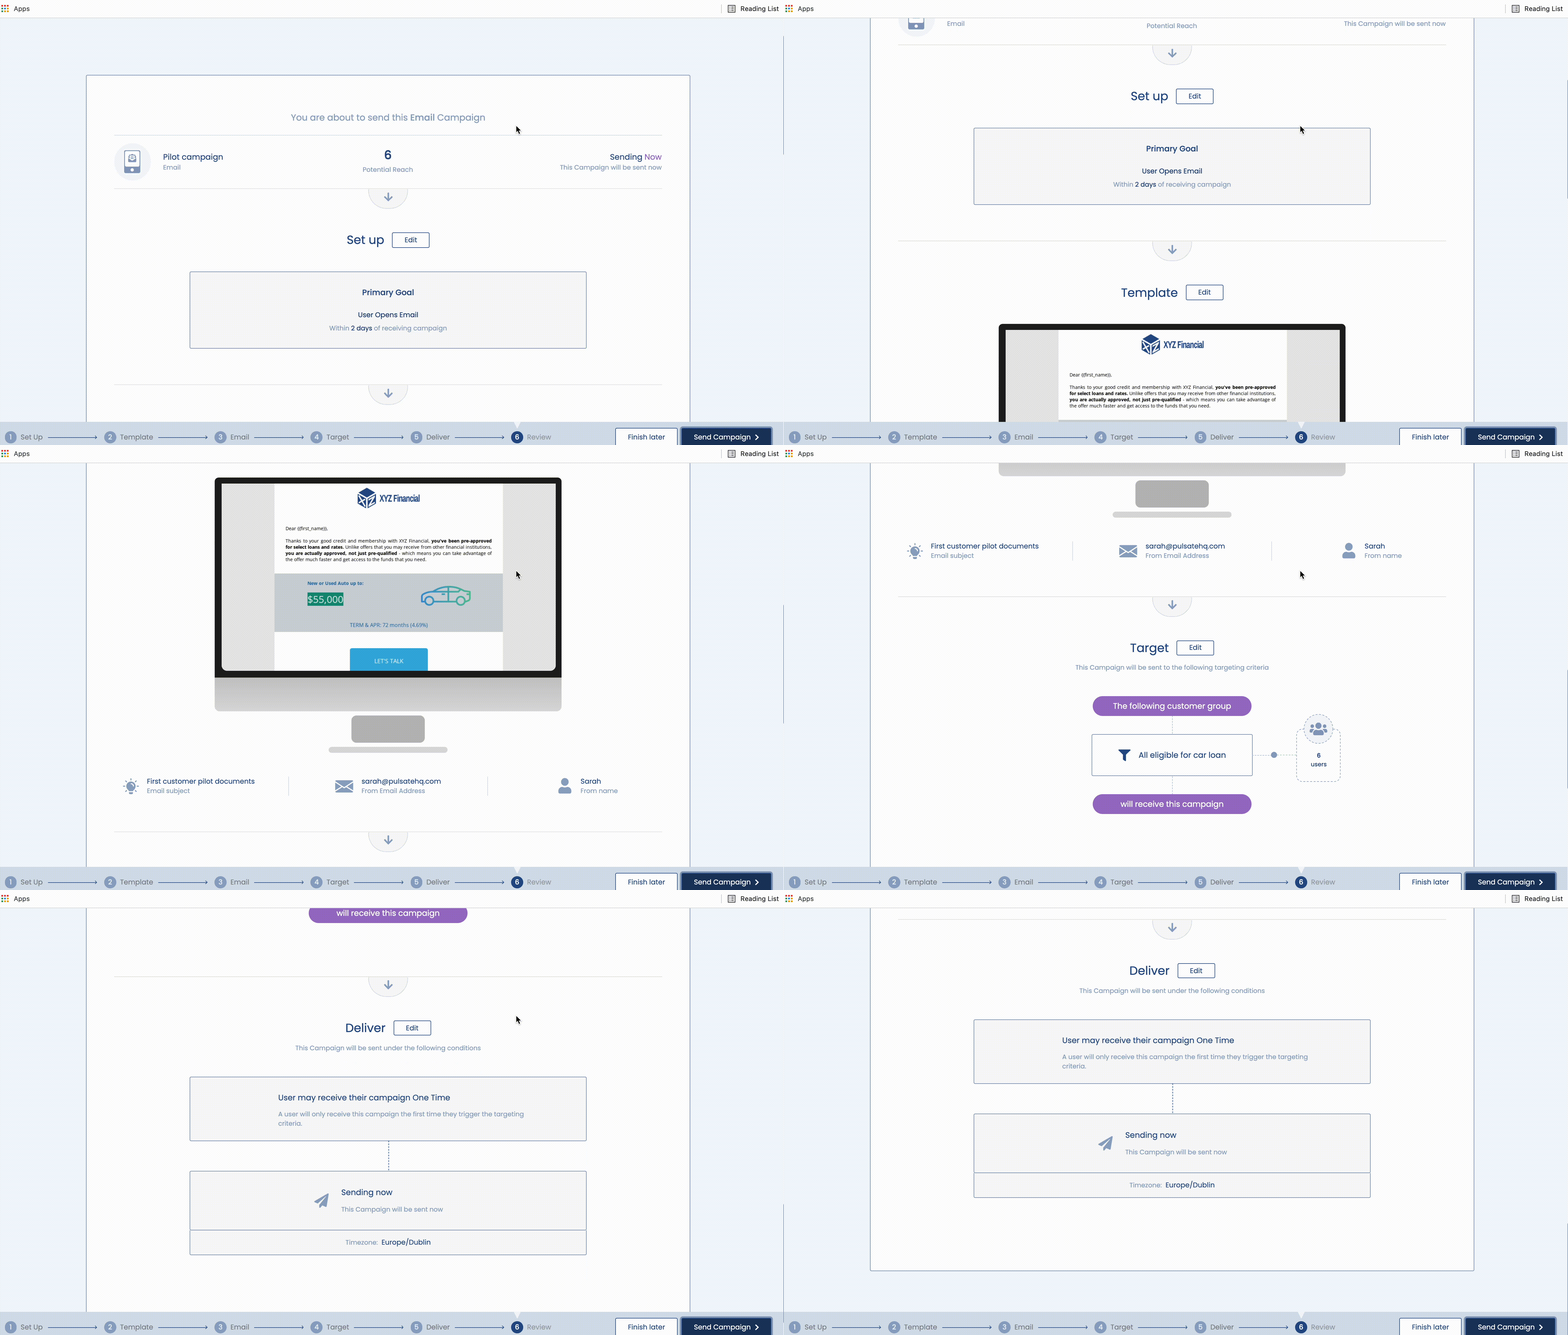
Once you are happy with all of the parameters that you have set for the campaign, you are ready to send it. To send the campaign press the Activate Campaign button at the bottom of the screen. You will be asked to confirm that you wish to send the campaign. If you are ready to send, press Activate Campaign and your campaign will be activated and sent when you have specified.
