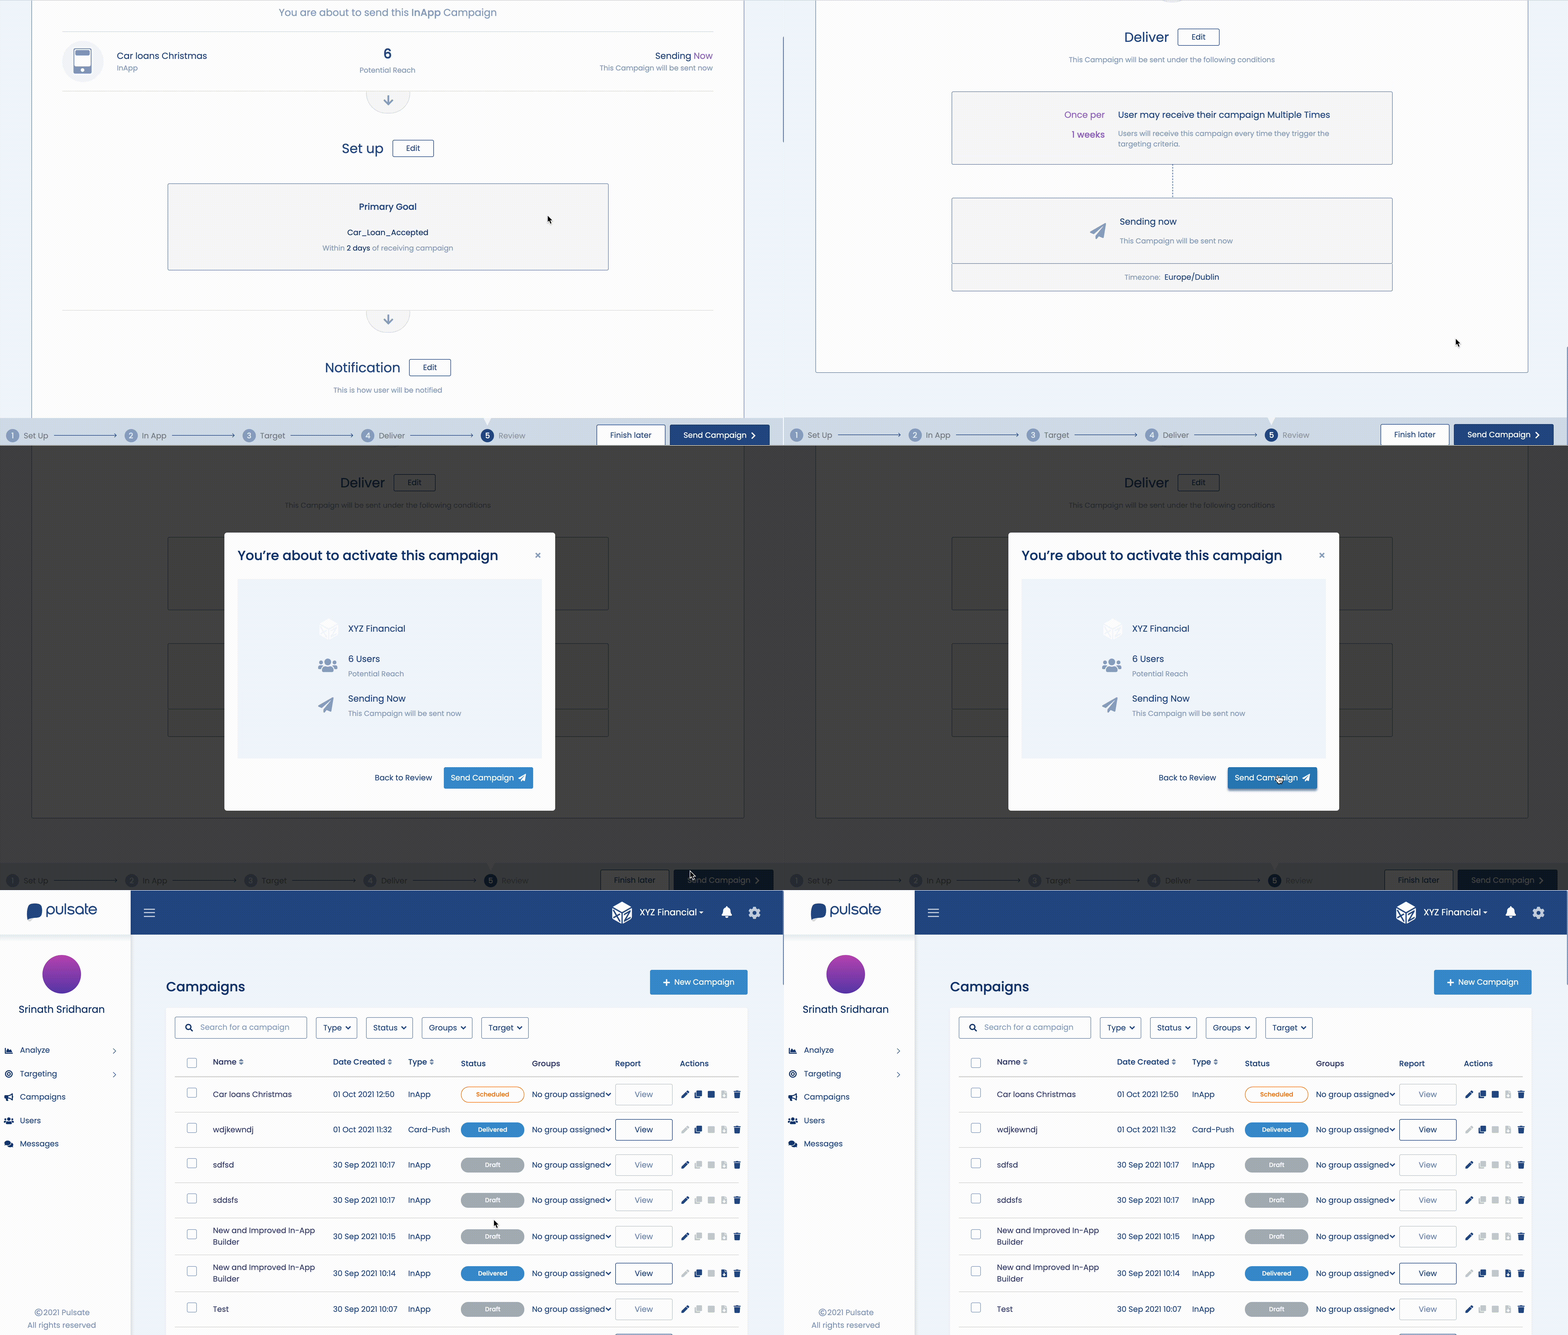
Guide how to set up an InApp notification campaign
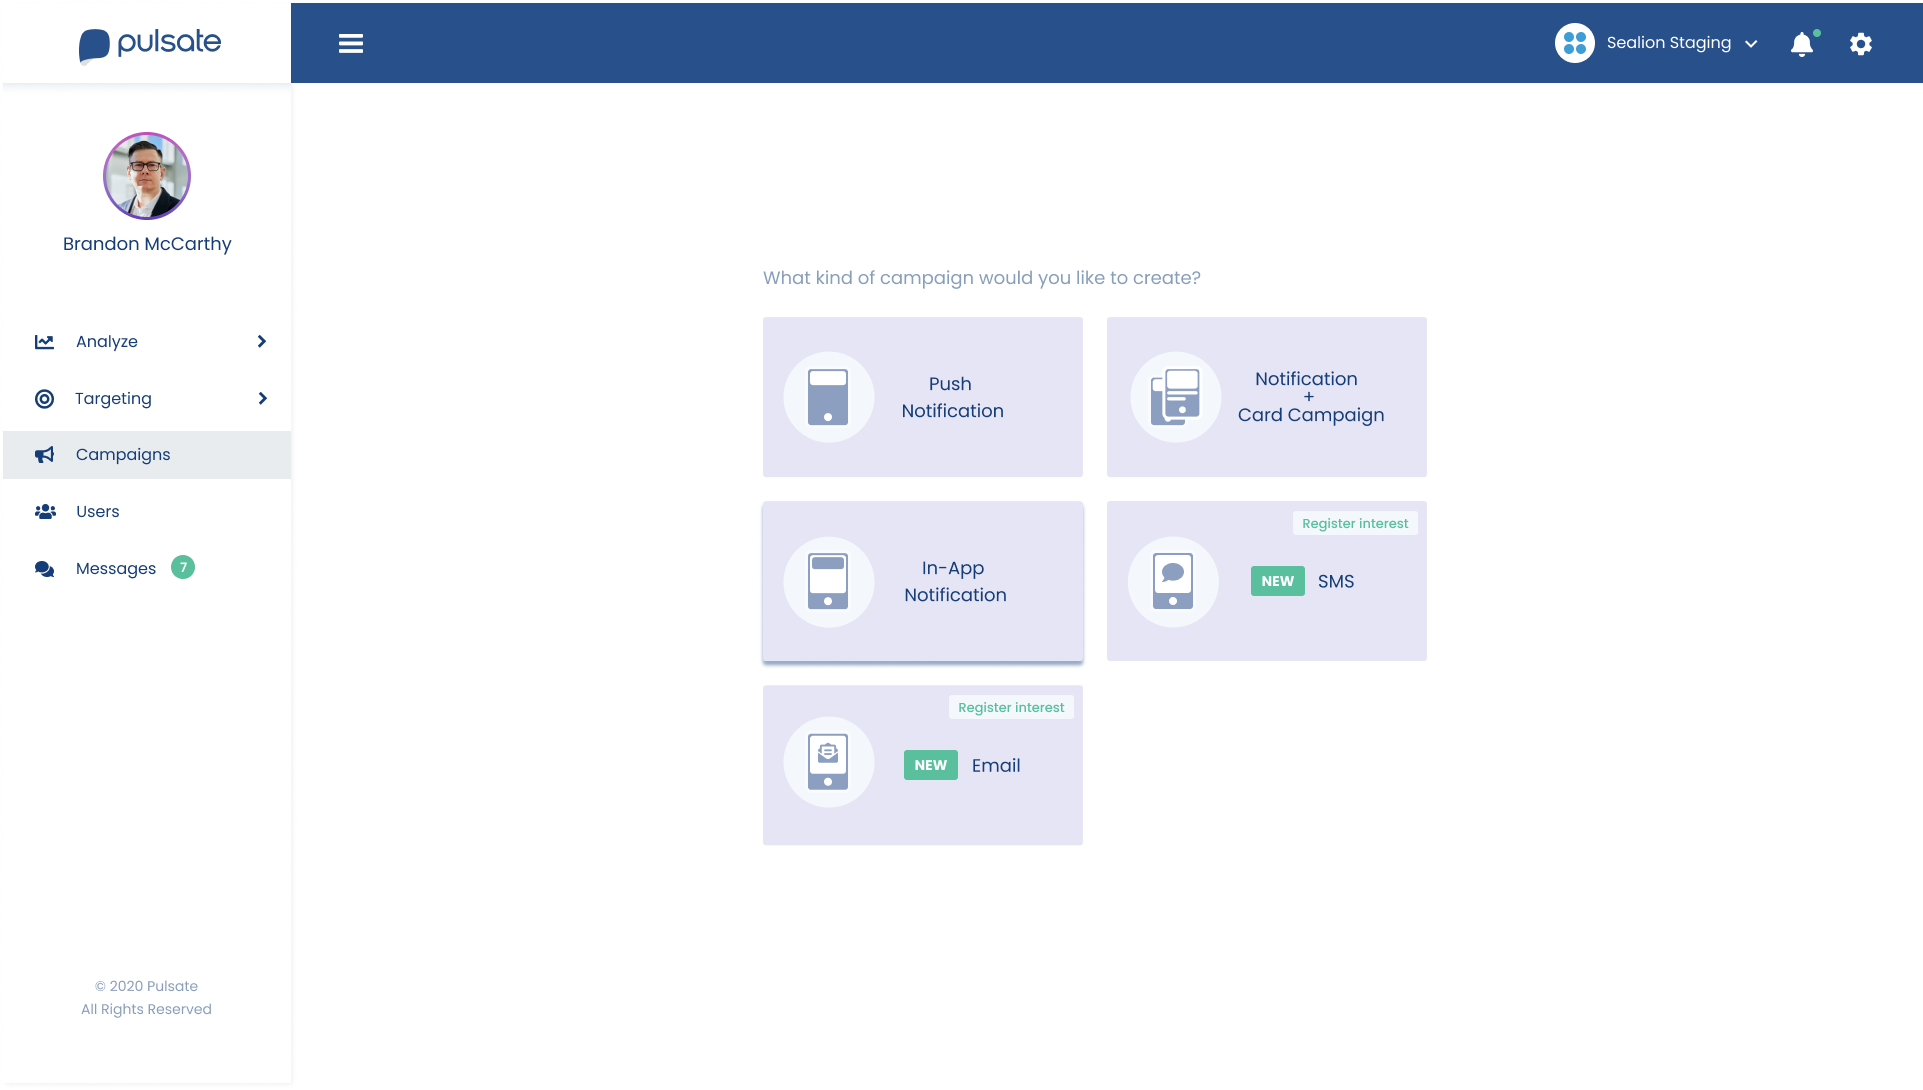
1. Select In-App Campaign Type
To send an In-App Notification campaign, click on New Campaign and choose In-App Notification from the grid containing different types of campaigns.
2. Choose In-App notification Size
When you have chosen the name, you will be presented with two choices:
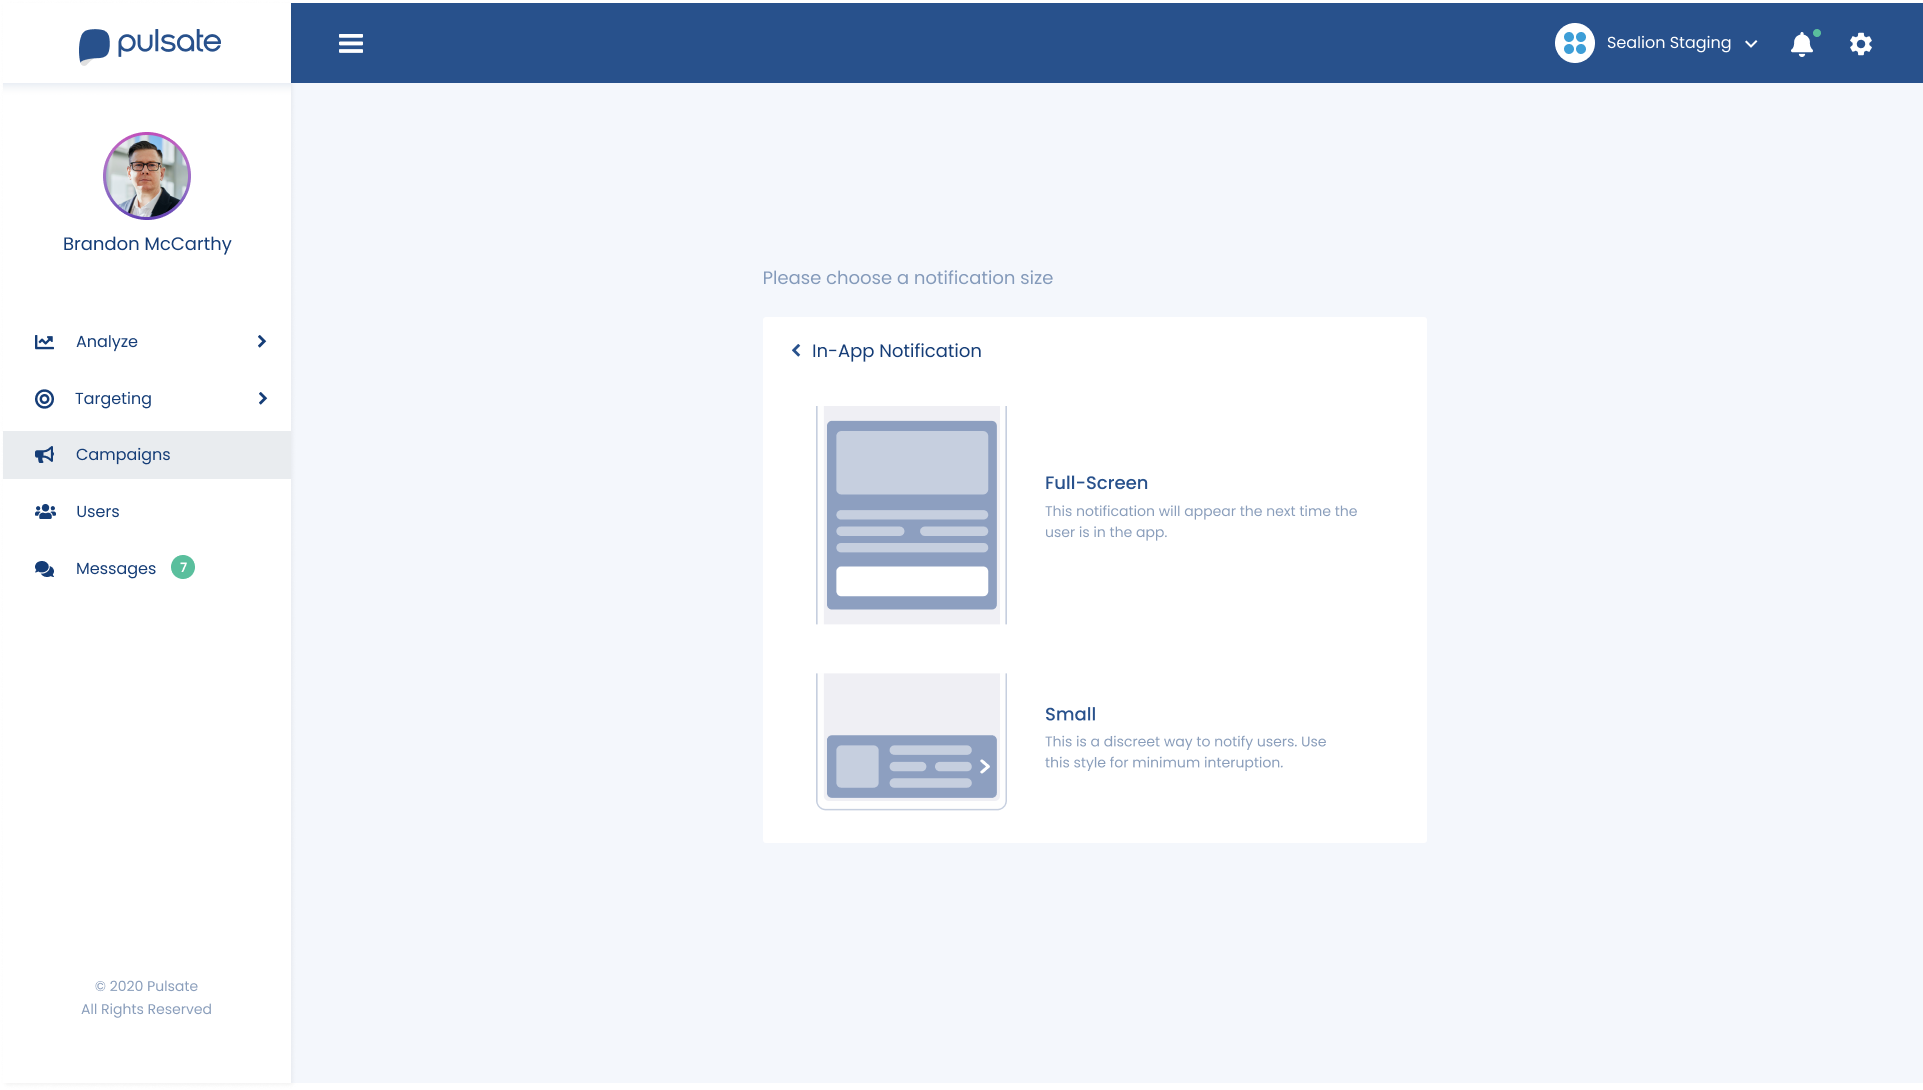
The choice that you make here will be dependant on what type of campaign that you wish to send. Small In-App notifications discreetly slide up from the top or the bottom of the user's screen and are great for non-urgent campaigns or giving the user small amounts of information. Full-Screen In-App notifications take over the user's screen and give you more room to add larger images and headline and body text and are useful for campaigns that are critical campaigns that are time-sensitive.
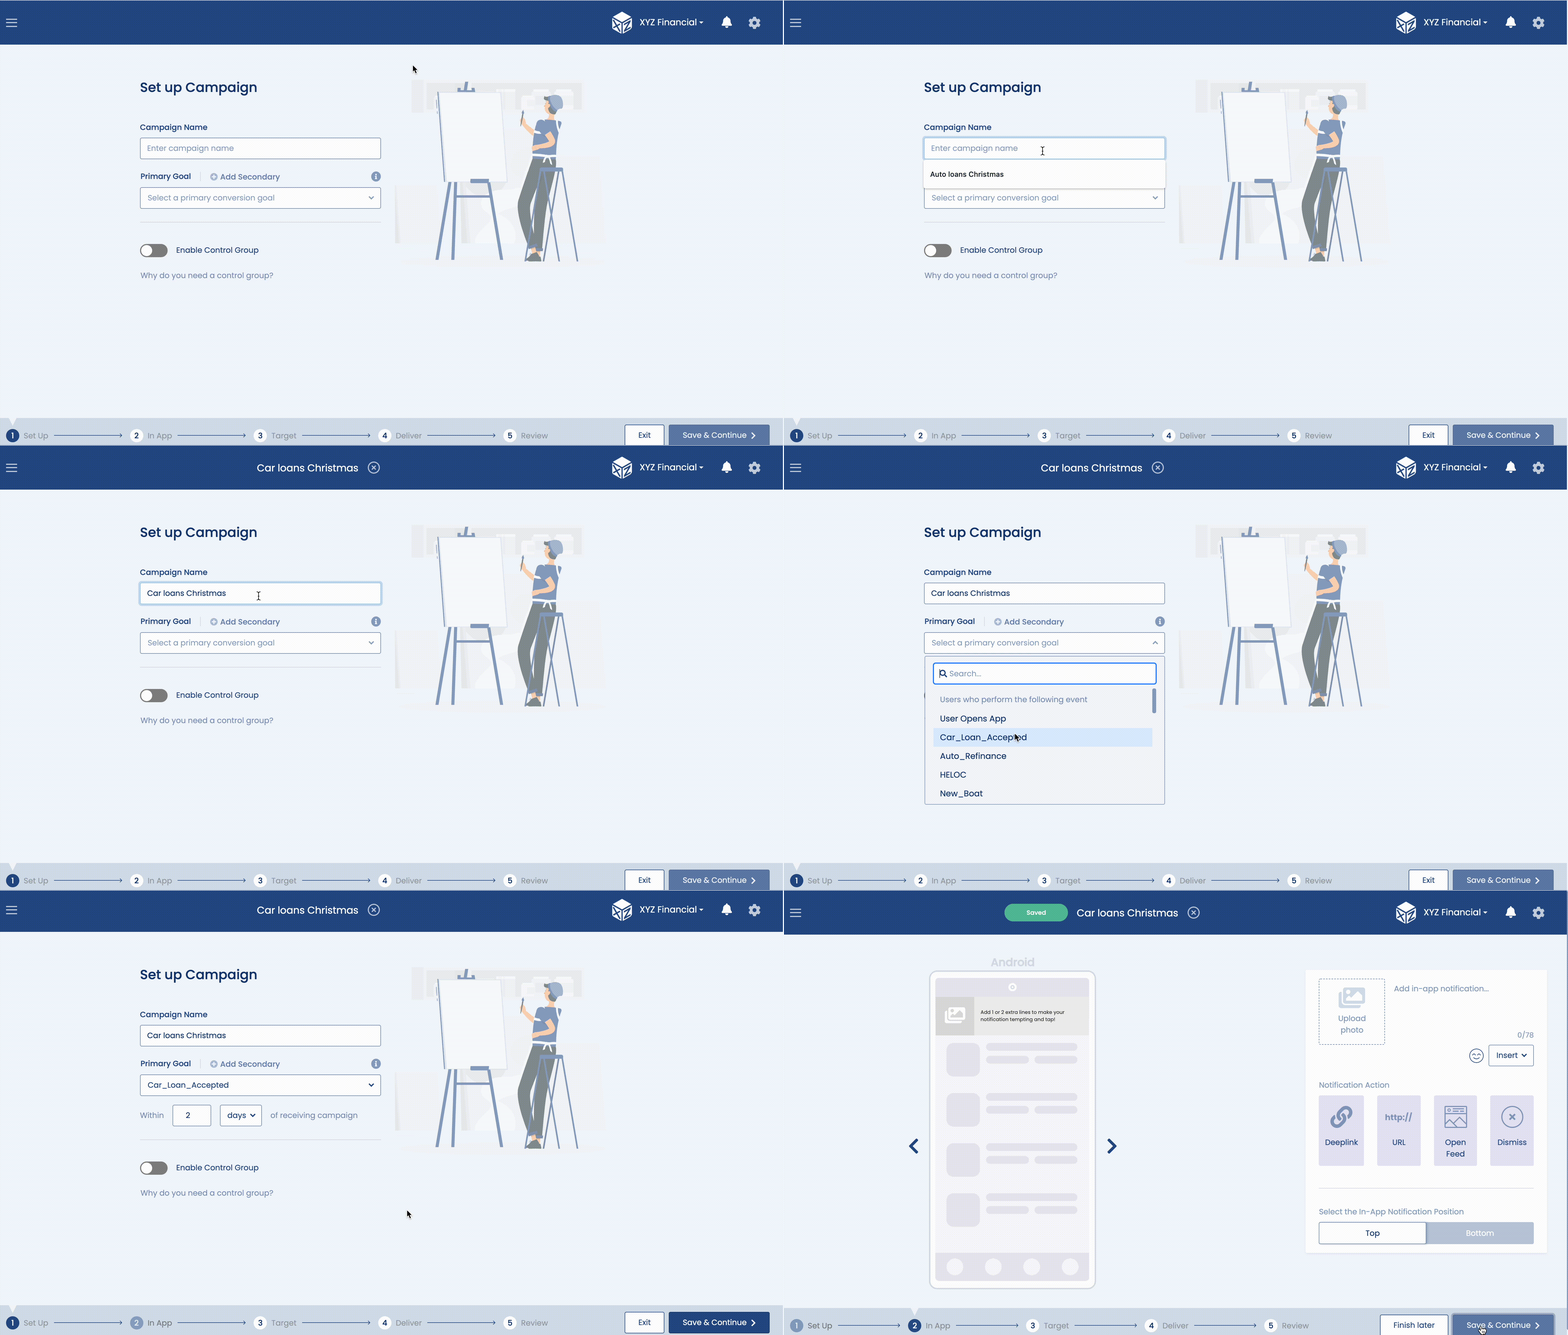
3. Set up Campaign
The campaign name, primary goal, and secondary goal could be configured on this page. Additionally, it allows the administrator to enable a control group, a subset of the customers we are targeting with a particular campaign, who will not receive the campaign communication. Upon setting up the parameters click on “Save & Continue”.
4a. Configuring a Small In-App Notification
Small In-App notifications are made up of two key parameters; text to get the user's attention and a small image. Much like push notification, the text should be short and snappy and include a clear call to action. You have a limited space to get your point across so make sure that you craft a notification that will quickly inform the user about what the purpose of the campaign. You must also add a small image to a small In-app notification to help grab the user's interest.
Pulsate also enables you to Insert a merge tag to your in-app notification to personalise the experience for your users. Adding a merge tag allows you to programmatically insert personal details about a user such as their first name, last name or any other piece of custom data that Pulsate has on record for that user. Don't worry, if we don't have a merge tag for some of your users, we will leave the space, we won't insert anything for those users. To add a merge tag, click on the Insert button and choose the merge that you want to insert.
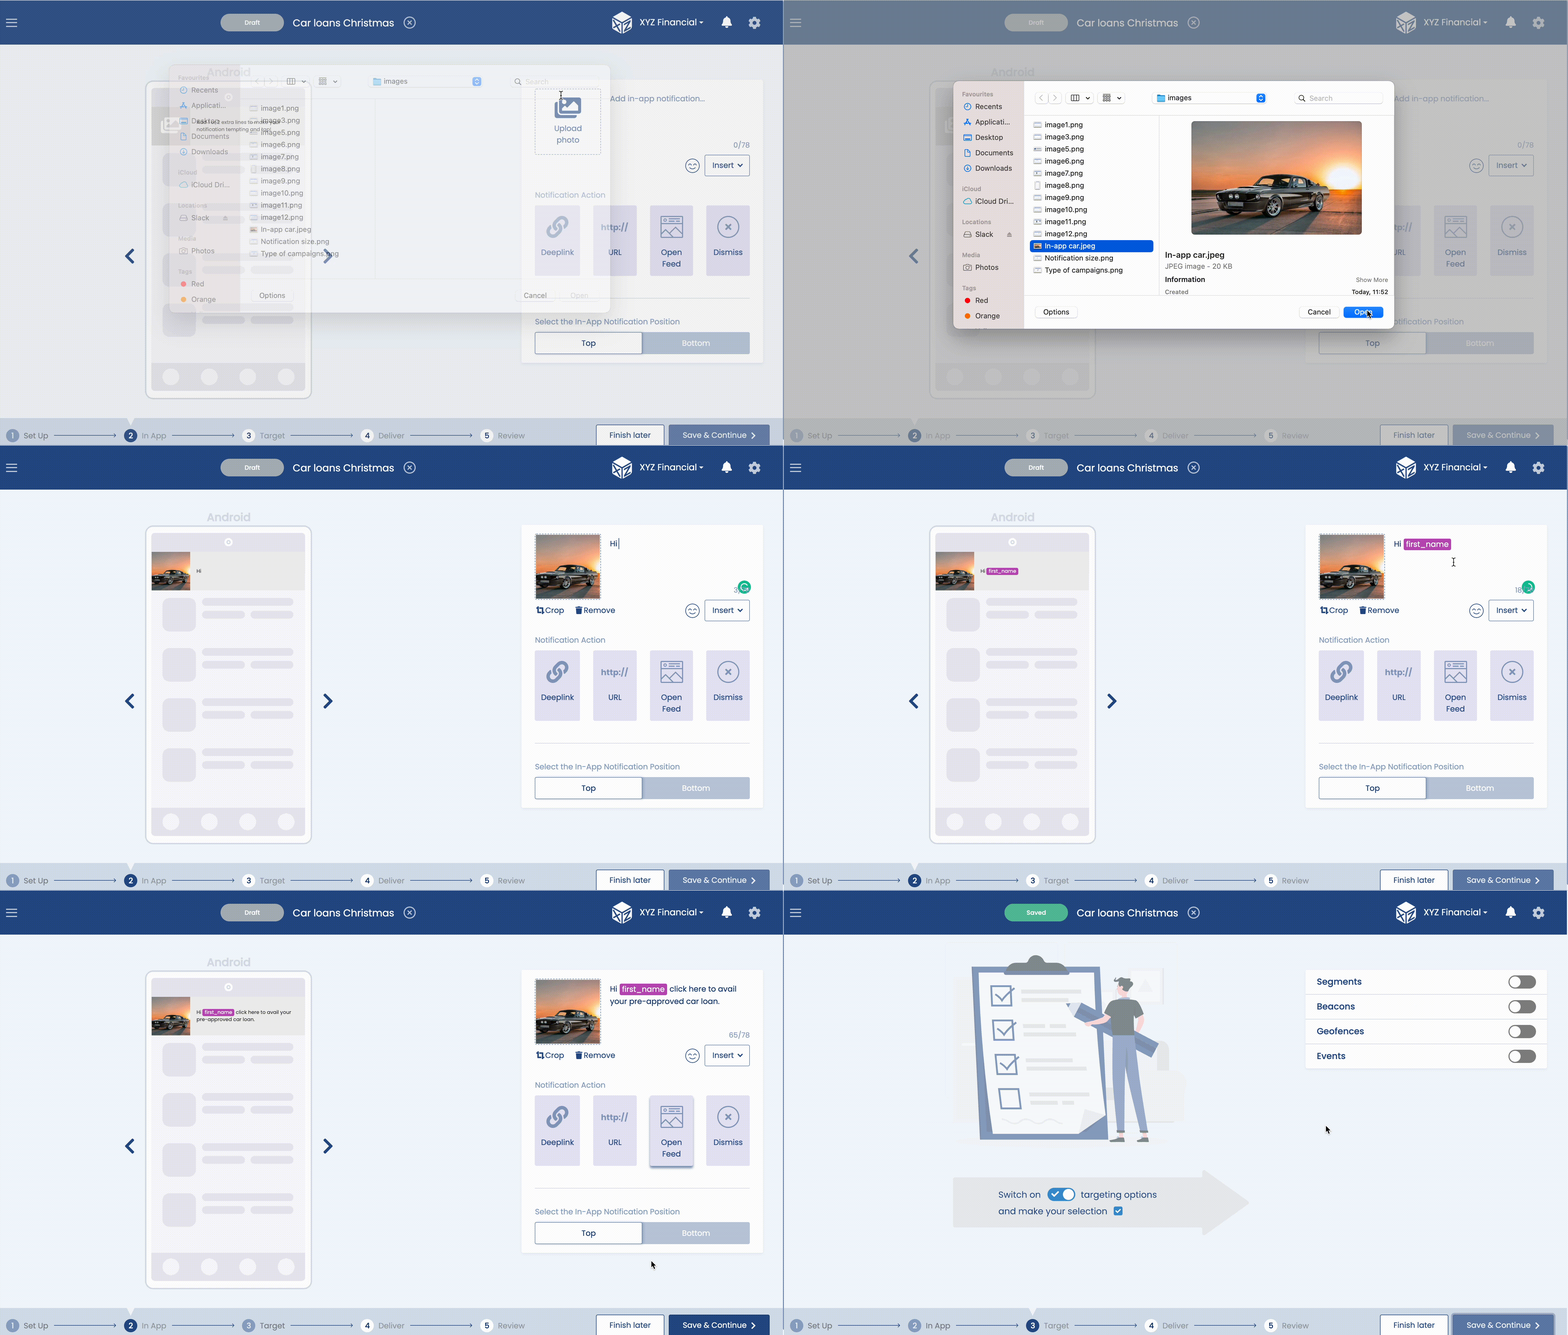
Setting up a small in app notification
Supported Image Size
| Minimum Image Width | Max Image Size | Supported Formats |
|---|---|---|
| 500px | 700KB | JPEG PNG GIF |
The next choice to be made is whether you wish the small in-app notification to slide up from the bottom of the screen or slide down from the bottom of the screen. Much of this will depend on the setup of your app, if you have navigation at the bottom of your app you may wish to slide this notification from the top and vice versa if app navigation is at the top of your app.
Now that you have set up the content and delivery mechanism for your notification, you must choose what happens when a user clicks on the notification. For small in-app notifications you have the following Destination choices:
4b. Configuring a Full-Screen In-App Notification
Fullscreen in-app notifications allow you to take over the entire screen of the user so there is much more space to add content. You must choose to send at least one of these widgets:
| Name | Description |
|---|---|
| Image | As you have more space, you can add a larger image to illustrate your campaign. |
| Headline | Larger and bolder than normal text, a brief headline can be a great tool for grabbing a user's attention. Headlines should be as short and snappy as possible whilst also getting your point across. |
| Text | The text widget gives you space to flesh out your campaign and add background info that is will add more detail to the notification. |
You can choose any combination of those parameters and you can also change the order that they are rendered by dragging each widget up or down. You can also add a merge tag to the Text or Headline widget and Pulsate will programatically add the value for that tag or leave it blank if we do not have a value for that user. Uploaded images can also be cropped if you wish to show a specific part of the image.
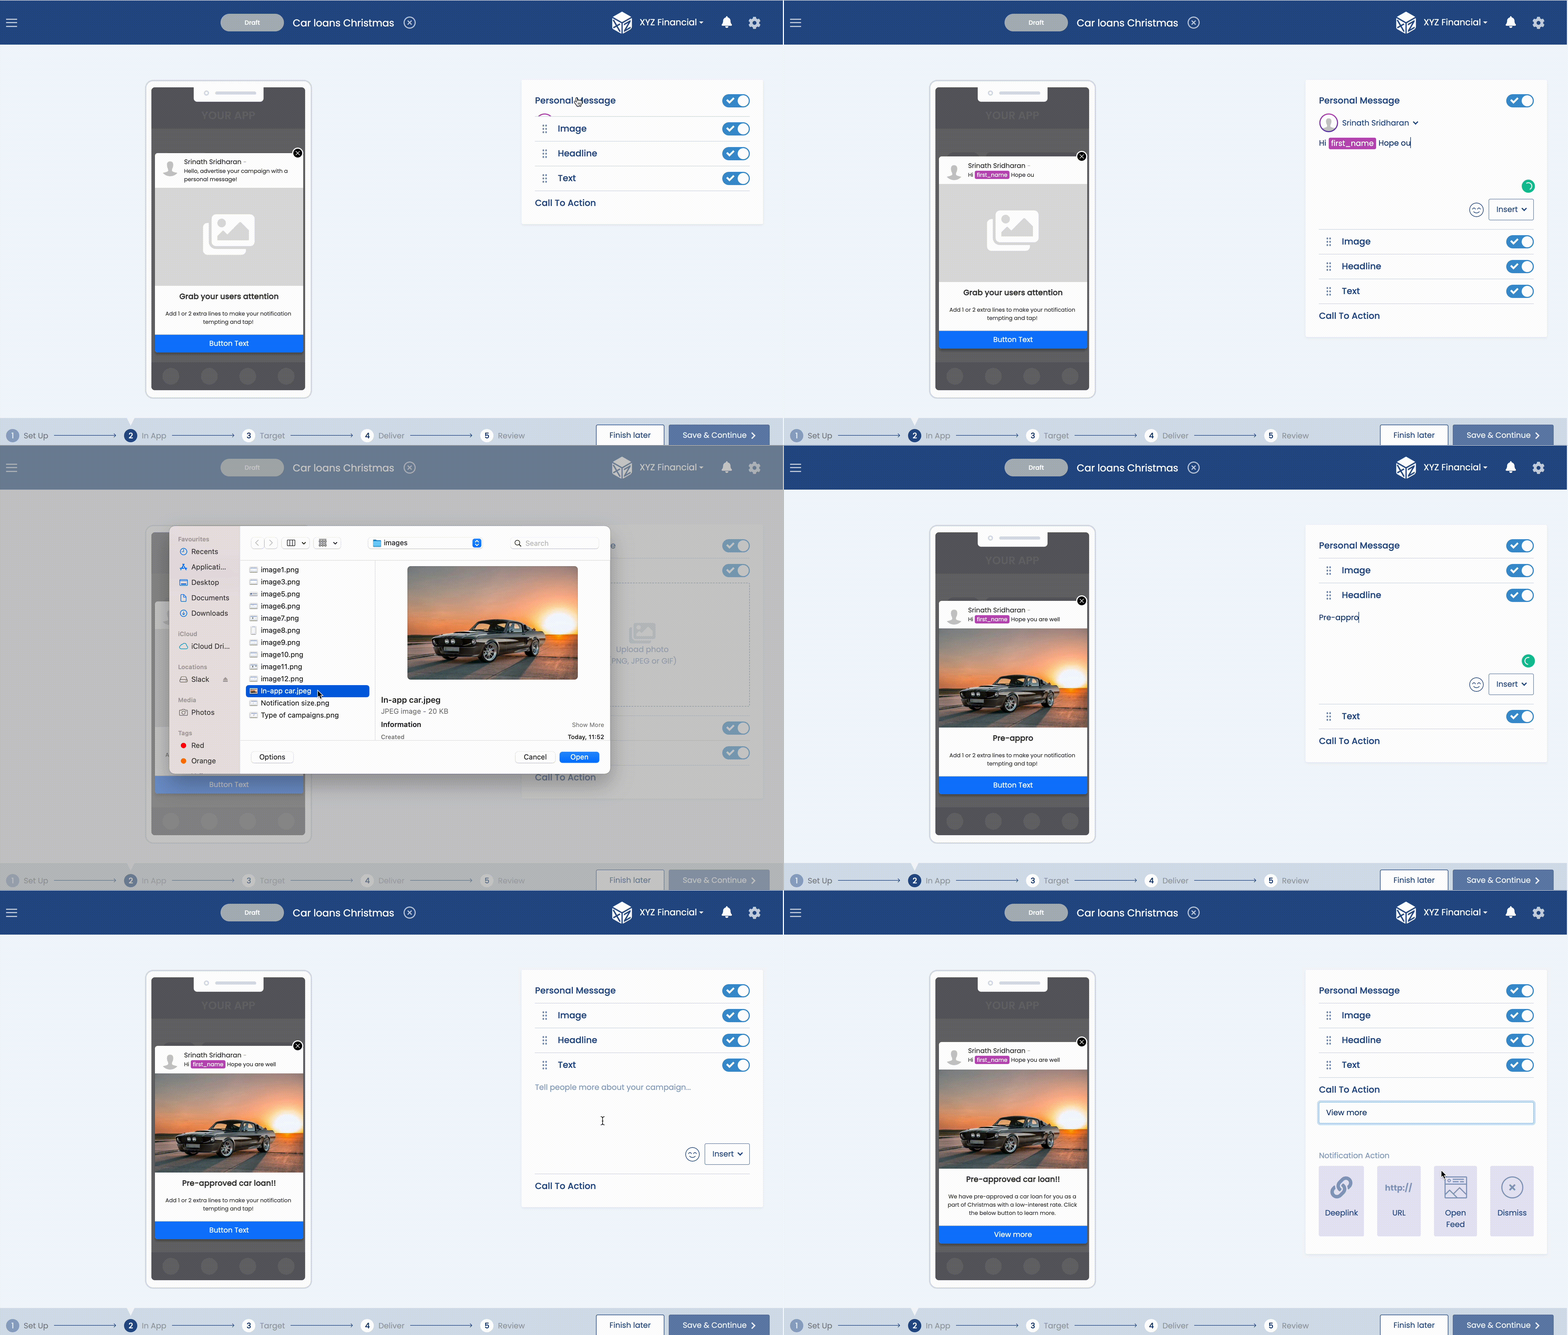
Setup a Large In App Notification
In App Notification Destinations
Once you have configured your small or full screen in app notification, you must then choose what happens when a user clicks on the notification. You can choose one of the following options:
| Name | Description |
|---|---|
| Deeplink | Deeplinks enable you to link users directly to a specific section or page within your app. If you choose to send a deeplink, you will be presented with a choice of which deeplink to choose. To find out more about deeplinks and how to upload them to Pulsate, please click here. |
| URL | Selecting URL allows you to link users directly to a web page. When you select this option you will be asked to enter a web page in the format of 'https://www.webpage.com' |
| Opens Feed | This option allows you to link users directly to the top of their Message Center within your app. Users will be brought to the top of the Message Center and can scroll through the previous feed card campaigns that you sent them. |
| Dismiss | If you select Dismiss, users will be directed to your app home page when they open the notification. |
5. Select Targeting
When you have created your in-app notification and chosen a destination for it, press the Next button to bring you into the Targeting section. Here you will be able to choose which groups of your users get your campaign. This is the audience for your push notification and as much as possible it should be chosen based on the group of users that you believe will be most interested in this campaign based on their previous transaction history, current proximity to a physical location and/ or in-app actions that the users will take within your app.
In the Targeting section you can choose from the following parameters:
- Segments
- Beacons
- Geofences
- In-App Events
When you choose any of these parameters, they will be displayed on the left-hand side of the screen in the Targeting simulator with an estimate of how many users the campaign will be sent to.
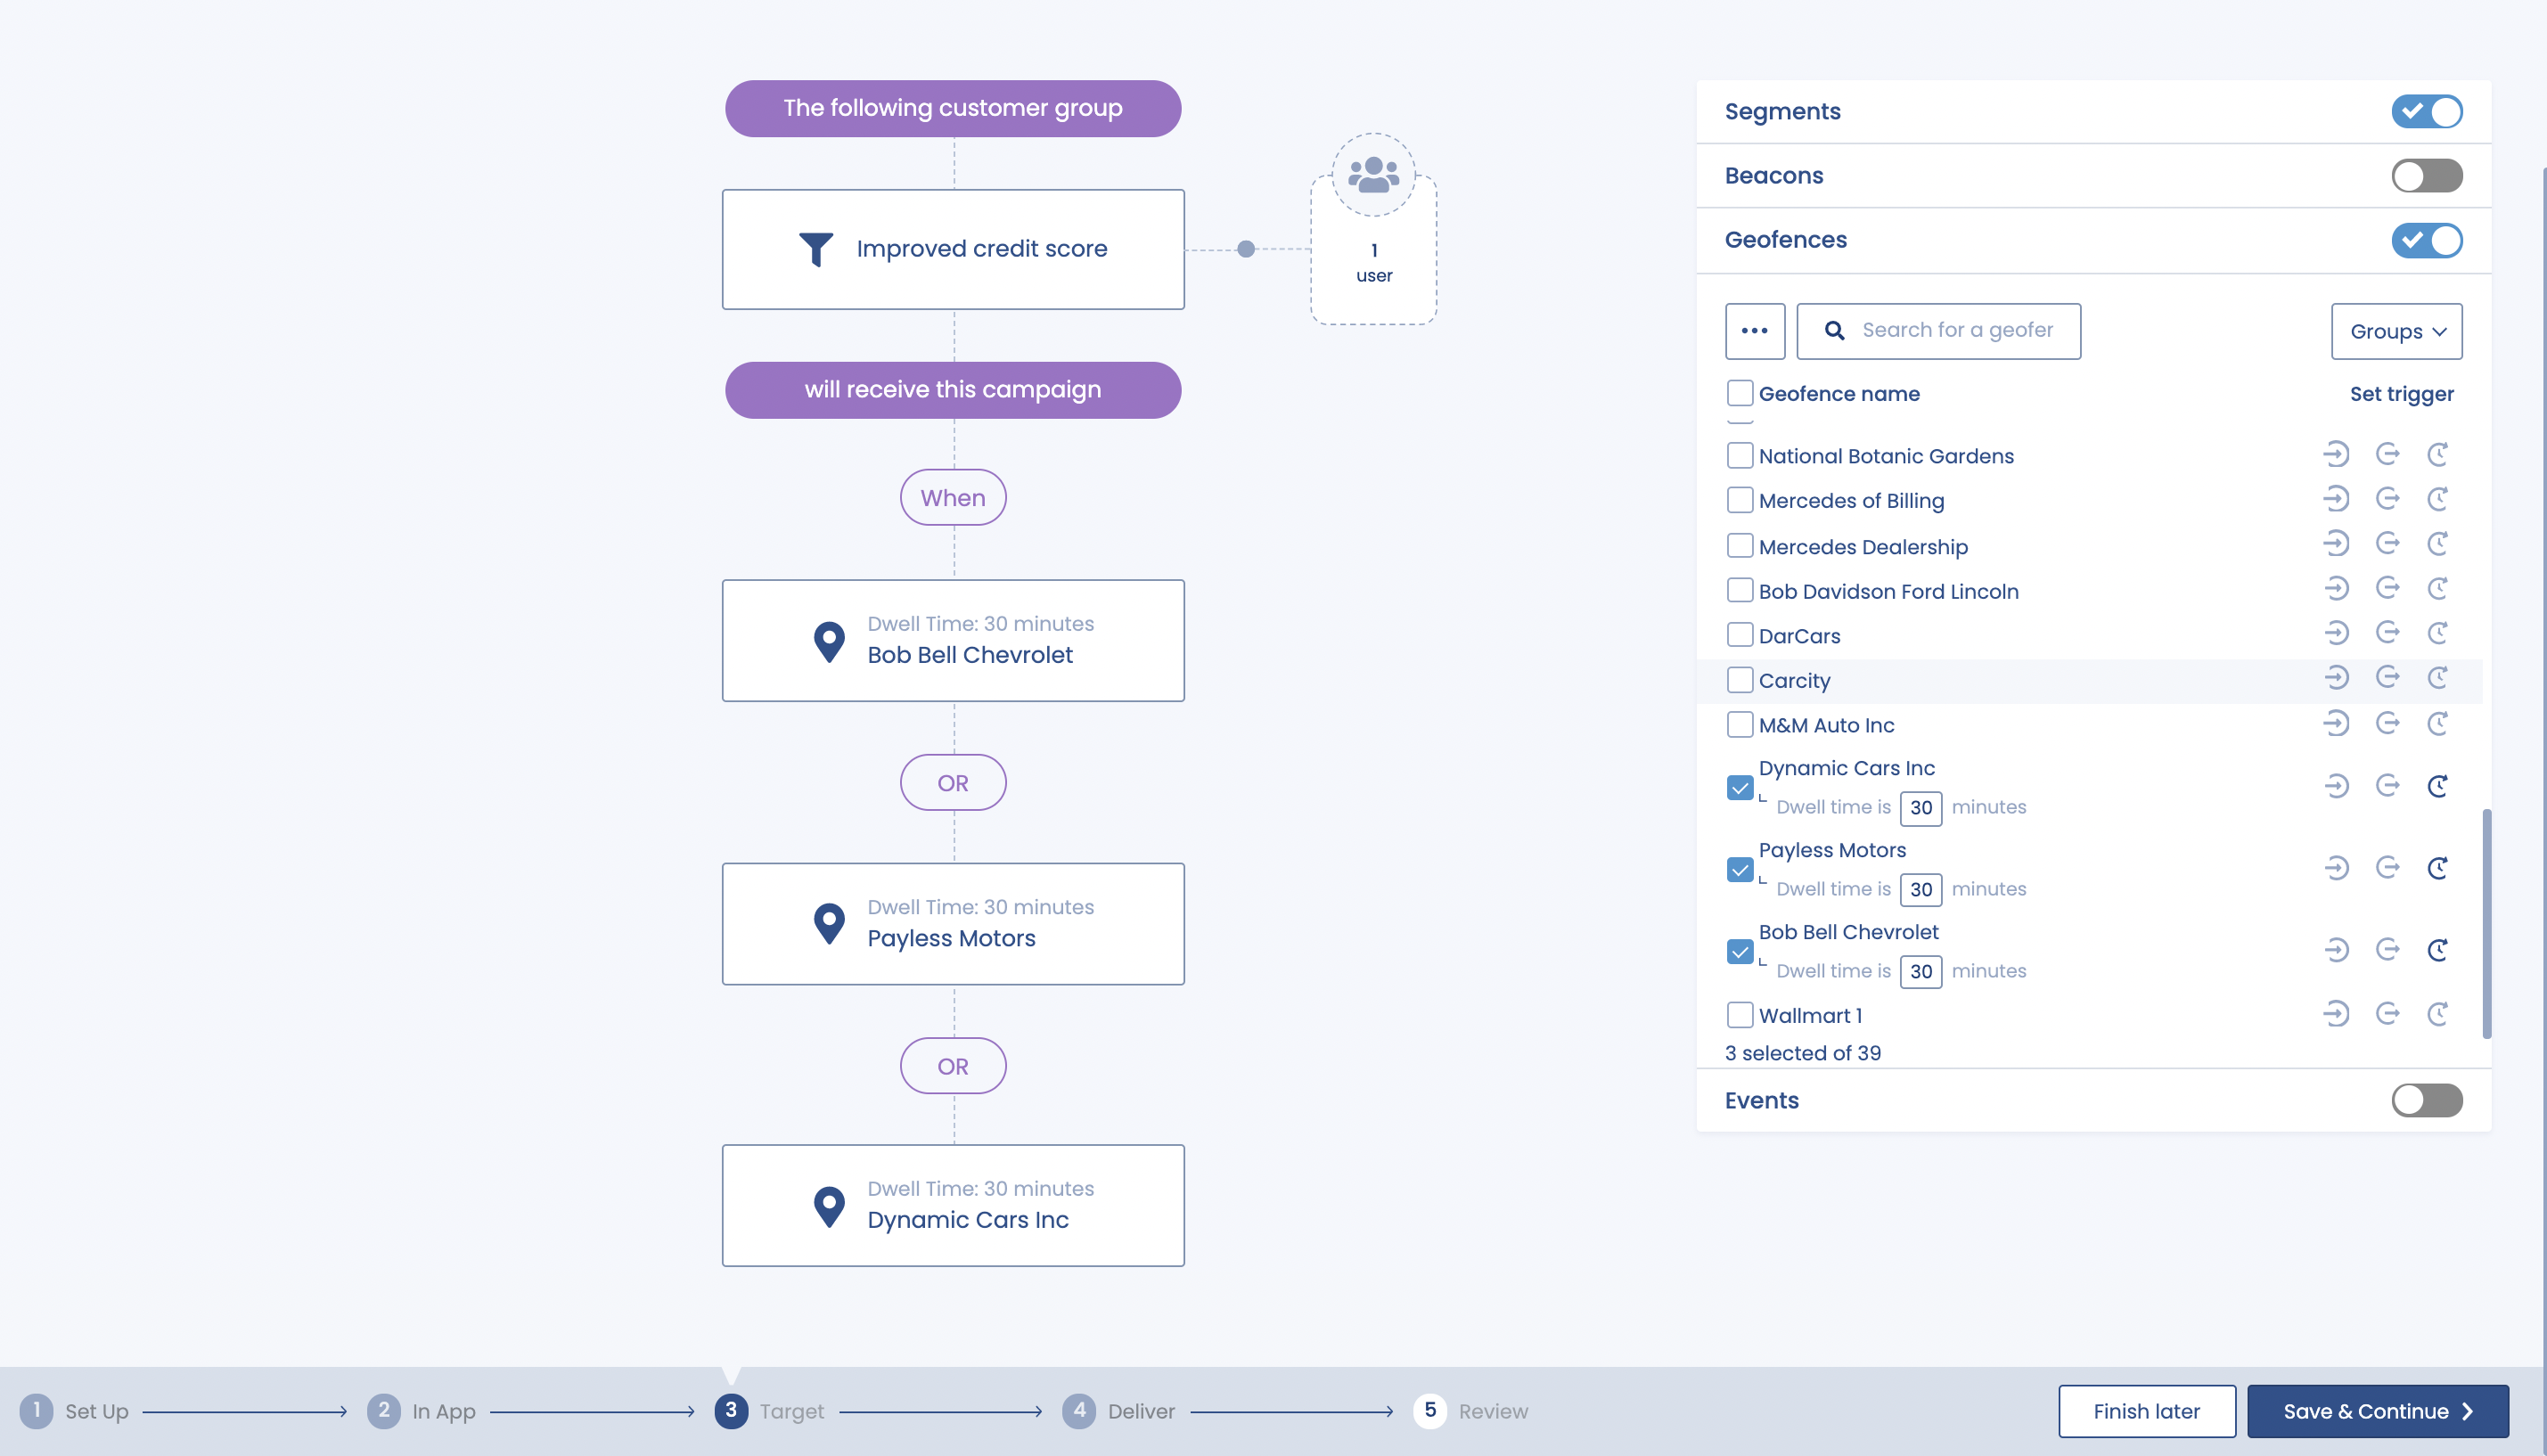
With Pulsate you can choose to target as many Segments, Beacons, Geofences and In App Events as you want. However, you should be trying to send each campaign to as well targeted a group of users as possible to ensure the highest open rates. You can send a campaign to multiple Segments of users and/ or send it to users who enter a Beacon, Geofence or carry out a specific in app action. Don't worry though, users will only receive the campaign once by default no matter how many of these parameters that they meet unless you specify otherwise whilst sending the campaign.
Pro Tip
Use the search functionality when you are looking for a Segment, Beacon, Geofence or In-App Event to quickly find the one that you are looking for.
You can also set up a Control Group in the Targeting section. For more information on Control Groups and how to set them up, please go here.
6. Select Delivery
Now that you have set up your push notification and chosen what users should receive it, the final step is to define when and how often users should receive your campaign. There are different scheduling options depending on whether you have chosen to send a campaign to a Segment or chosen to send it to any combination of Segments, Beacons, Geofences or In-App Events. The reason for the difference is that if you are sending a campaign to only a segment, you may want to just send the campaign to users already in the segment.
However, if you decide to send the campaign to users who enter or exit a beacon or geofence region or carry out an In-App Event (and possibly are also in a segment), you are relying on those users being in that location or carrying out that event in the future so you cannot just send it to users already in that segment.
Segment Only Campaigns
As mentioned above, if you send a campaign exclusively with a segment you will be given a choice whether to send the campaign only to users who are already in the segment or users in the segment combined with users who may enter the segment at some point in the future whilst the campaign is live.
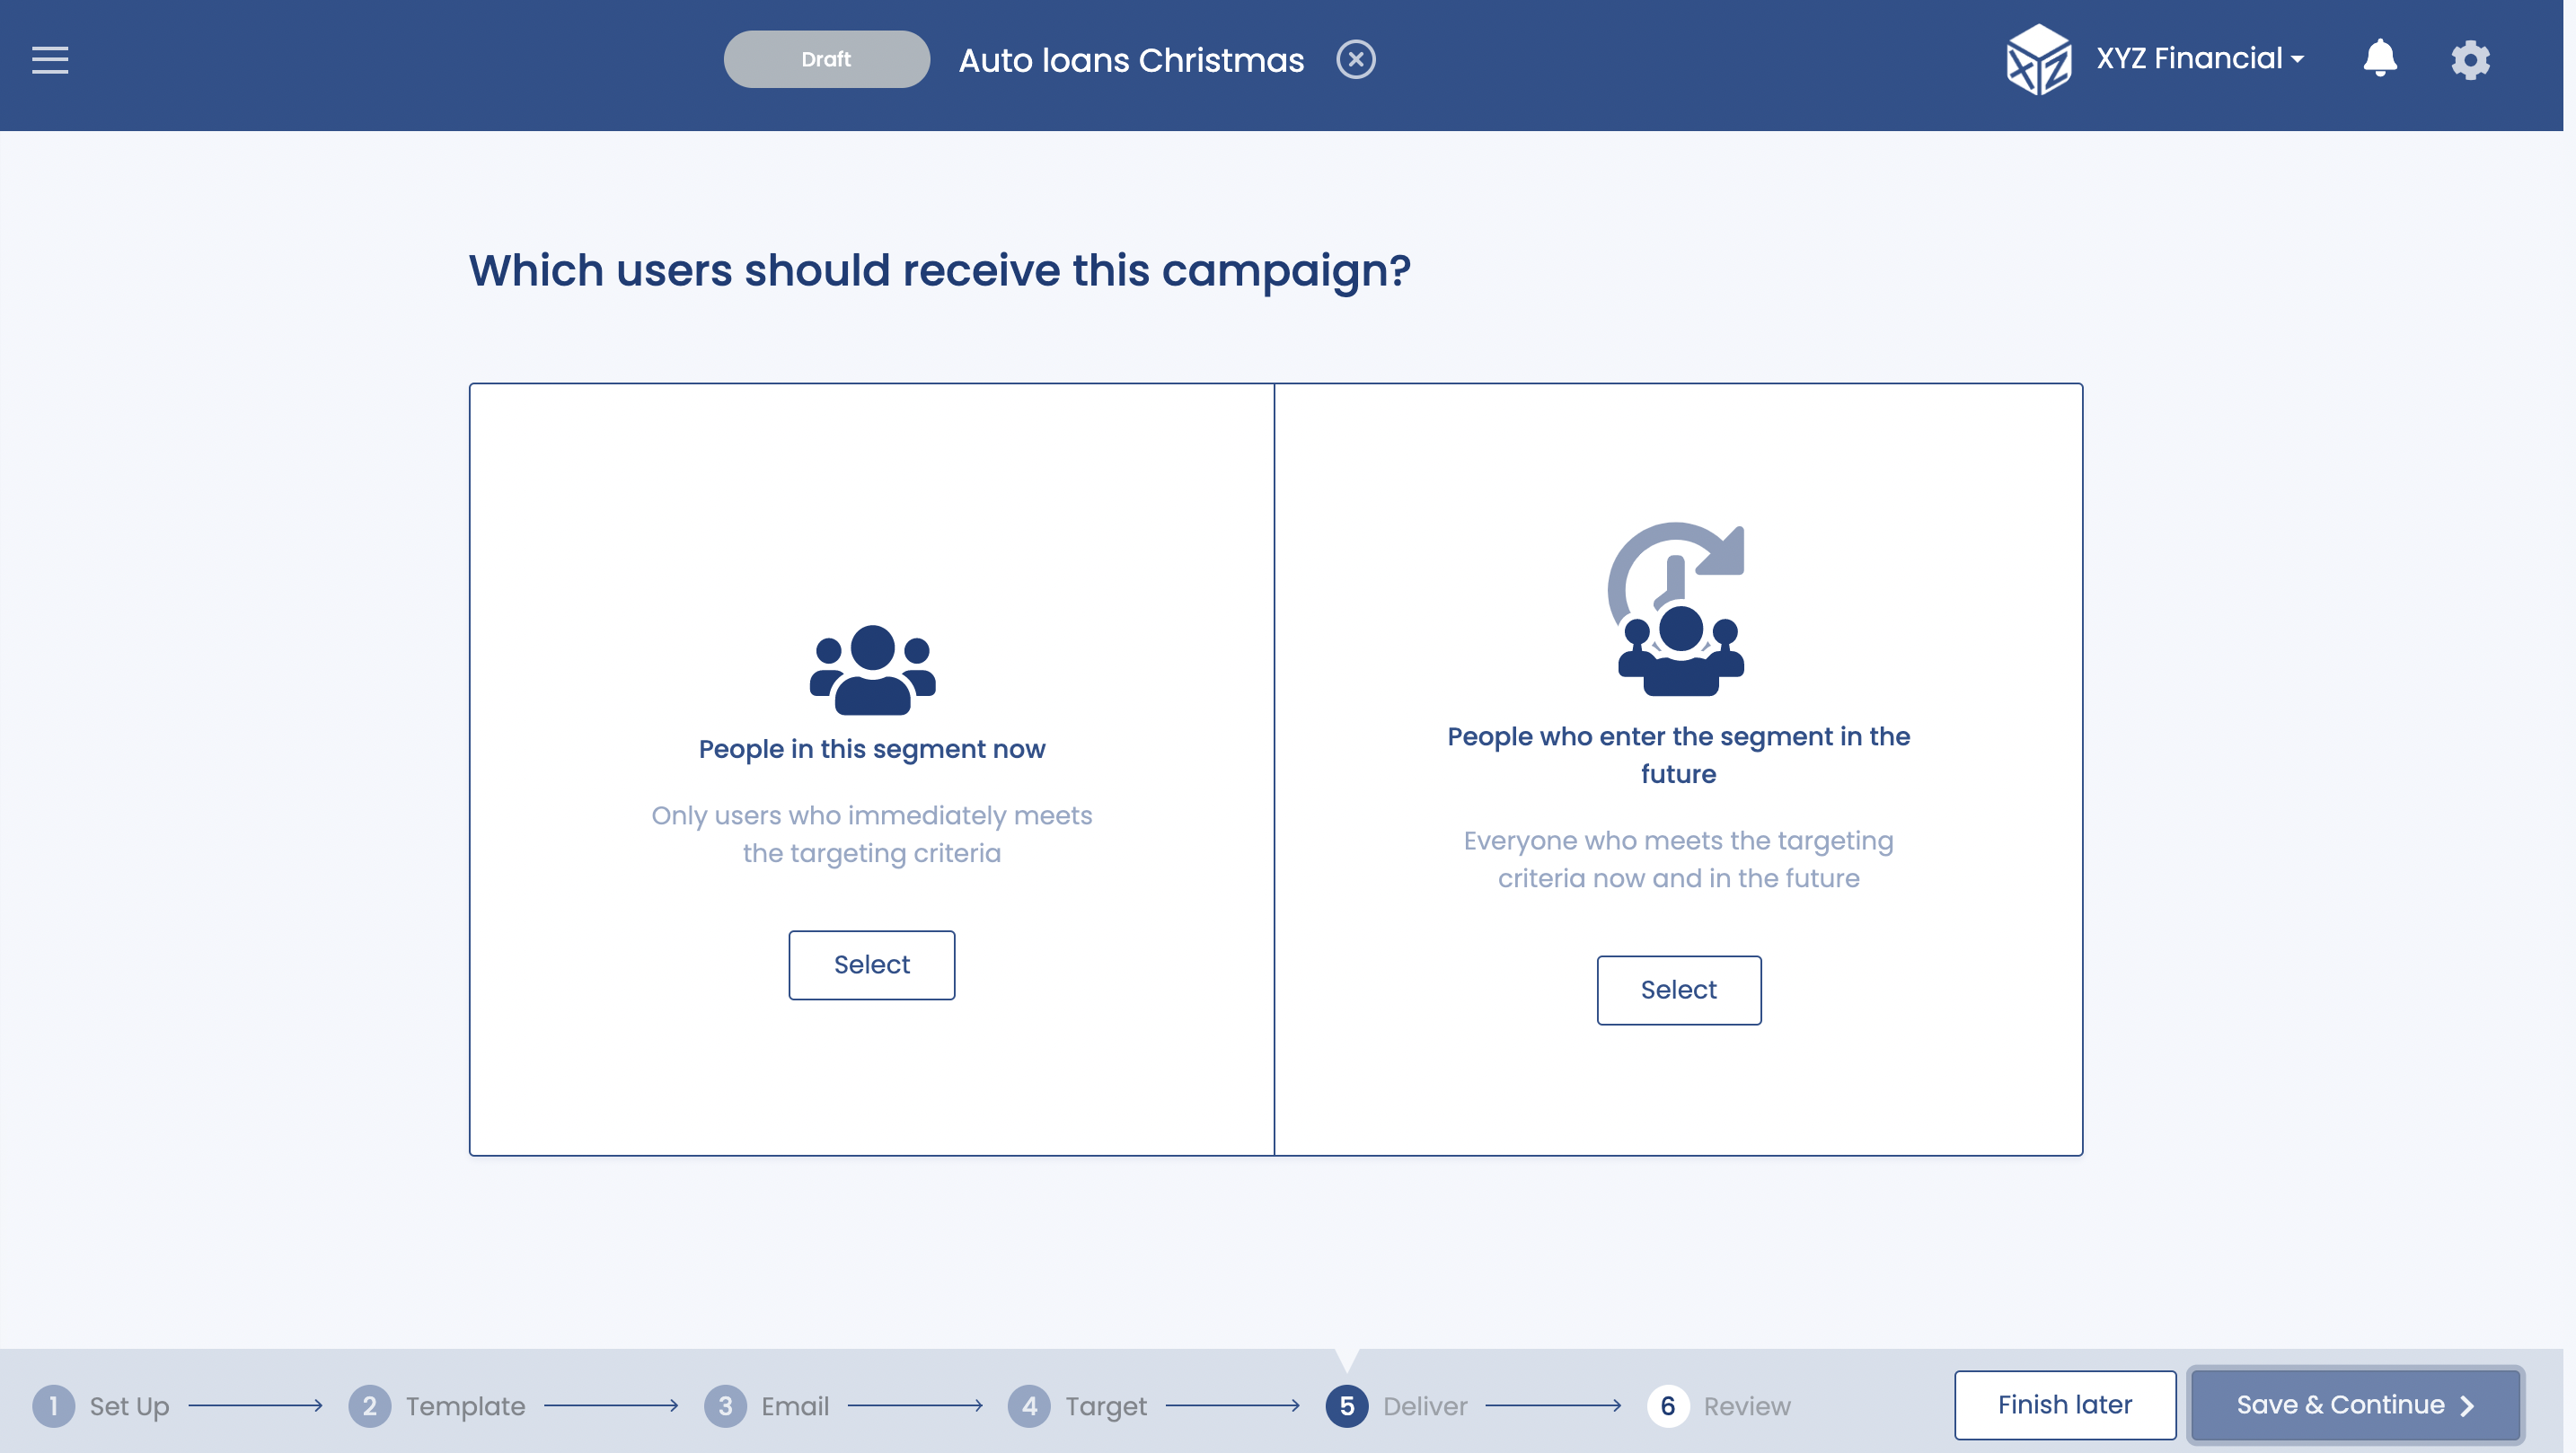
People in the segment now
If you choose to send the campaign to only users who are currently in the segment, it will be sent to every user that is in the segment when the campaign is sent and the campaign will then end. However you can still choose whether the campaign should be sent now or at some point in the future.
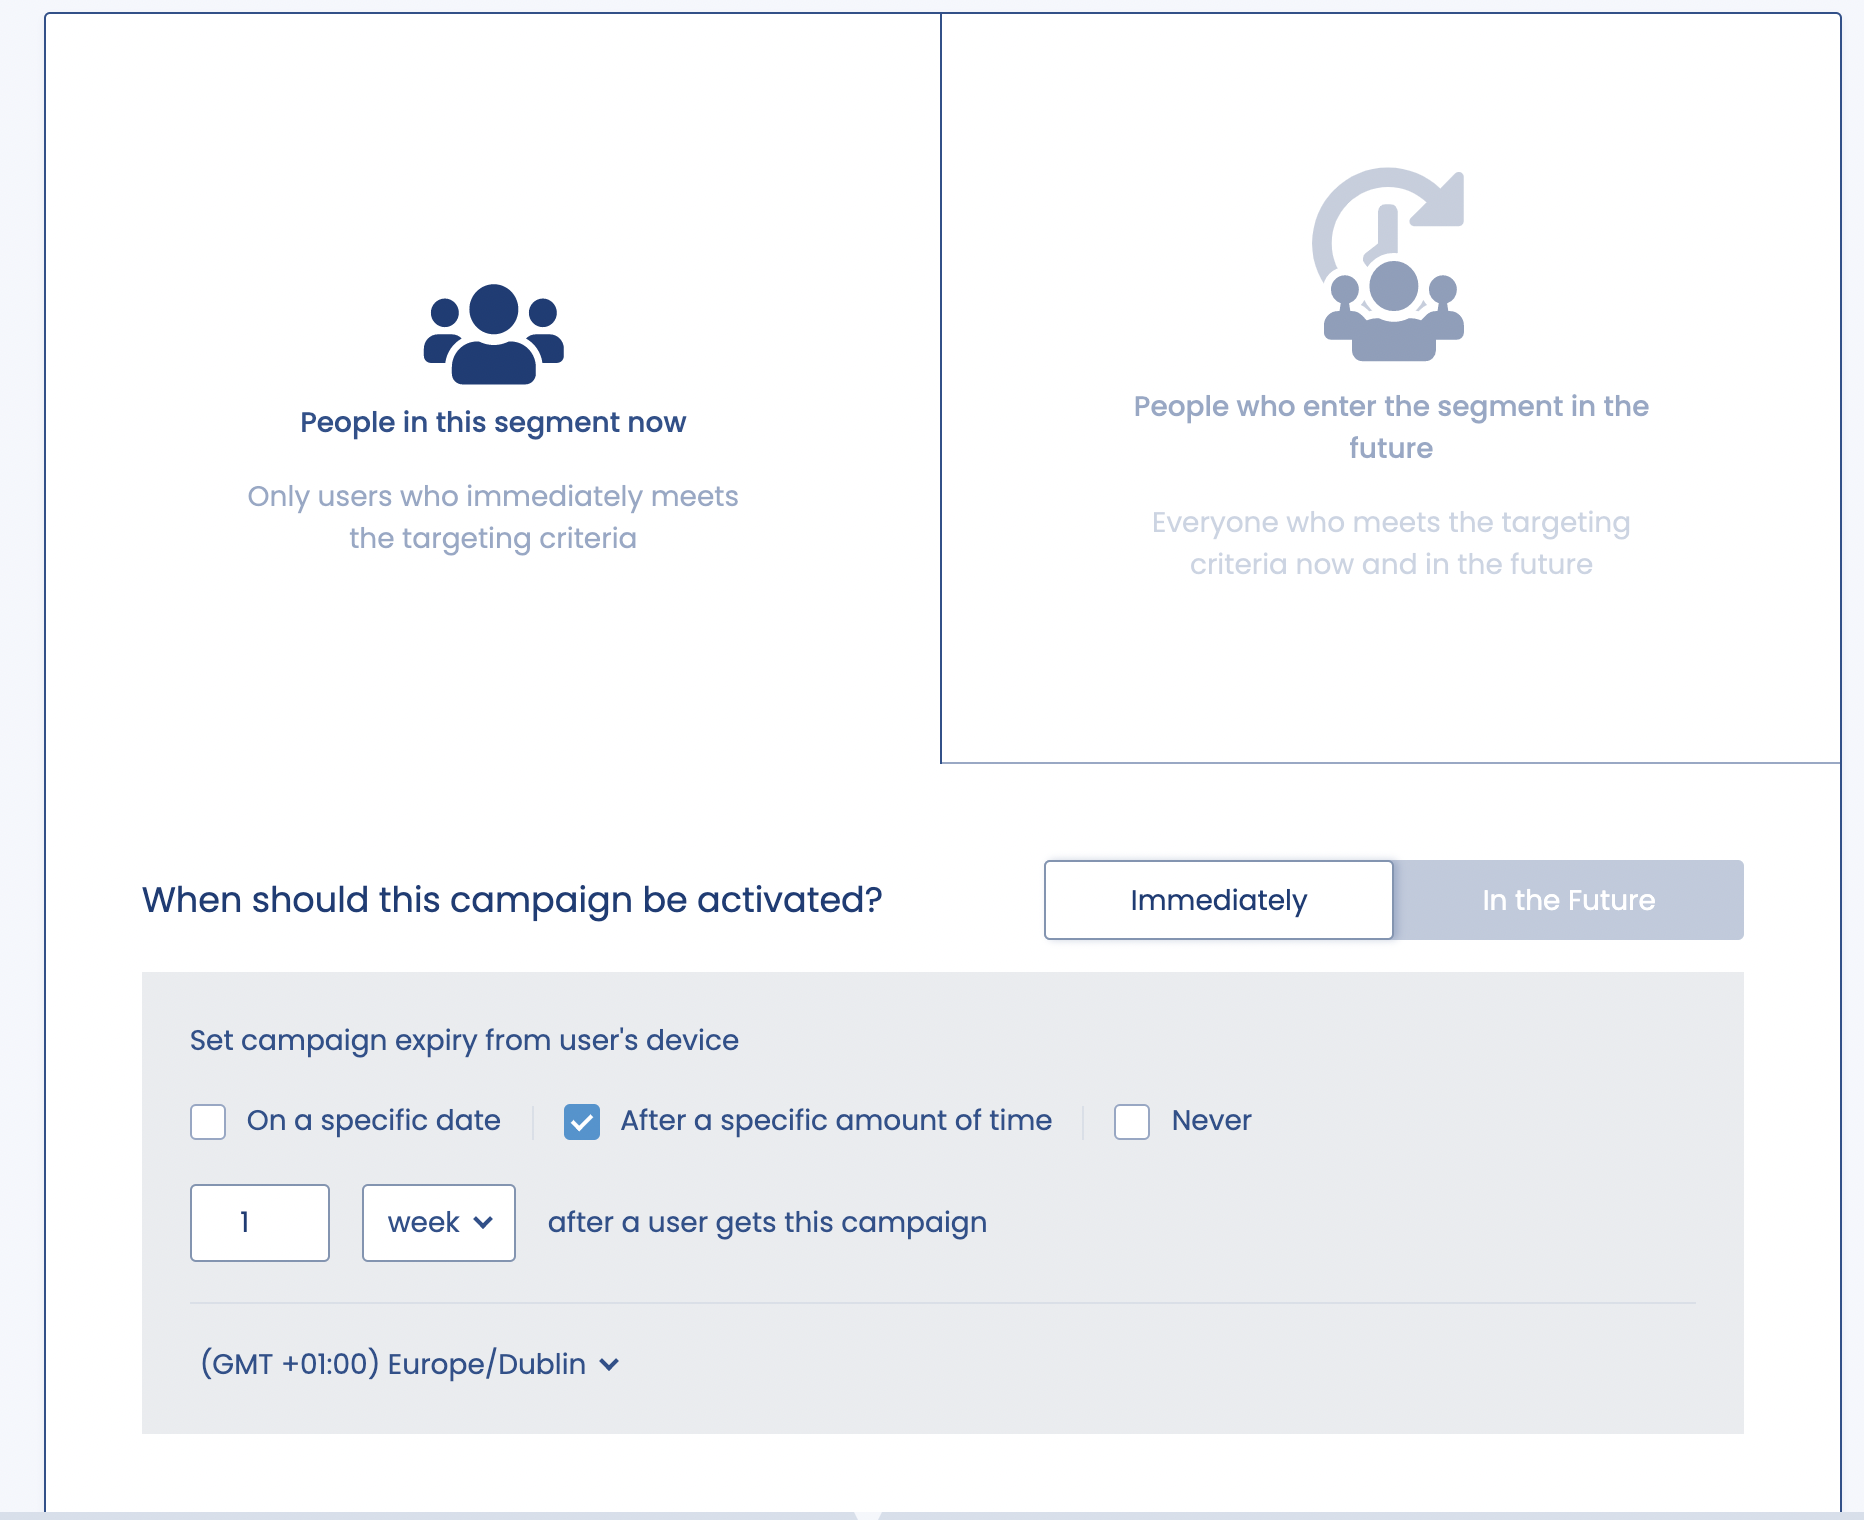
There is no option for an end date when you are sending a campaign to People in the segment now because the campaign will be ended as soon as it is sent to all users in that segment.
People who enter the segment in the future
There are a number of different options if you want to send a campaign to users who enter the segment in the future too.
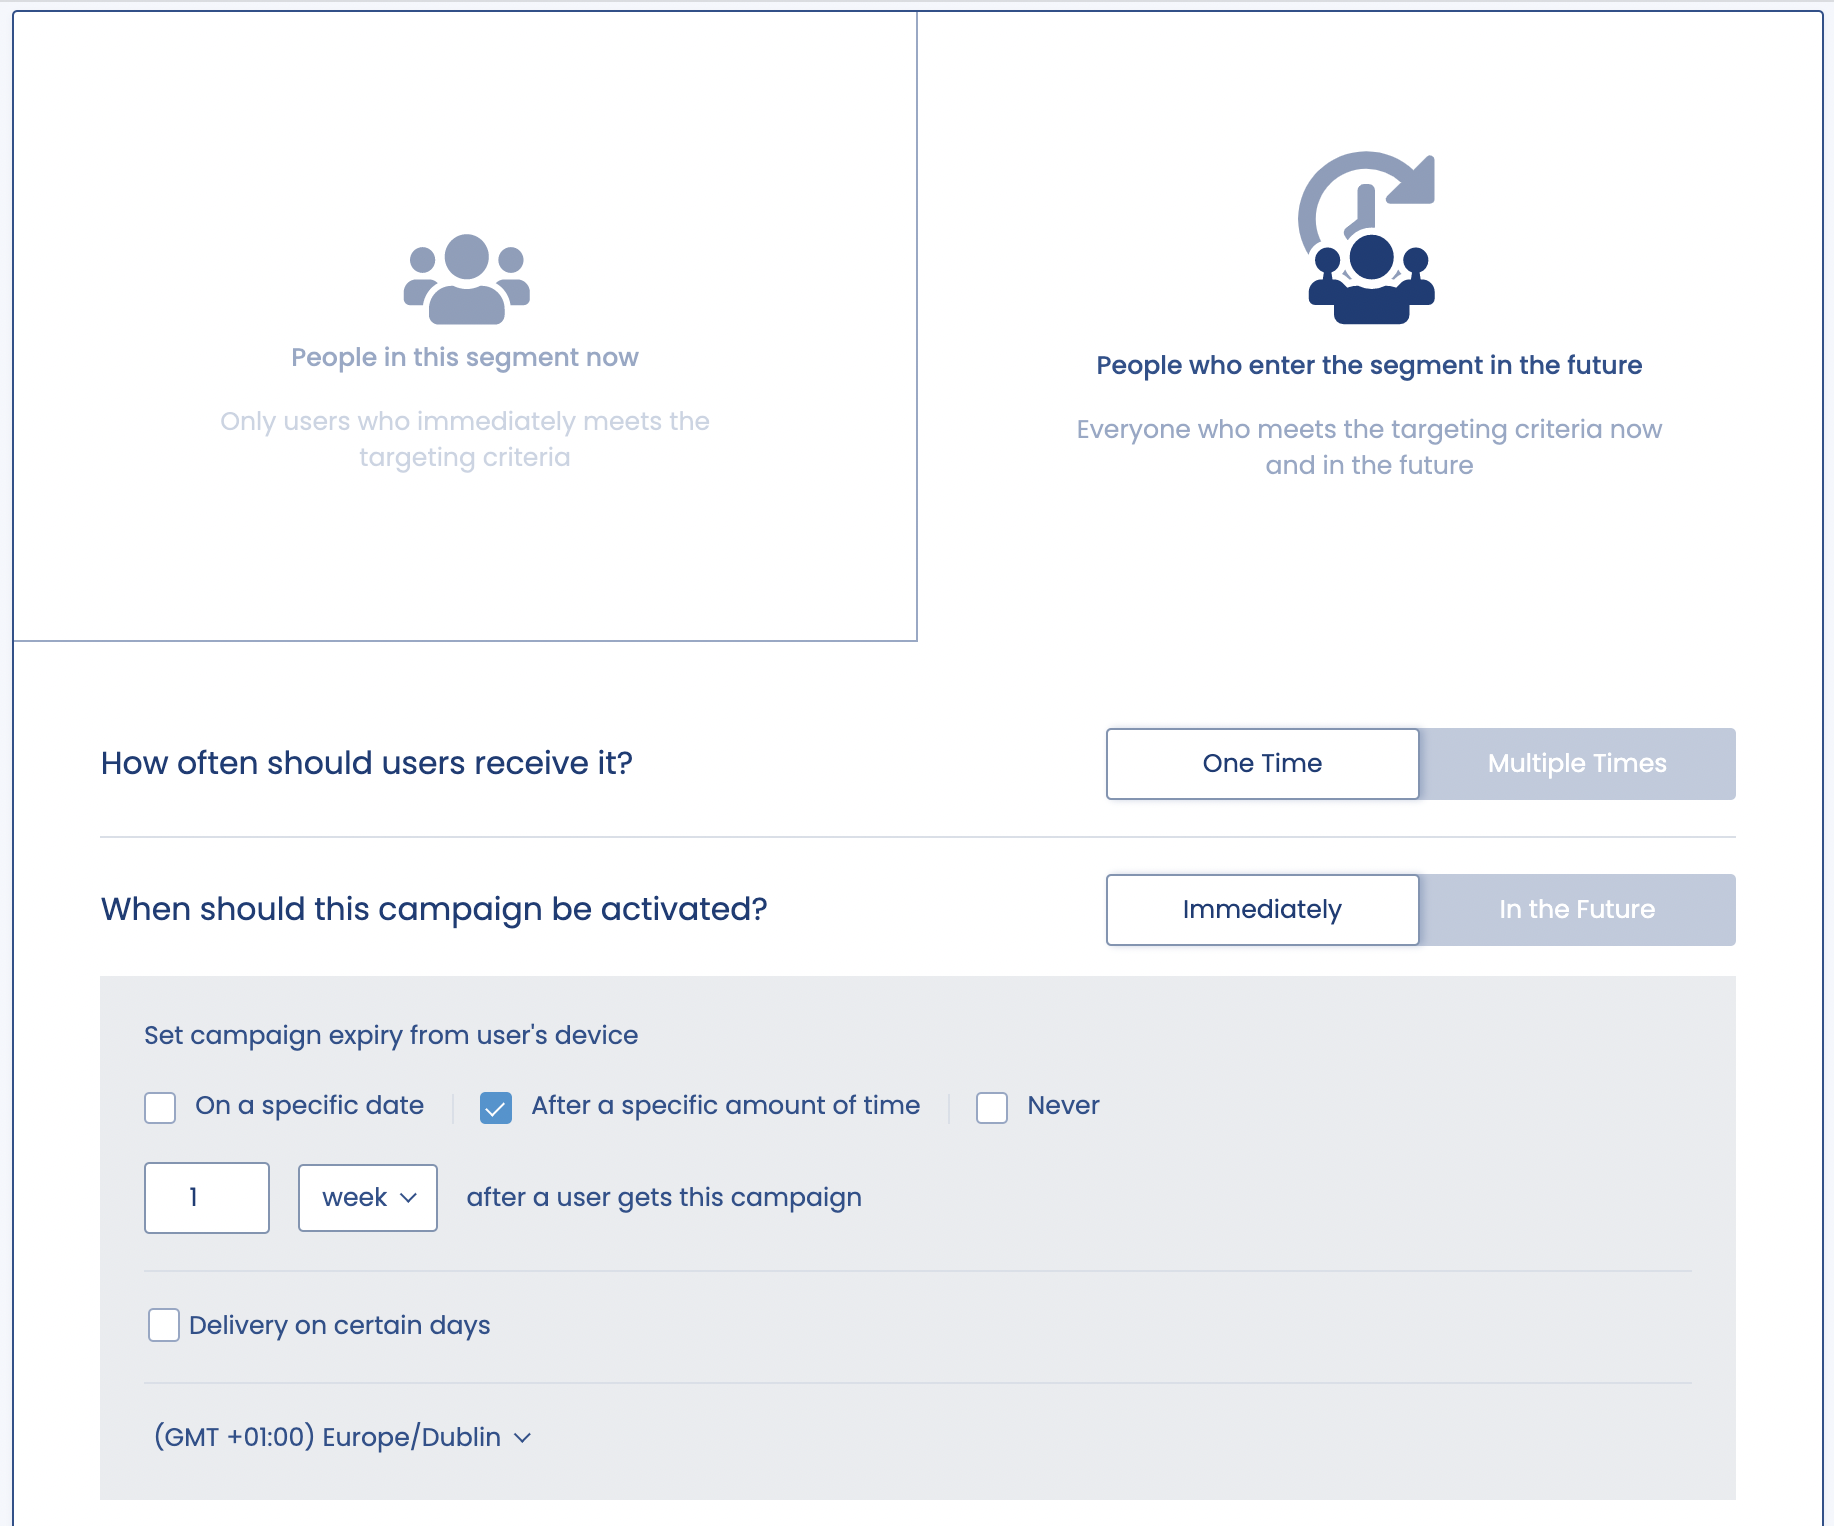
The first choice to be made is whether this campaign is send to each user once or multiple times if they remain eligible for it. Choosing One Time is useful would be useful if you were sending a campaign that every user in that segment should get but only once. An example might be a Welcome Campaign which you would like to send every user once they enter the segment but you only want to send it once even if the user leaves and re-enters the segment at some point in the future.
Conversely, you may want to send other campaigns multiple times to a user. An example might be a receipt for purchases the user makes, you may want to send that campaign to users every time they make a purchase and are added to that segment. If you choose to send a campaign Multiple Times, you can set Campaign Limits to ensure that users do not get overloaded by campaigns. Campaign Limits adds a delay between users receiving this campaign. For instance, if you set the campaign limit to five minutes, users will only receive this campaign once every five minutes even if they are eligible to receive it more often than that.
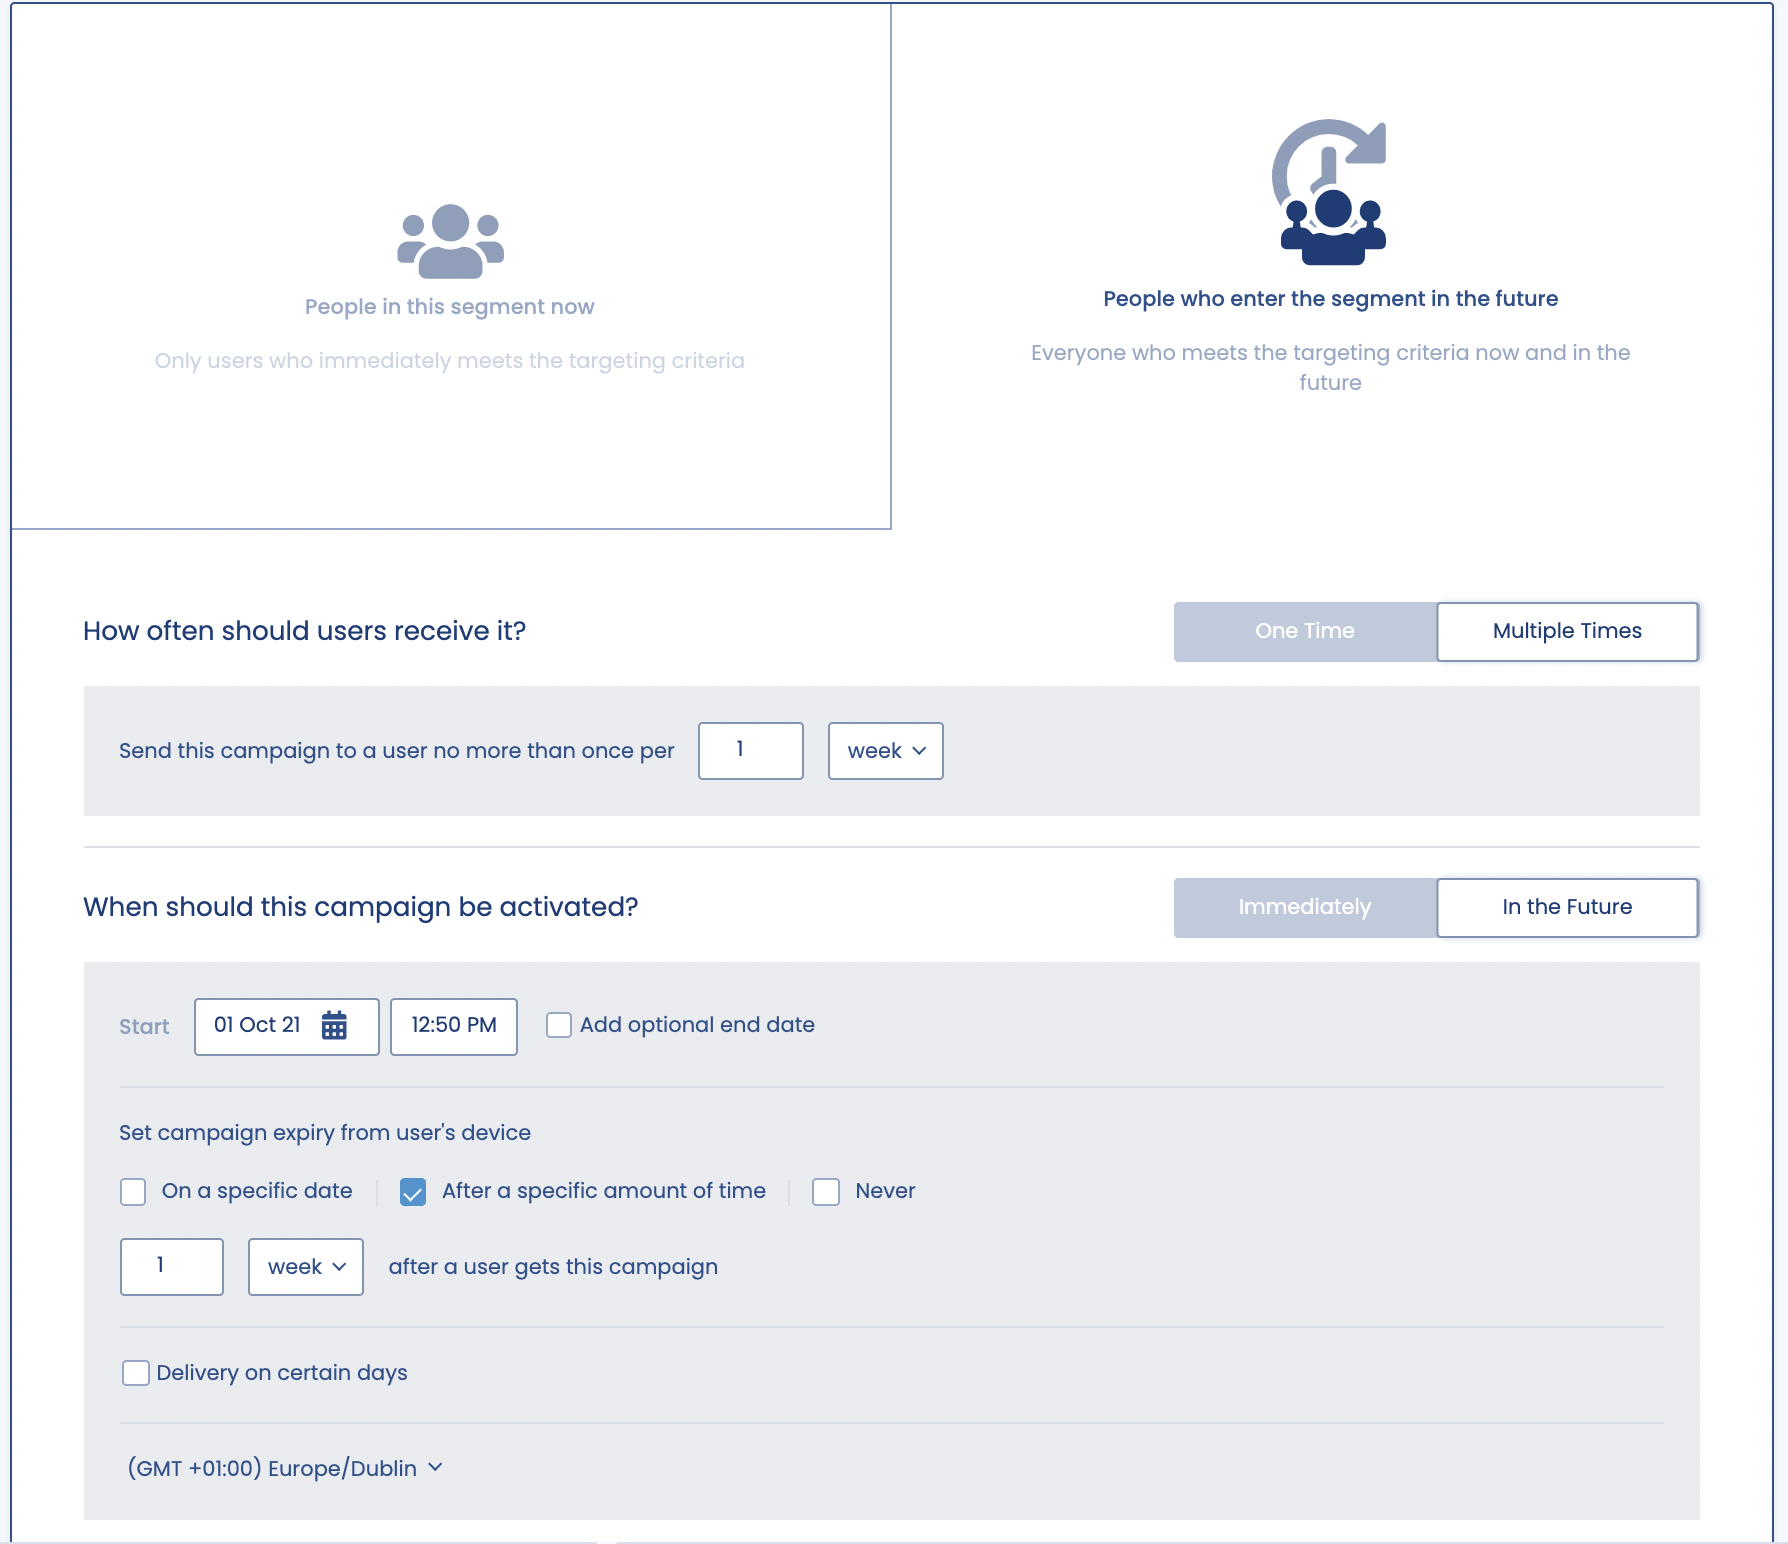
The final choice to make is to decide when the campaign should be scheduled. Choose Activate Immediately to send the campaign immediately or choose Schedule for the future to send the campaign at some point in the future. You can also choose here when the campaign should stop sending or whether it should continue until it is manually stopped. You can also choose to send your campaign in another timezone if you wish.
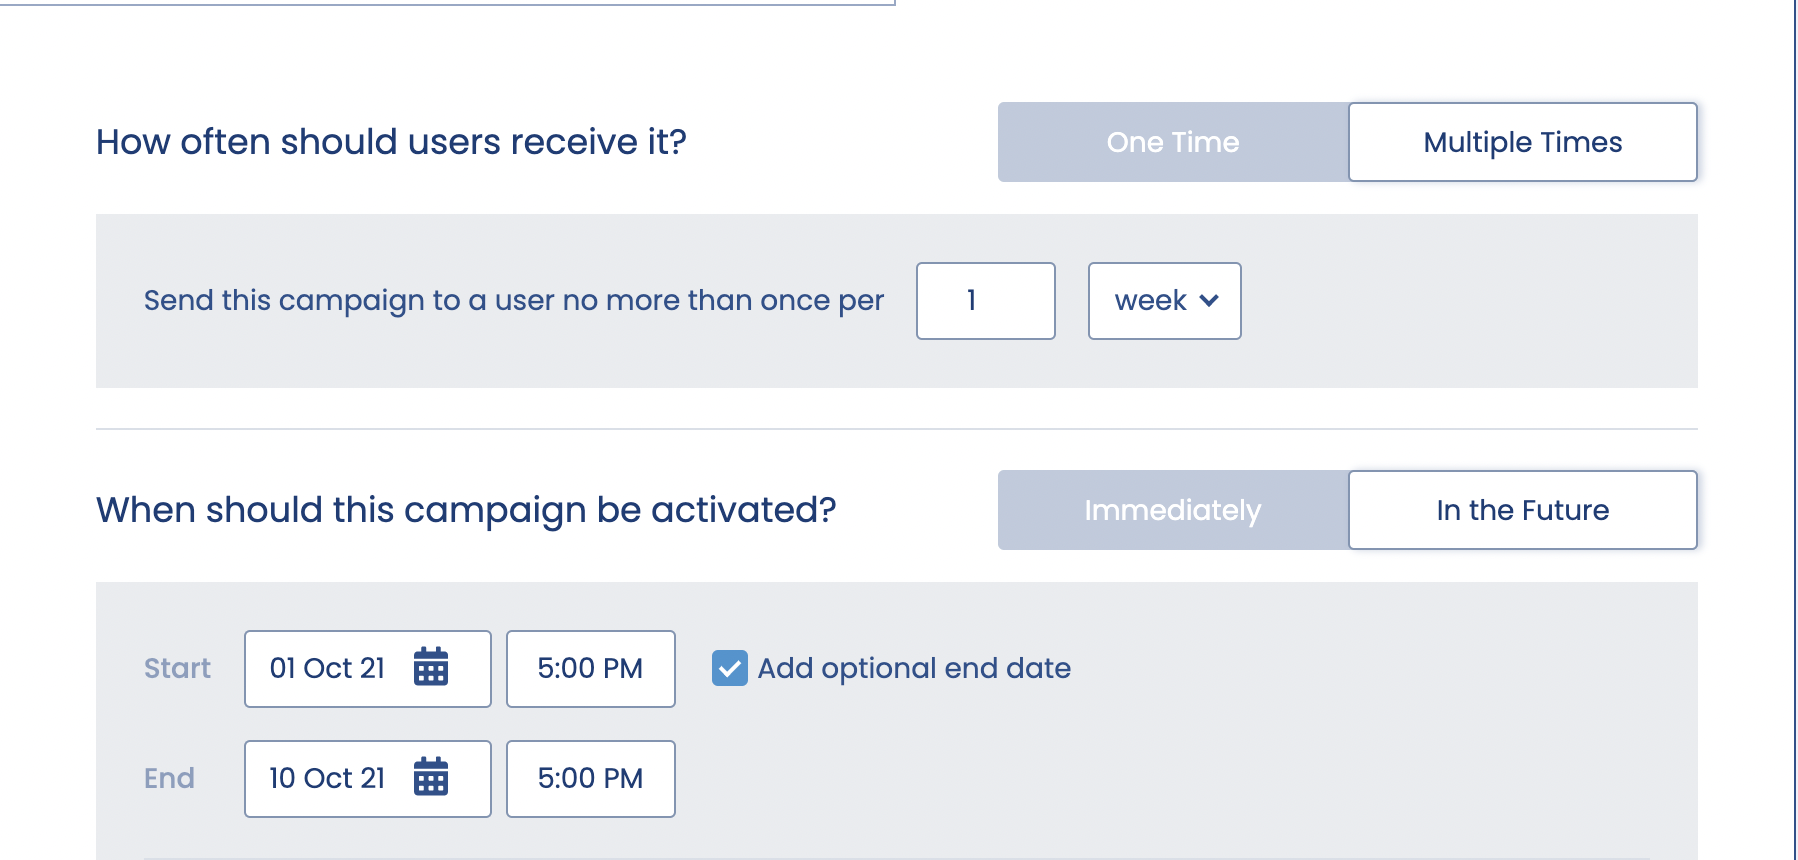
Pro Tip
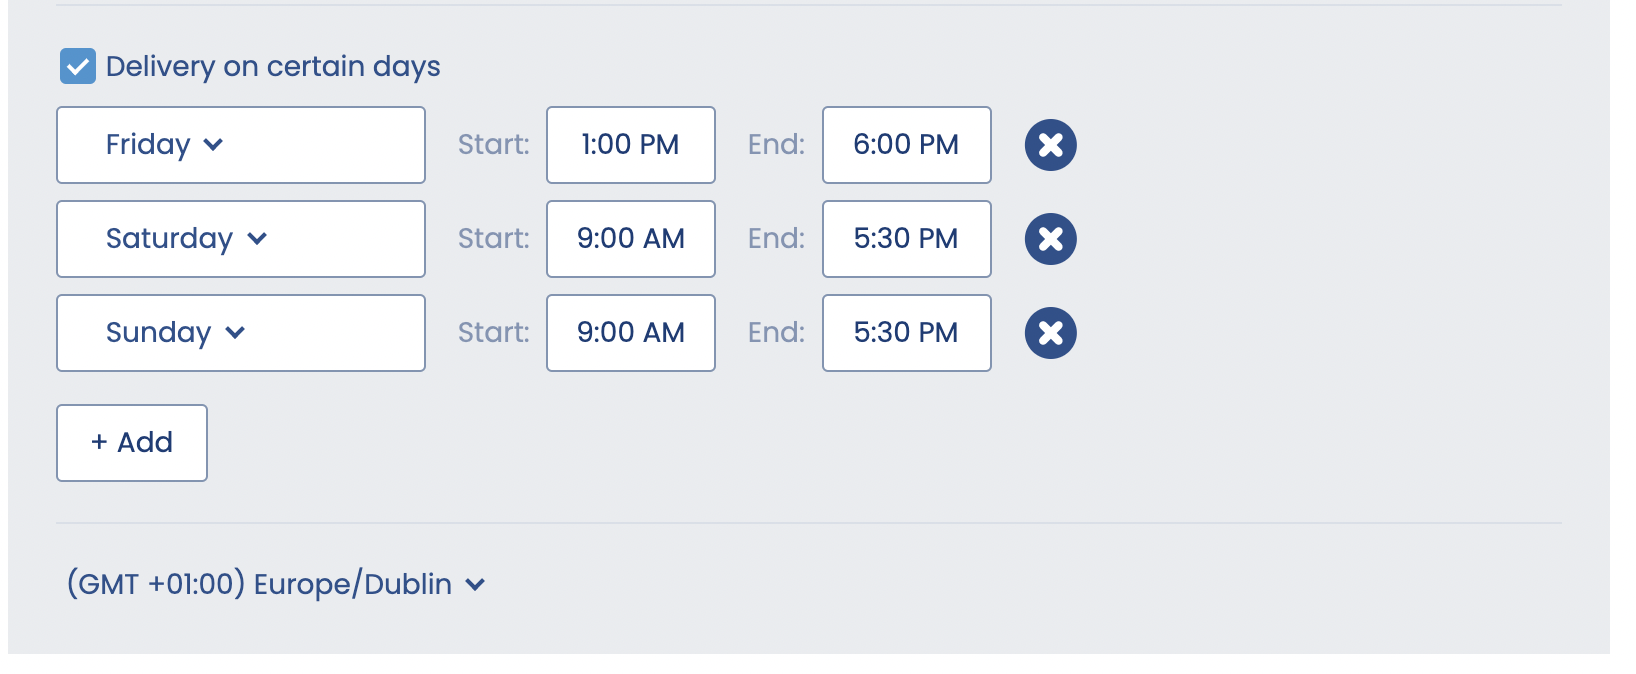
If you would like to set your campaign to be delivered on certain times on specific days of the week, click Advanced Options and you can specify that by clicking the Deliver on certain days checkbox.
Delivery for Other Campaigns
If you wish to send a campaign based on the user entering or exiting a beacon or geofence or carrying out an in app event in your app and/ or combining those targeting types with a segment, you have slightly different targeting options. As users will be carrying out these actions in the future, you can only target people who will receive the campaign in the future.
The first choice to be made is whether this campaign is send to each user once or multiple times if they remain eligible for it. Choosing One Time is useful would be useful if you were sending a campaign that every user in that segment should get but only once. An example might be a Welcome Campaign which you would like to send every user once they enter a physical location but you only want to send it once even if the user leaves and re-enters the beacon or geofence region at some point in the future.
Conversely, you may want to send other campaigns multiple times to a user. An example might be a receipt for purchases the user makes, you may want to send that campaign to users every time they make a purchase and are added to that segment.
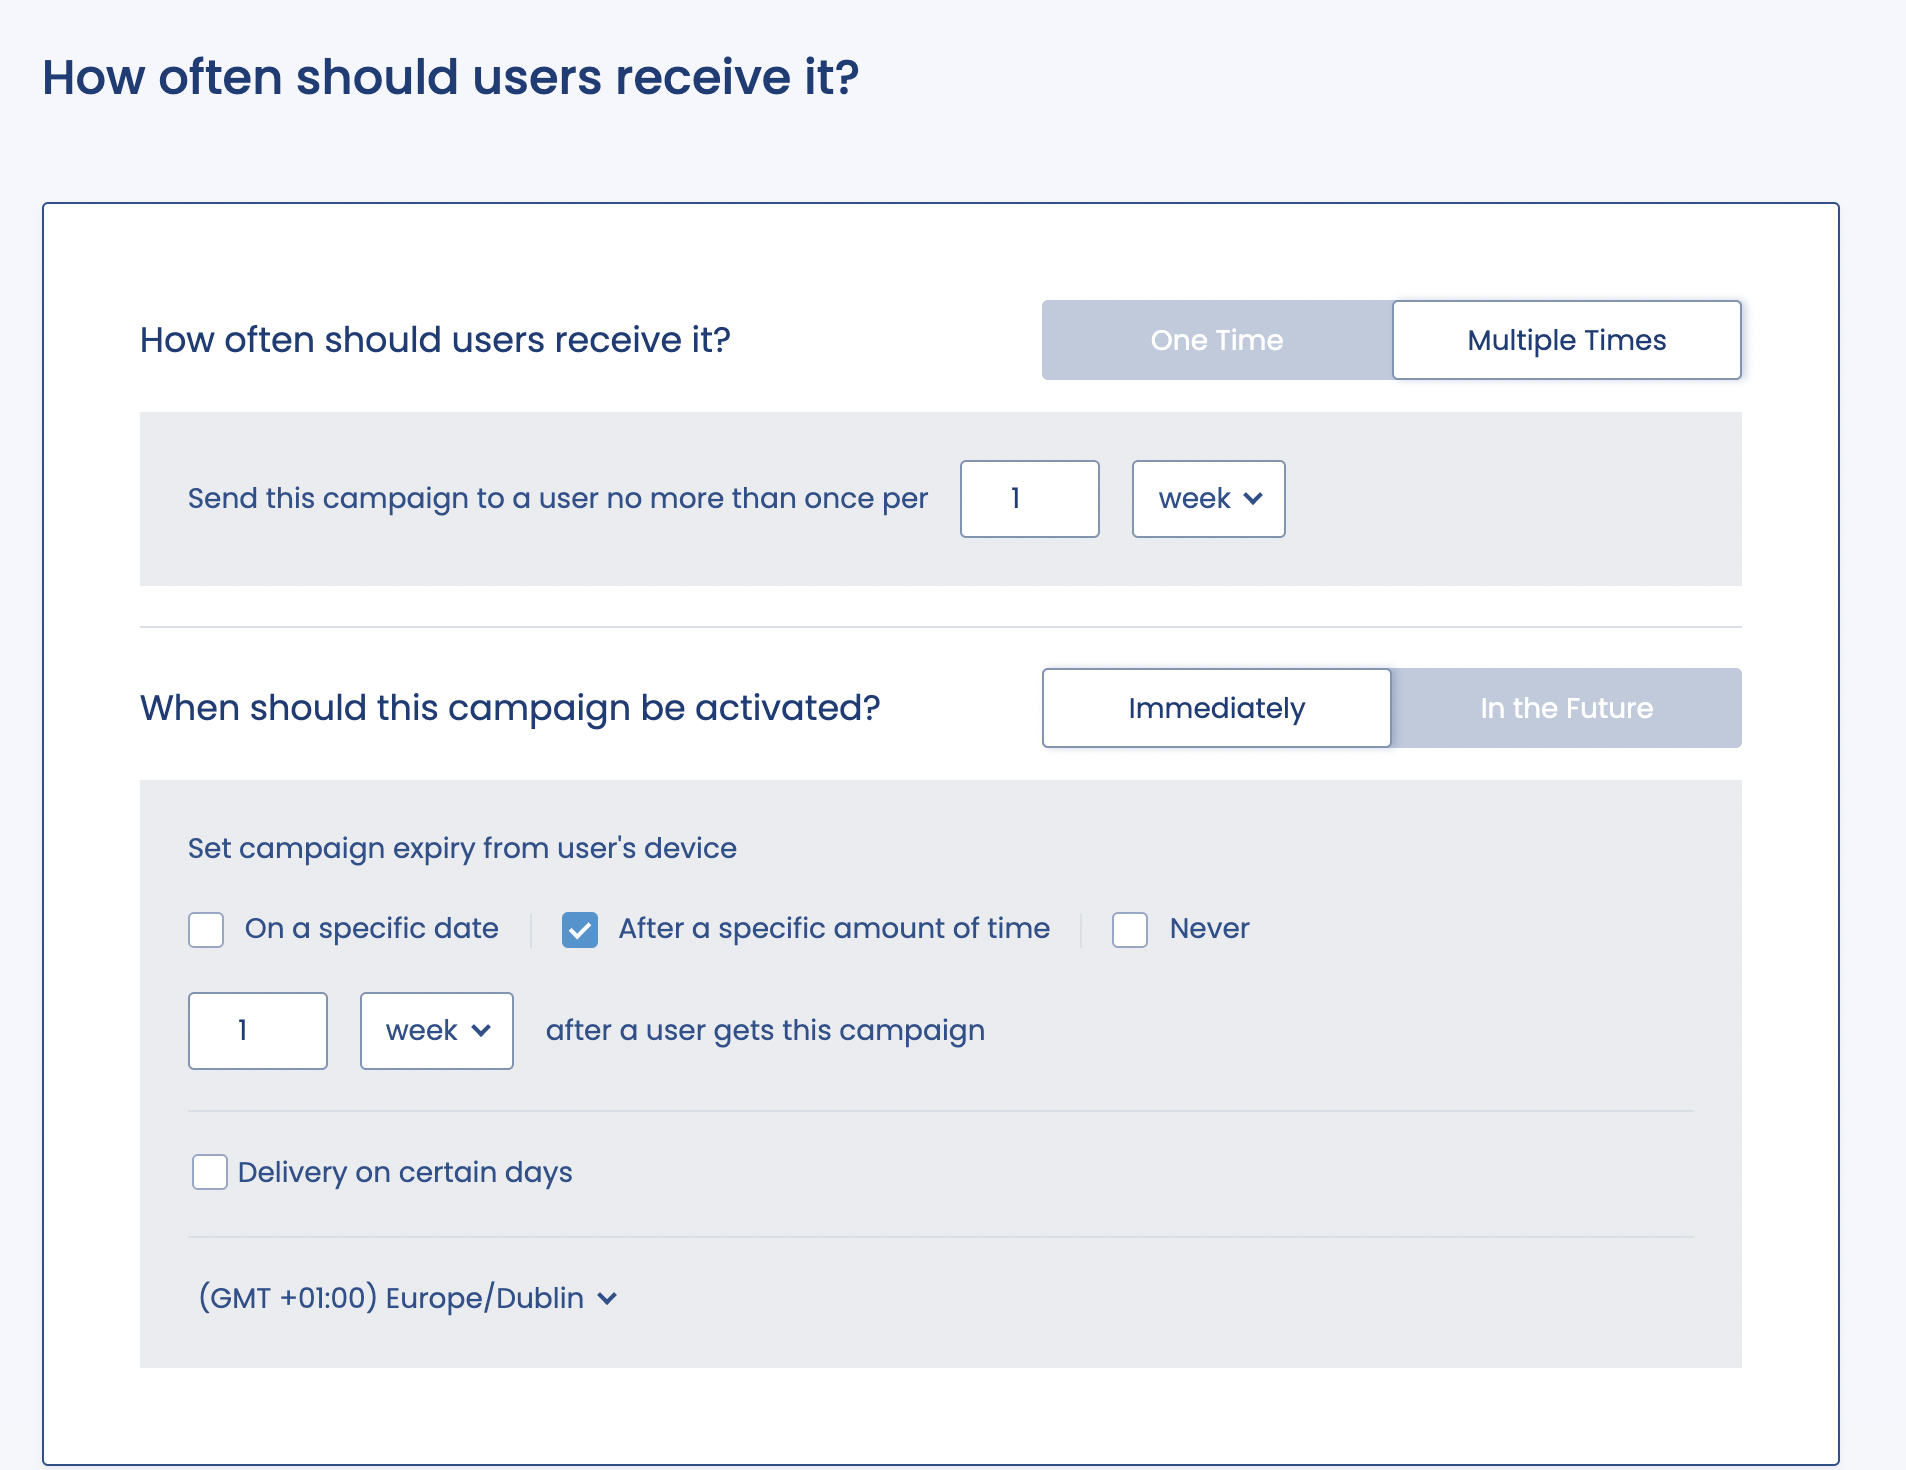
If you choose to send a campaign Multiple Times, you can set Campaign Limits to ensure that users do not get overloaded by campaigns. Campaign Limits adds a delay between users receiving this campaign. For instance, if you set the campaign limit to five minutes, users will only receive this campaign once every five minutes even if they are eligible to receive it more often than that.
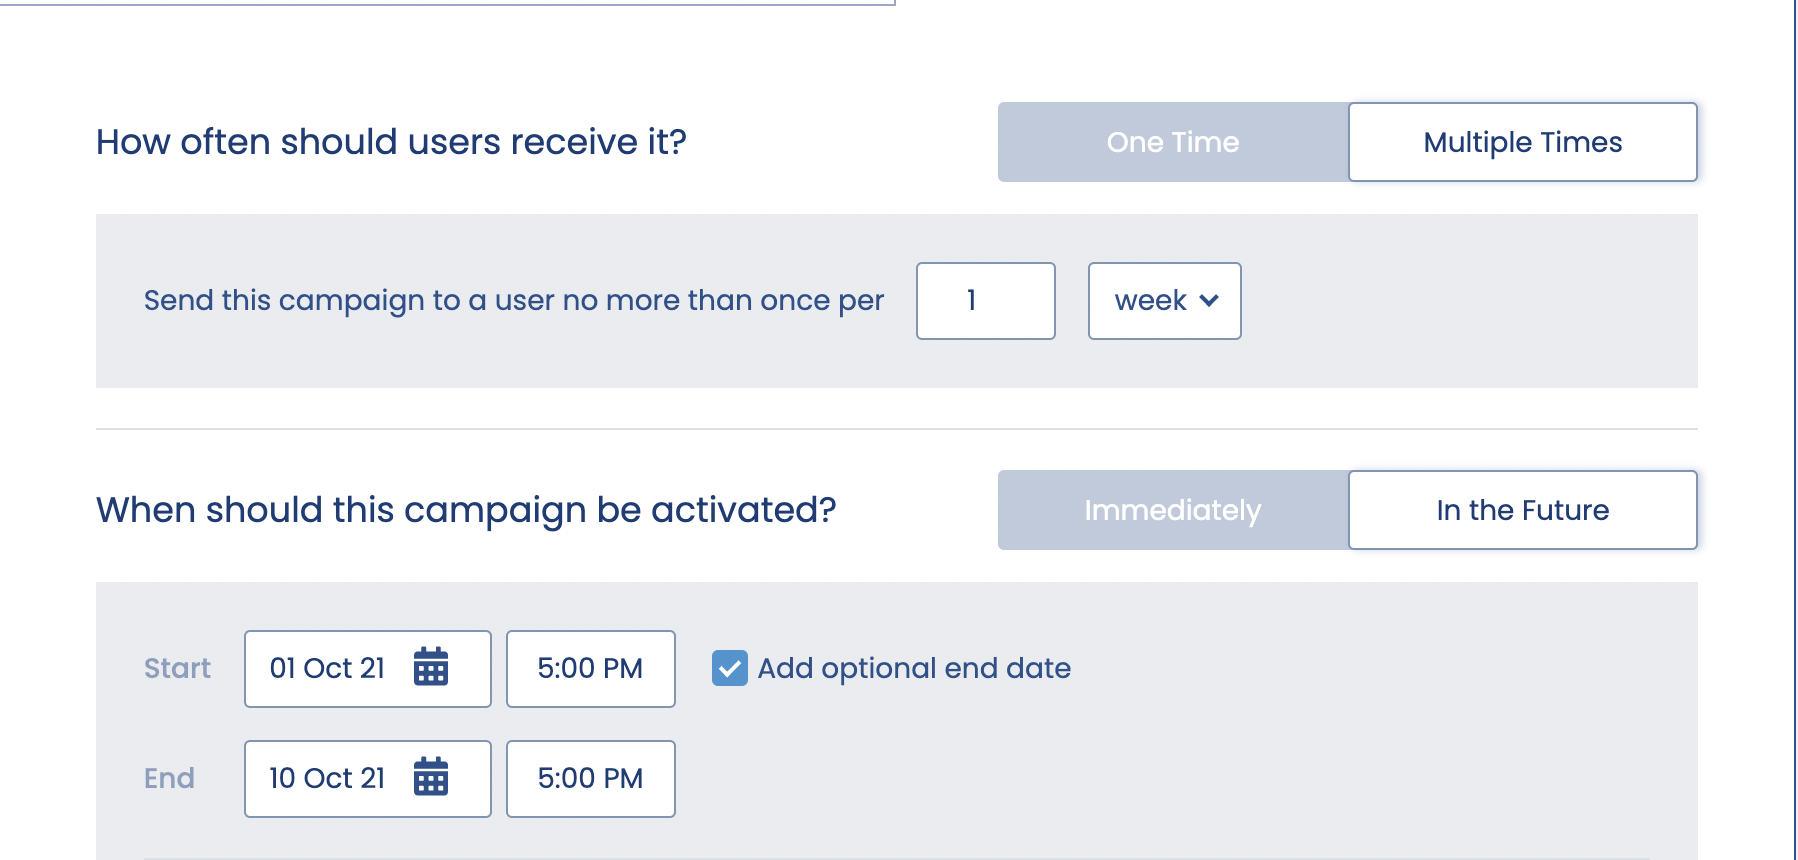
The final choice to make is to decide when the campaign should be sent now or scheduled for some point in the future. Choose Activate Immediately to send the campaign immediately or choose Schedule for the future to send the campaign at some point in the future. You can also choose here when the campaign should stop sending or whether it should continue until it is manually stopped. You can also choose to send your campaign in another timezone if you wish.
Be Careful
Please ensure that you add an end date if you want this card to be removed from the feed at some point in the future. It will not be possible to change this after the campaign is sent.
Pro Tip
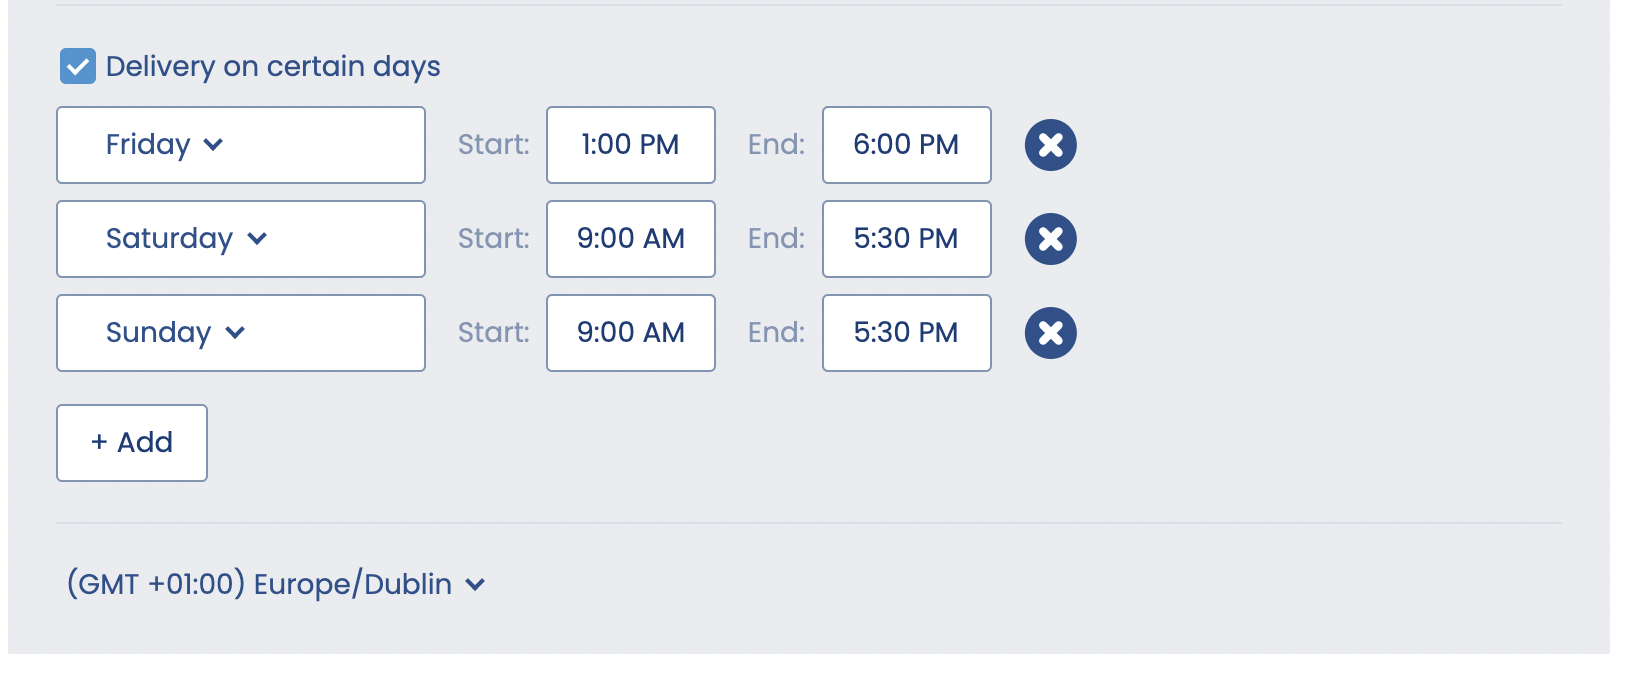
If you would like to set your campaign to be delivered on certain times on specific days of the week, click Advanced Options and you can specify that by clicking the Deliver on certain days checkbox.
Pro Tip
The Set campaign expiry from user's device functionality allows you to configure the duration up to which a campaign remains in the user's feed. Three choices are available:
Never - The campaign will never expire from the user's device unless an optional scheduled end date is selected
On a specific date - The campaign would expire the user's feed on this day
After a specific amount of time - Custom time range after which the campaign would expire from the user's feed.

7. Review and activate the campaign
Congratulations, your campaign is almost ready to be sent. Before you send it, Pulsate enable you to review everything that you have set up one last time so that you can make sure that everything is perfect.
The first thing you will notice on the Review page is the key parameters for this campaign which are what app the campaign is being sent for, the estimated reach of the campaign and when the campaign will be sent.
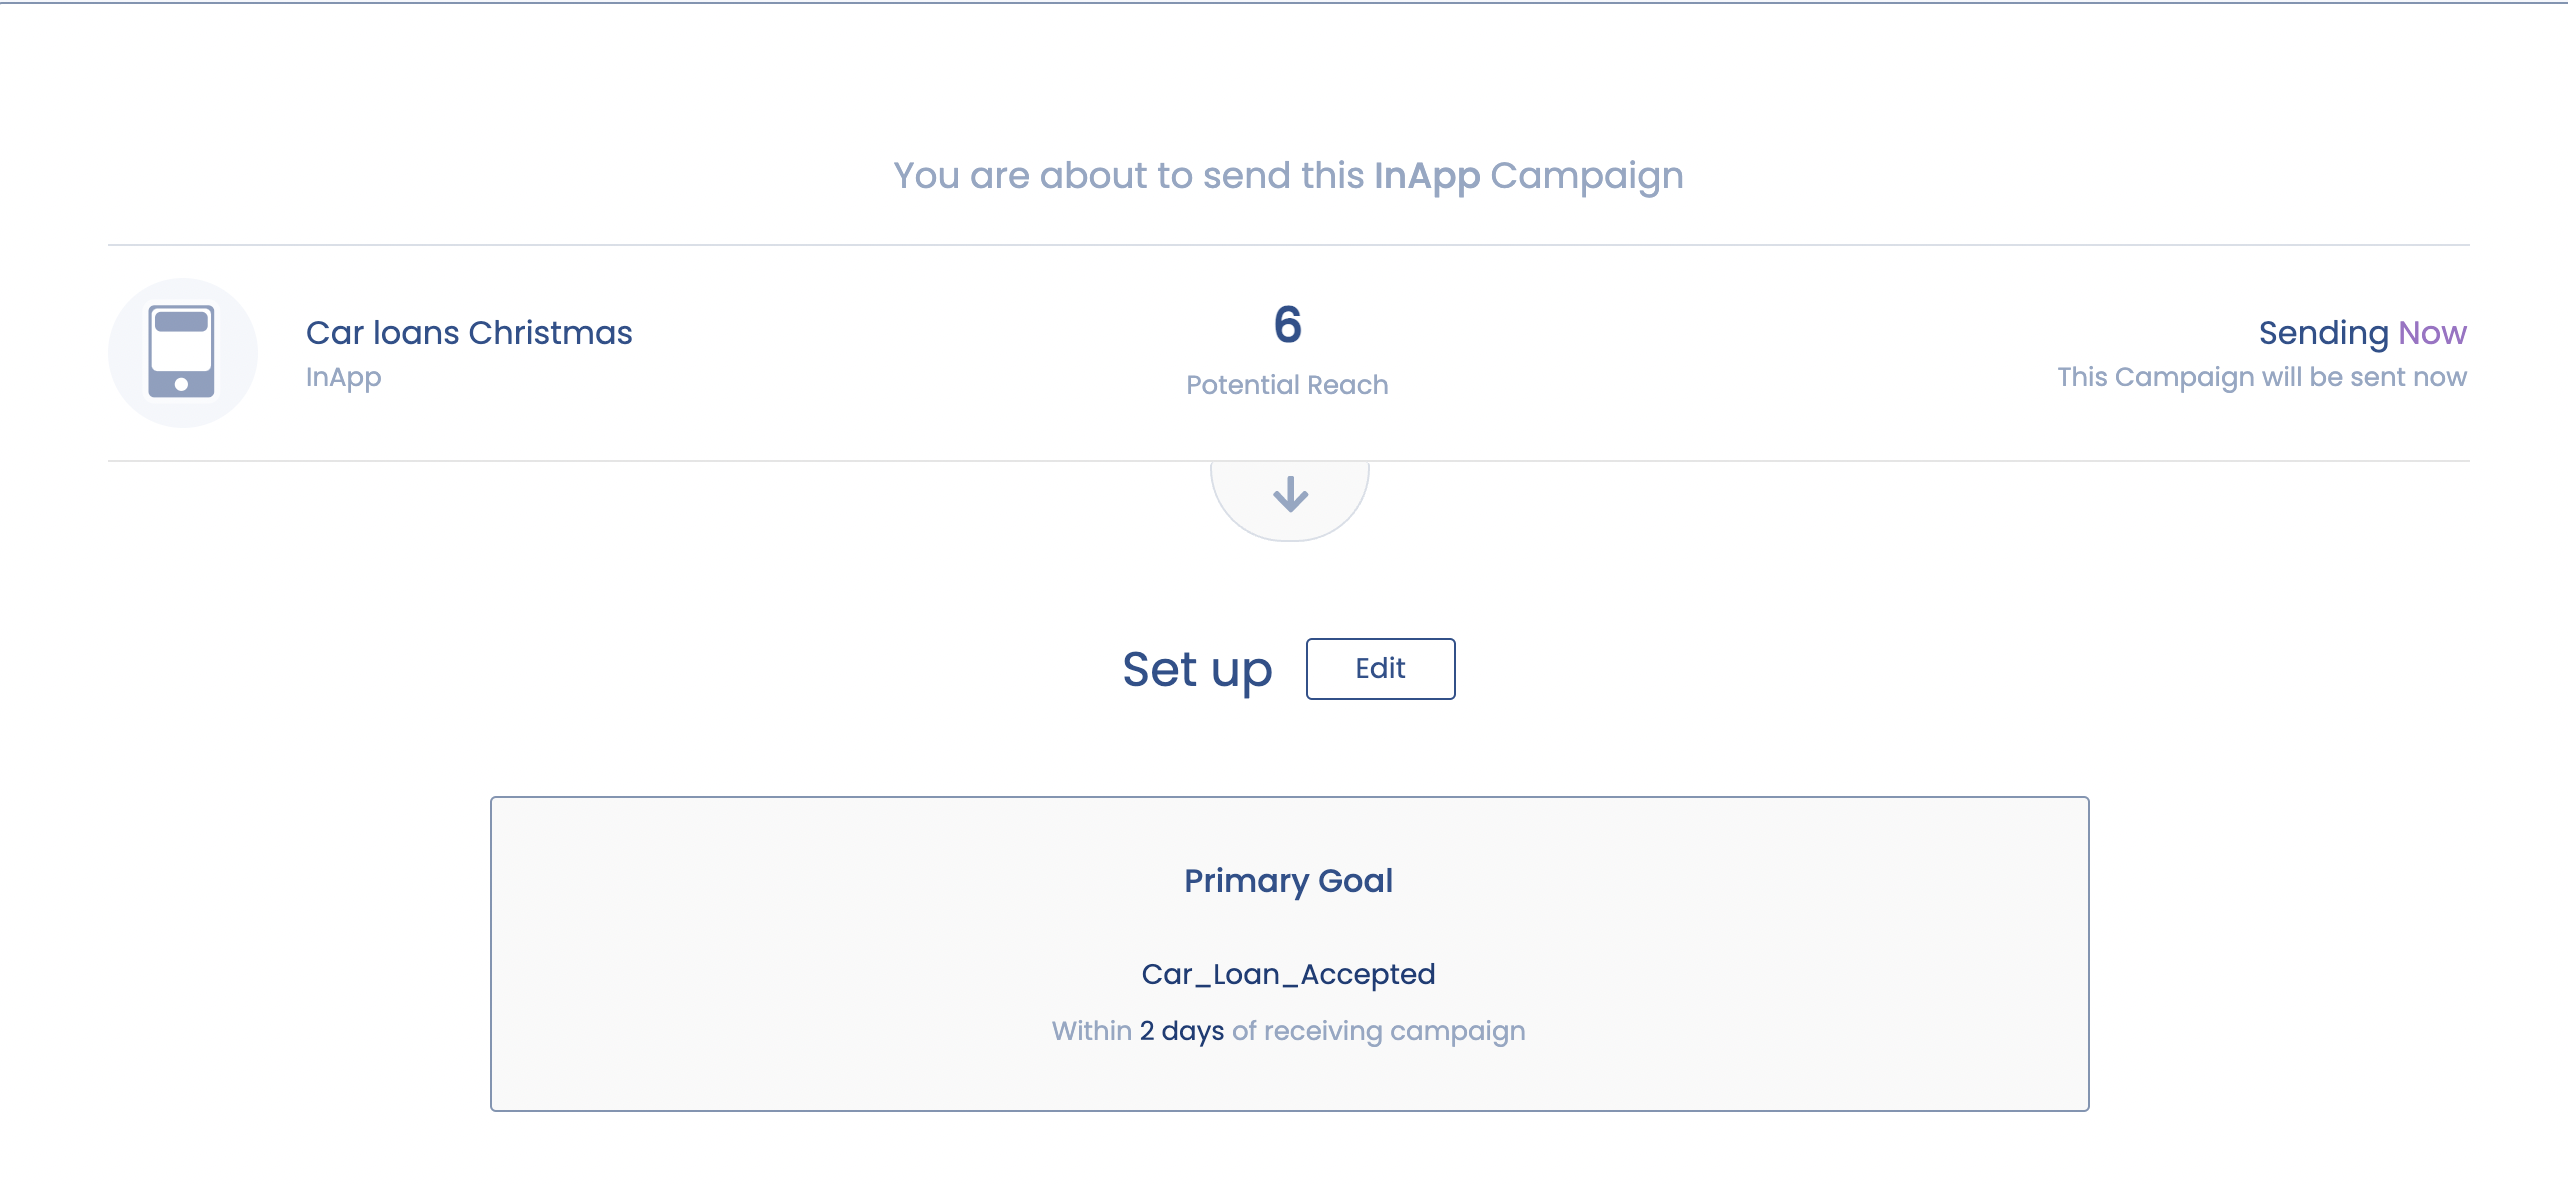
As you scroll down through the rest of the review page, you will be able to check the other details that you have set for that campaign including the Notification, Targeting and Delivery Options. If you see anything that you would like to change, you can quickly jump to that section by pressing the back button located at the bottom of the page.
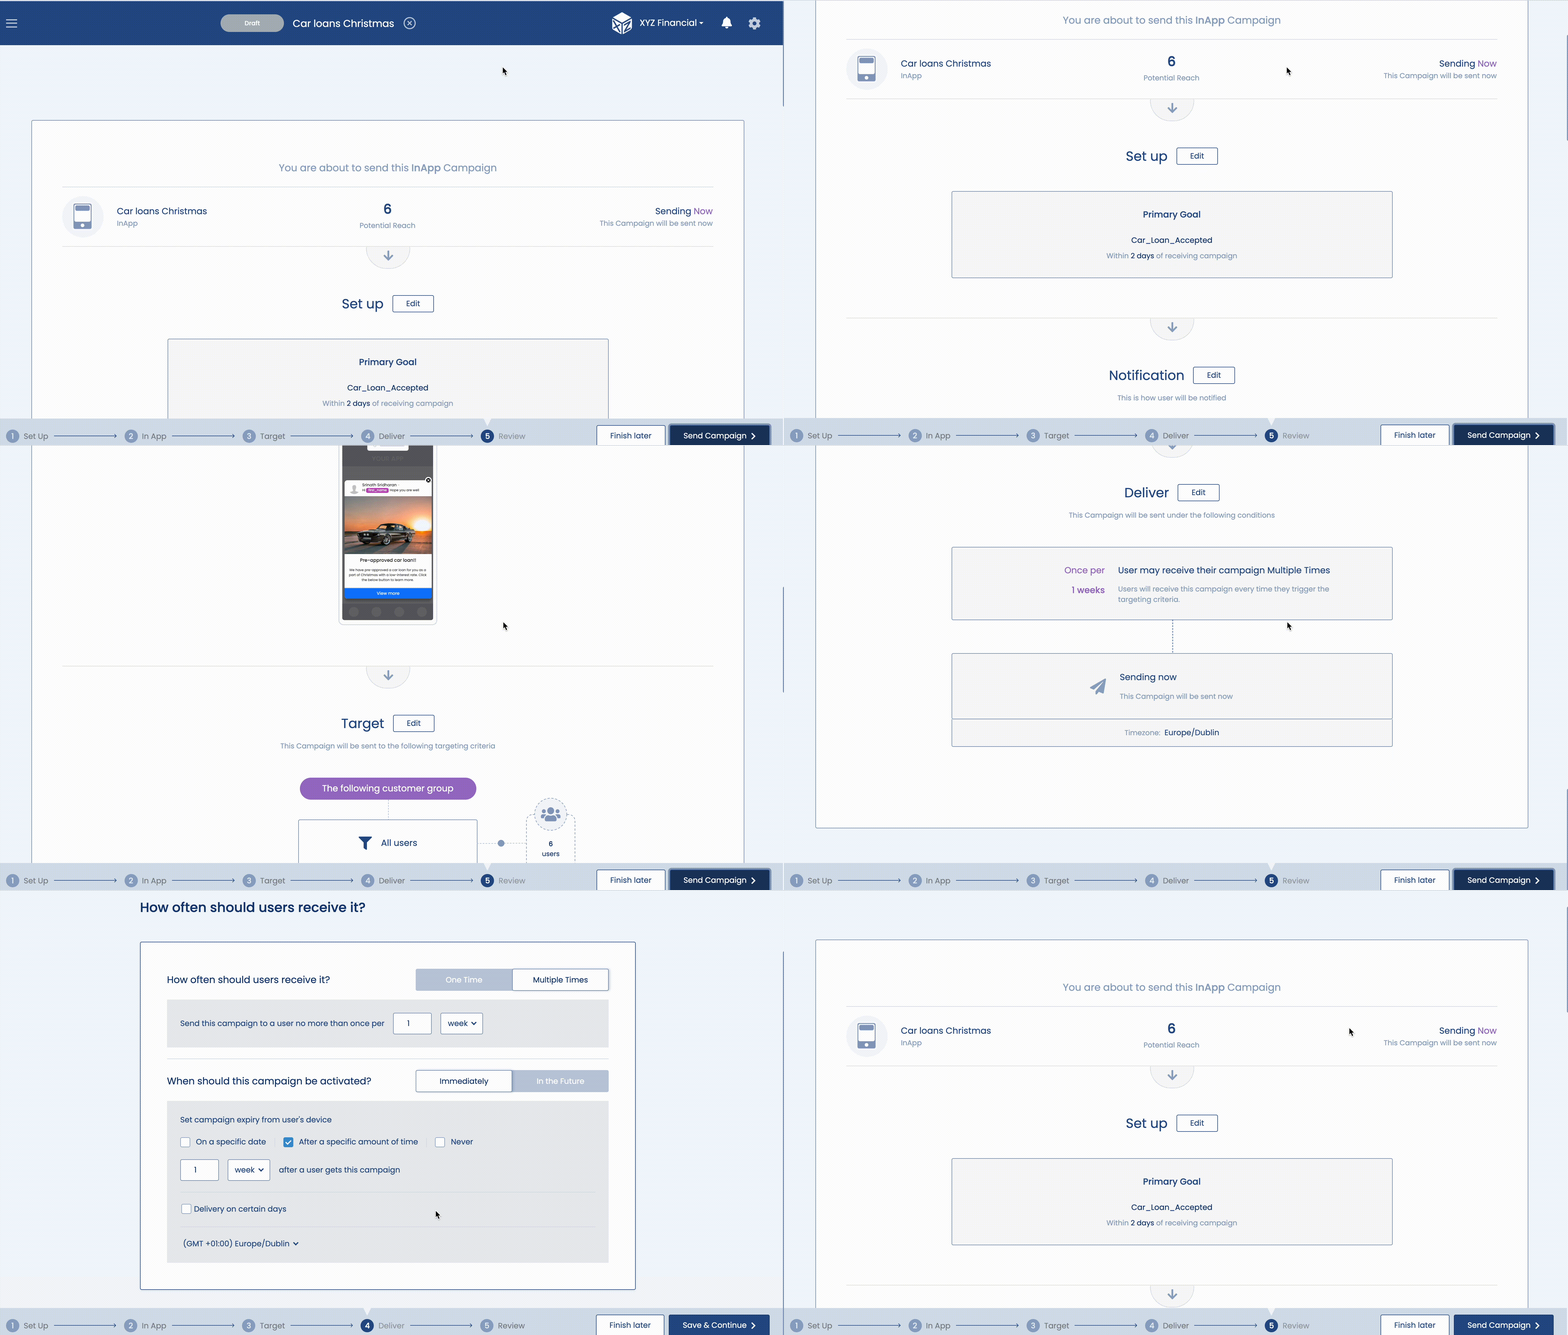
Once you are happy with all of the parameters that you have set for the campaign, you are ready to send it. To send the campaign press the Activate Campaign button at the bottom of the screen. You will be asked to confirm that you wish to send the campaign. If you are ready to send, press Activate Campaign and your campaign will be activated and sent when you have specified.
